When the hooligans were young, I began wrapping all of the gifts for each of them in the same paper, because, really, it’s ridiculous to put a gift tag on every gift for little ones. Back then, it was pretty easy to tell whose was whose. Princess Thundercloud was always pink, the eldest was red, and the middle kid was green or blue. That worked great for several years, but now that they’re teens, they think it’s fun to try to guess which paper belongs to them. So it’s more of a challenge. Sometimes I use their favorite color, but sometimes it’s completely random, just to throw them off track.
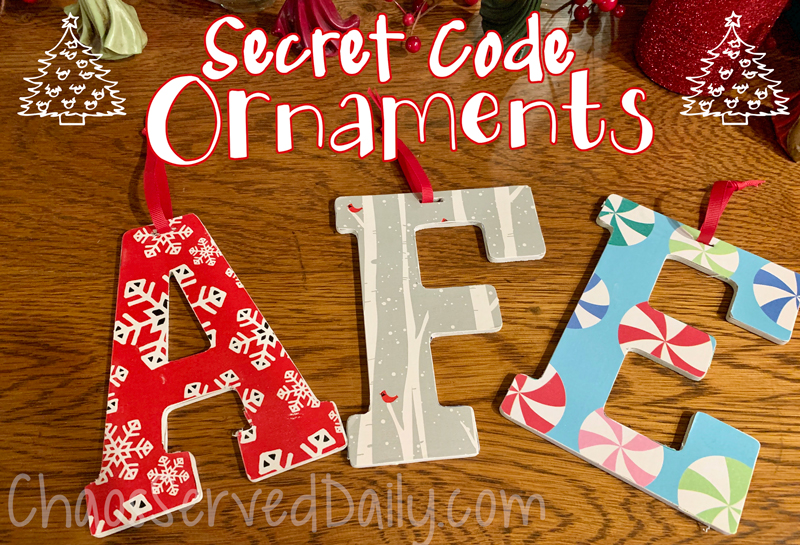
To prolong the suspense, I have a little craft that’s quick and easy to make! I bought inexpensive wood ornaments (I think from the dollar spot at Target), and I cover the ornament with their paper for the year. Then I slip that into their stocking, which is the first thing we open on Christmas morning, while waiting for everyone to get up and moving. Teens, you know. I do it for the hubs, as well. Although his paper is generally black or white background, and he uses the opposite for me. So not as much suspense for us!
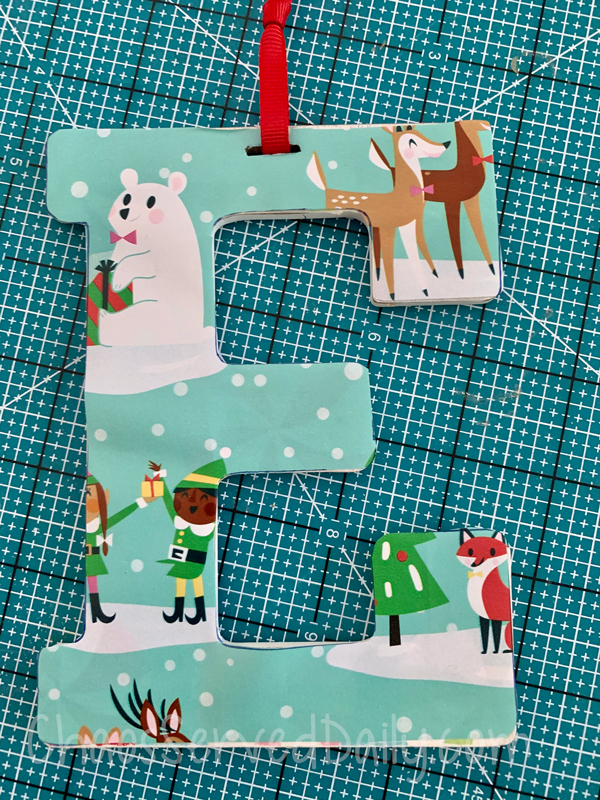
To make these for your own hooligans, the supplies are simple. An initial ornament, some wrapping paper, tacky glue, scissors, a Sharpie, and an Exacto knife. This is Esme’s ornament from last year…as you can see, 2020 has been pretty rough on it, too.
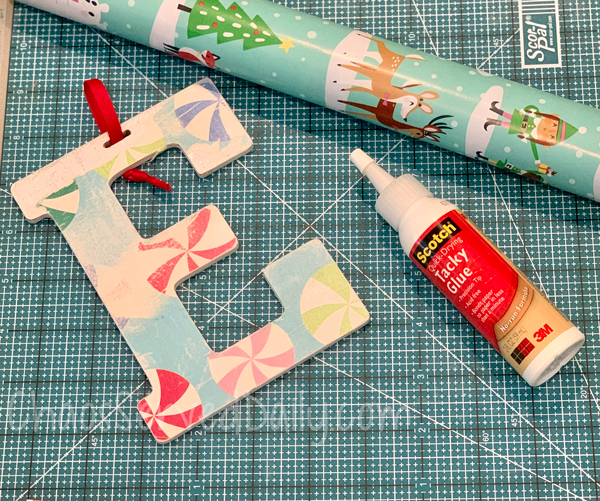
- Place the ornament on the wrapping paper, both facing up. I kind of move it around and try to get the most of the pattern I can on it.
- Outline it with a fine tip Sharpie, then cut it out. This is the hardest part of this craft for me!
- If there’s a ribbon on the ornament, untie it or cut it, if you’re planning to use new ribbon.
- Spread a very thin layer of craft glue on the ornament (not on the paper…it’s too thin), then carefully place your cutout paper on the ornament. I like to start with an edge and work across, smoothing as I go.
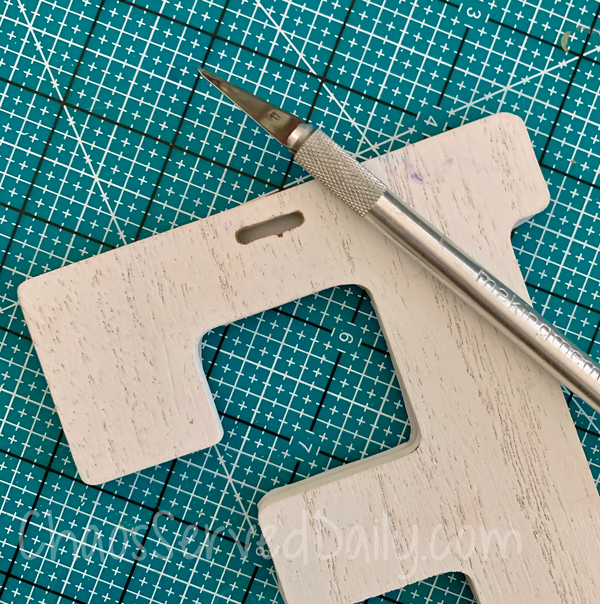
- Now we’ve covered the ribbon slot, so flip the ornament over and use an Exacto knife to trim out the hole.

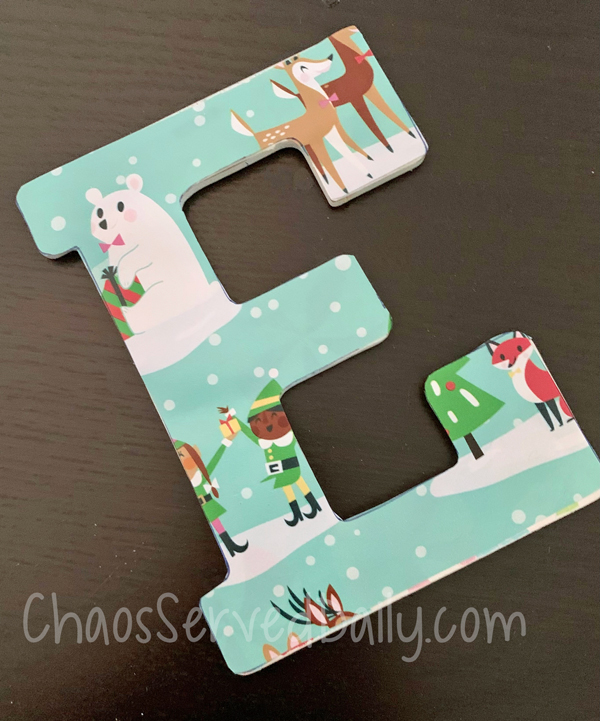
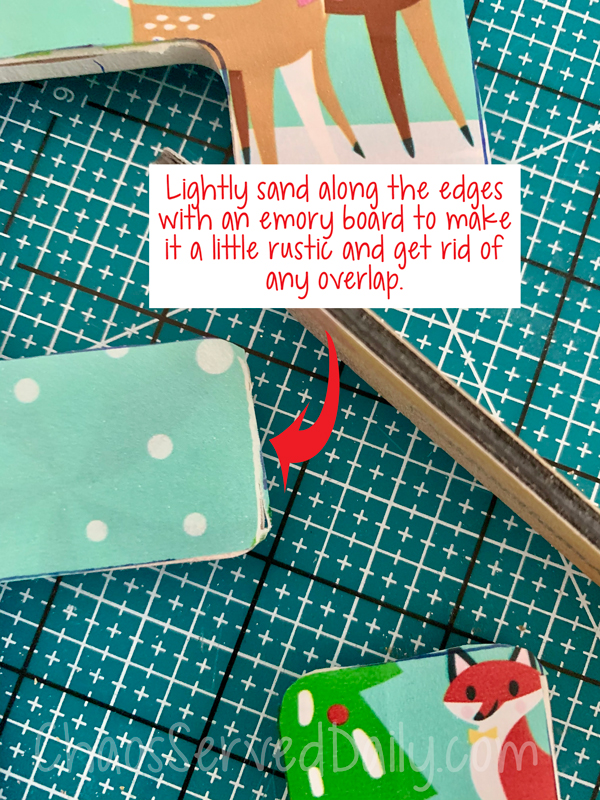
The paper will likely not be an exact fit, so just use an emery board to sand off any overhang. Wouldn’t it be nice if that worked on waistlines, too! Anyway, sand it off and it looks more finished and a little rustic.
Thread the ribbon through and tie it, and you’re done!
I keep thinking my kids will outgrow this, along with many other traditions, but right now, they’re hanging on to childhood…and I’m fine with that! They’re only home for a few more years and I’m happy to oblige them with Advent calendars, secret code ornaments, and Christmas lights inside my car. But I’d be just as happy if our elf moves away to live with whichever of them has their own home first!
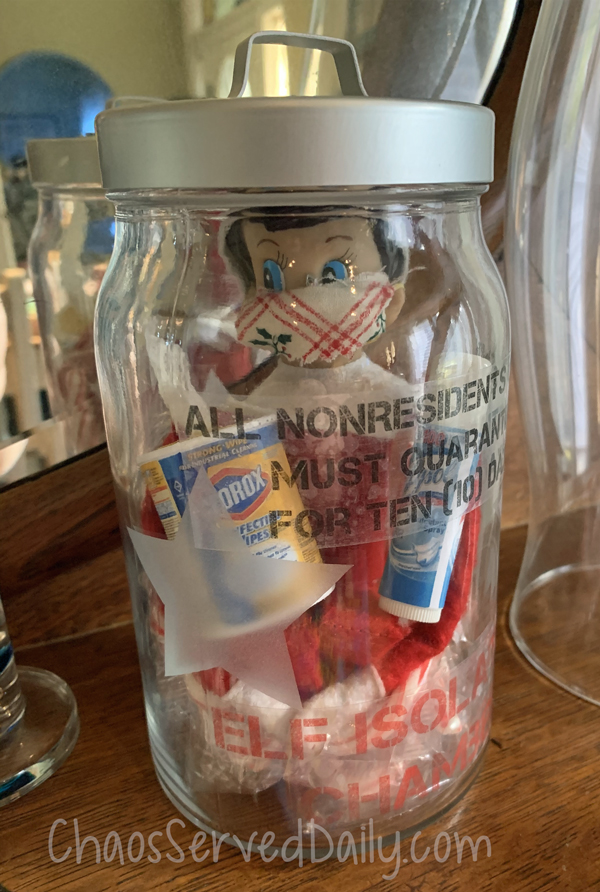
Our elf, Joe, reappeared on December 1, bearing chocolate filled Advent calendars. However, our state has some pretty strict restrictions in place, so Joe is in quarantine for ten days. That’s ten days of me not waking in a panic in the middle of the night, realizing I forgot to move him again! I’ll take that as a win.