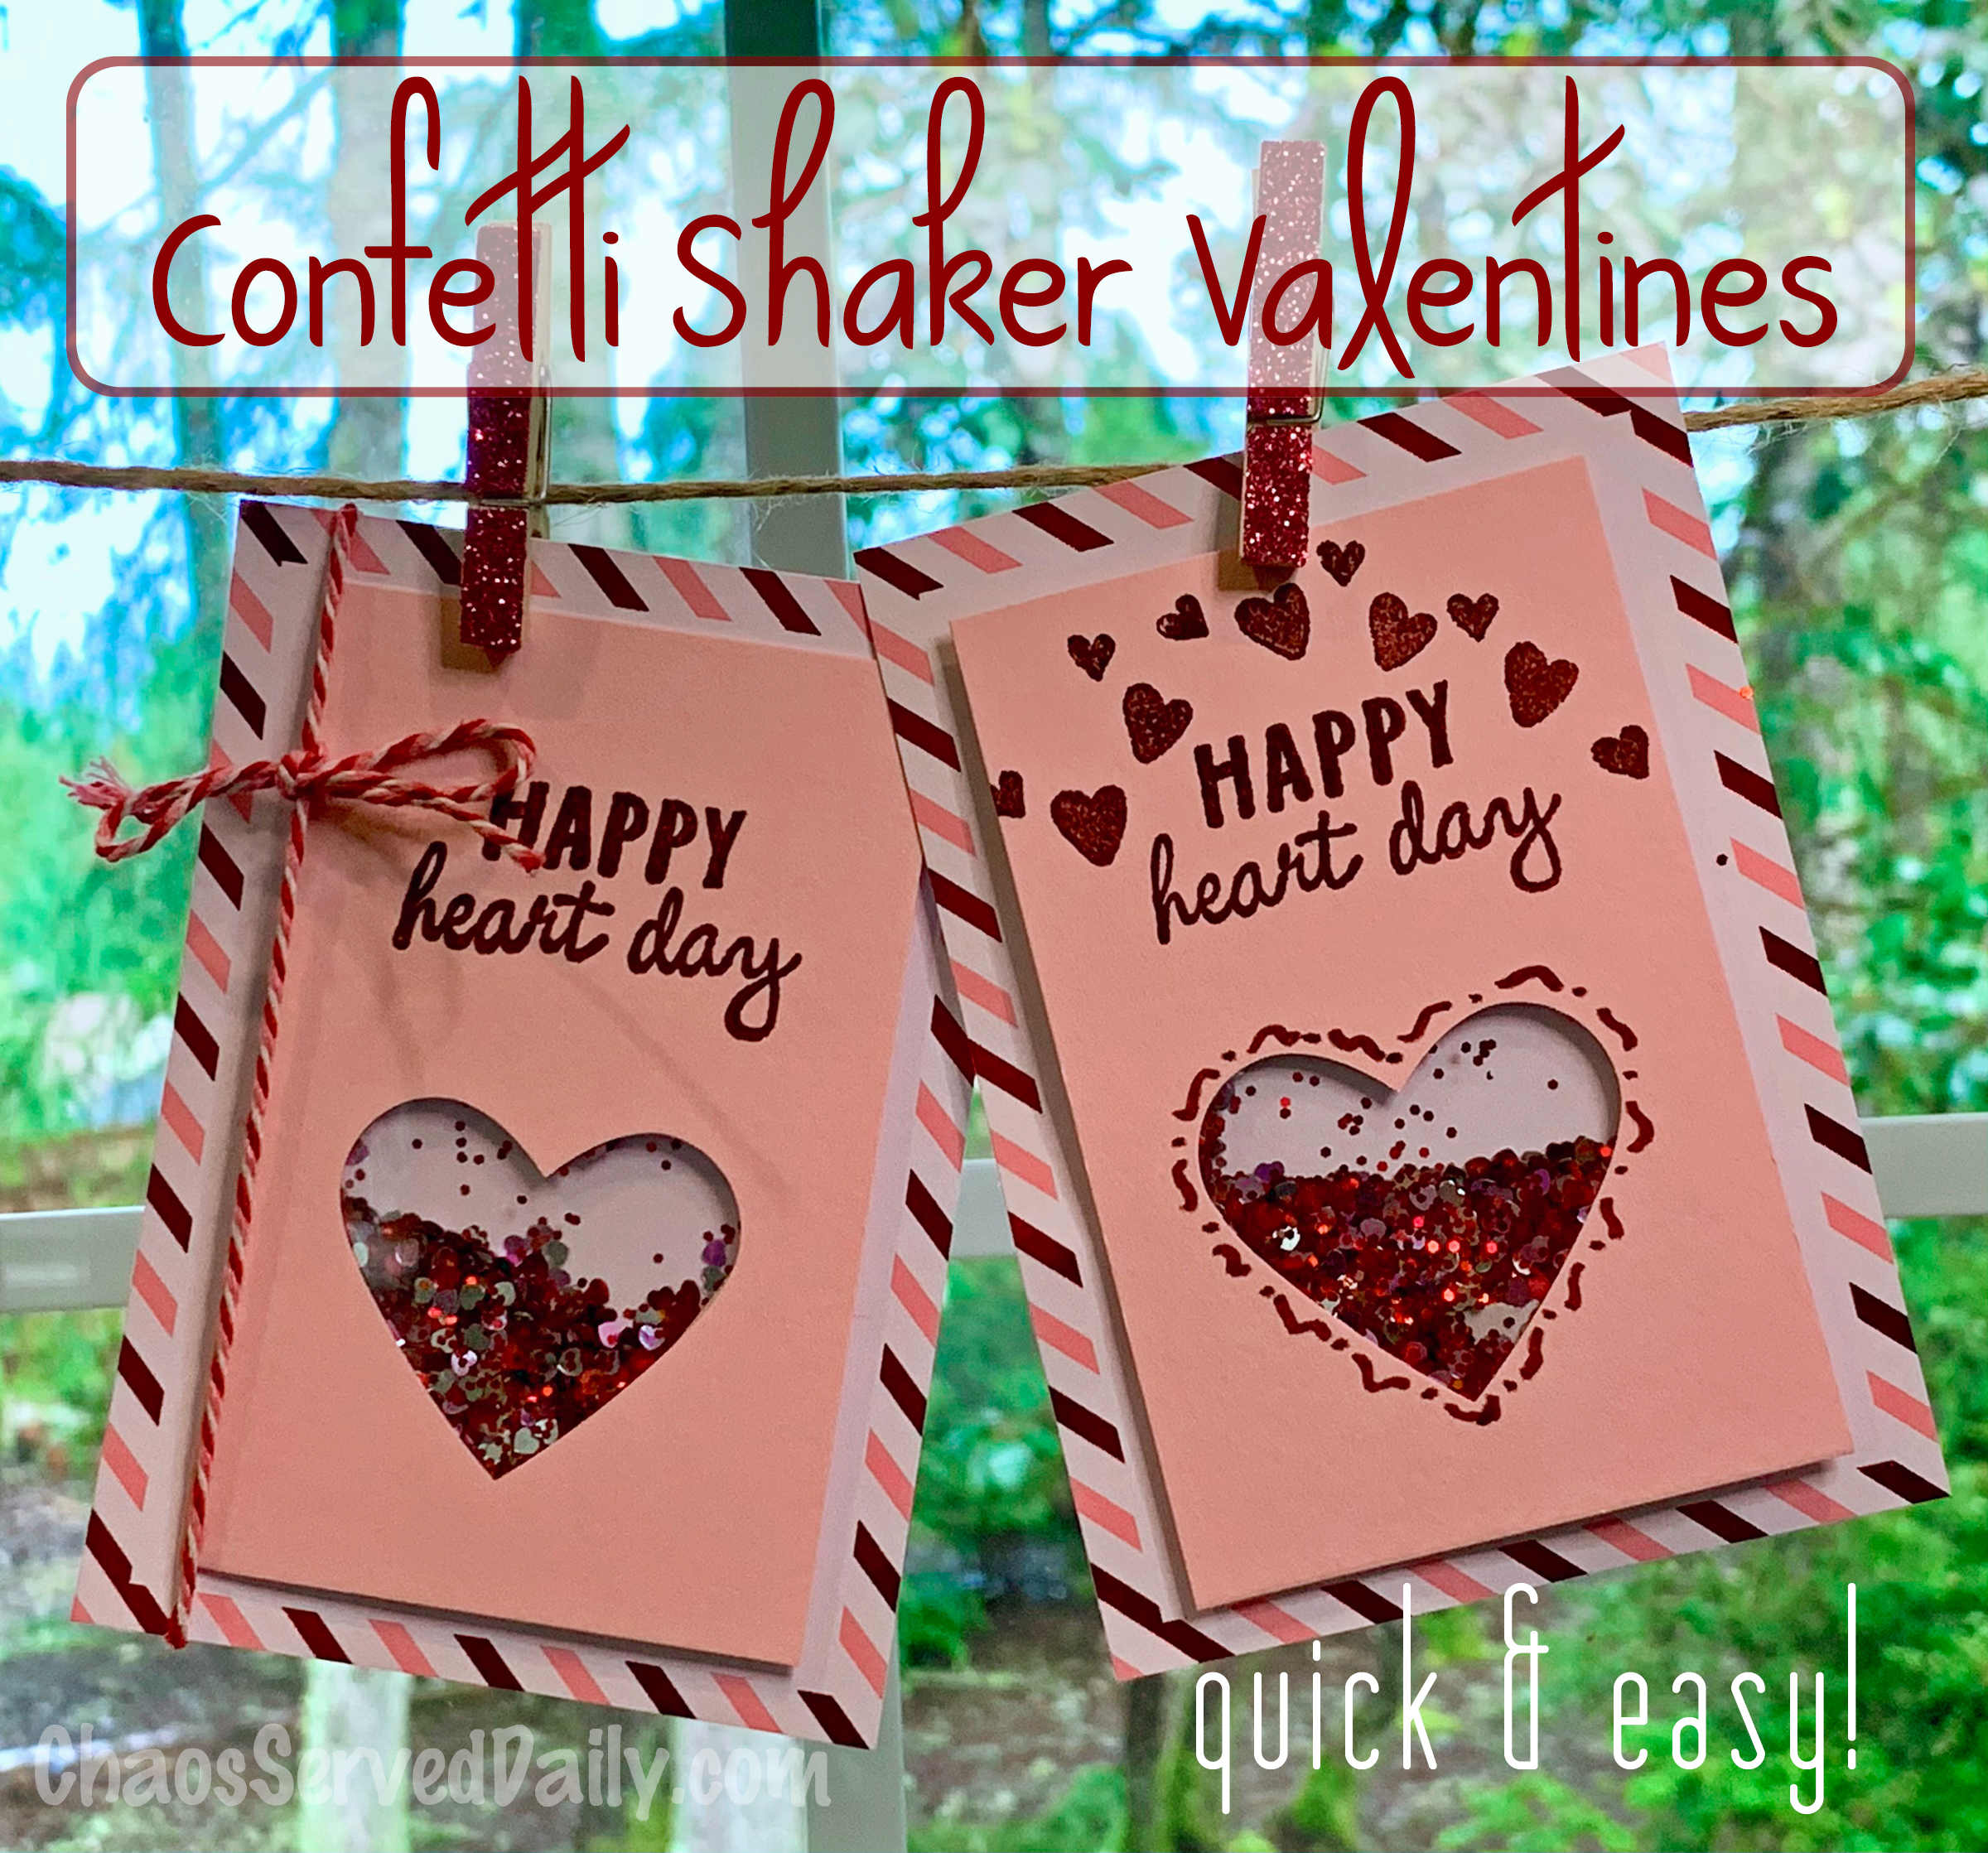
Like pretty much any crafter, I think a little glitter can give a fun finishing touch to any card, and I also think shaker cards are super fun. When I saw a set of Valentine glitter confetti at the craft store, I knew I needed to come up with a way to use those for Valentines.
These are pretty quick and easy to make, and don’t take a ton of supplies.
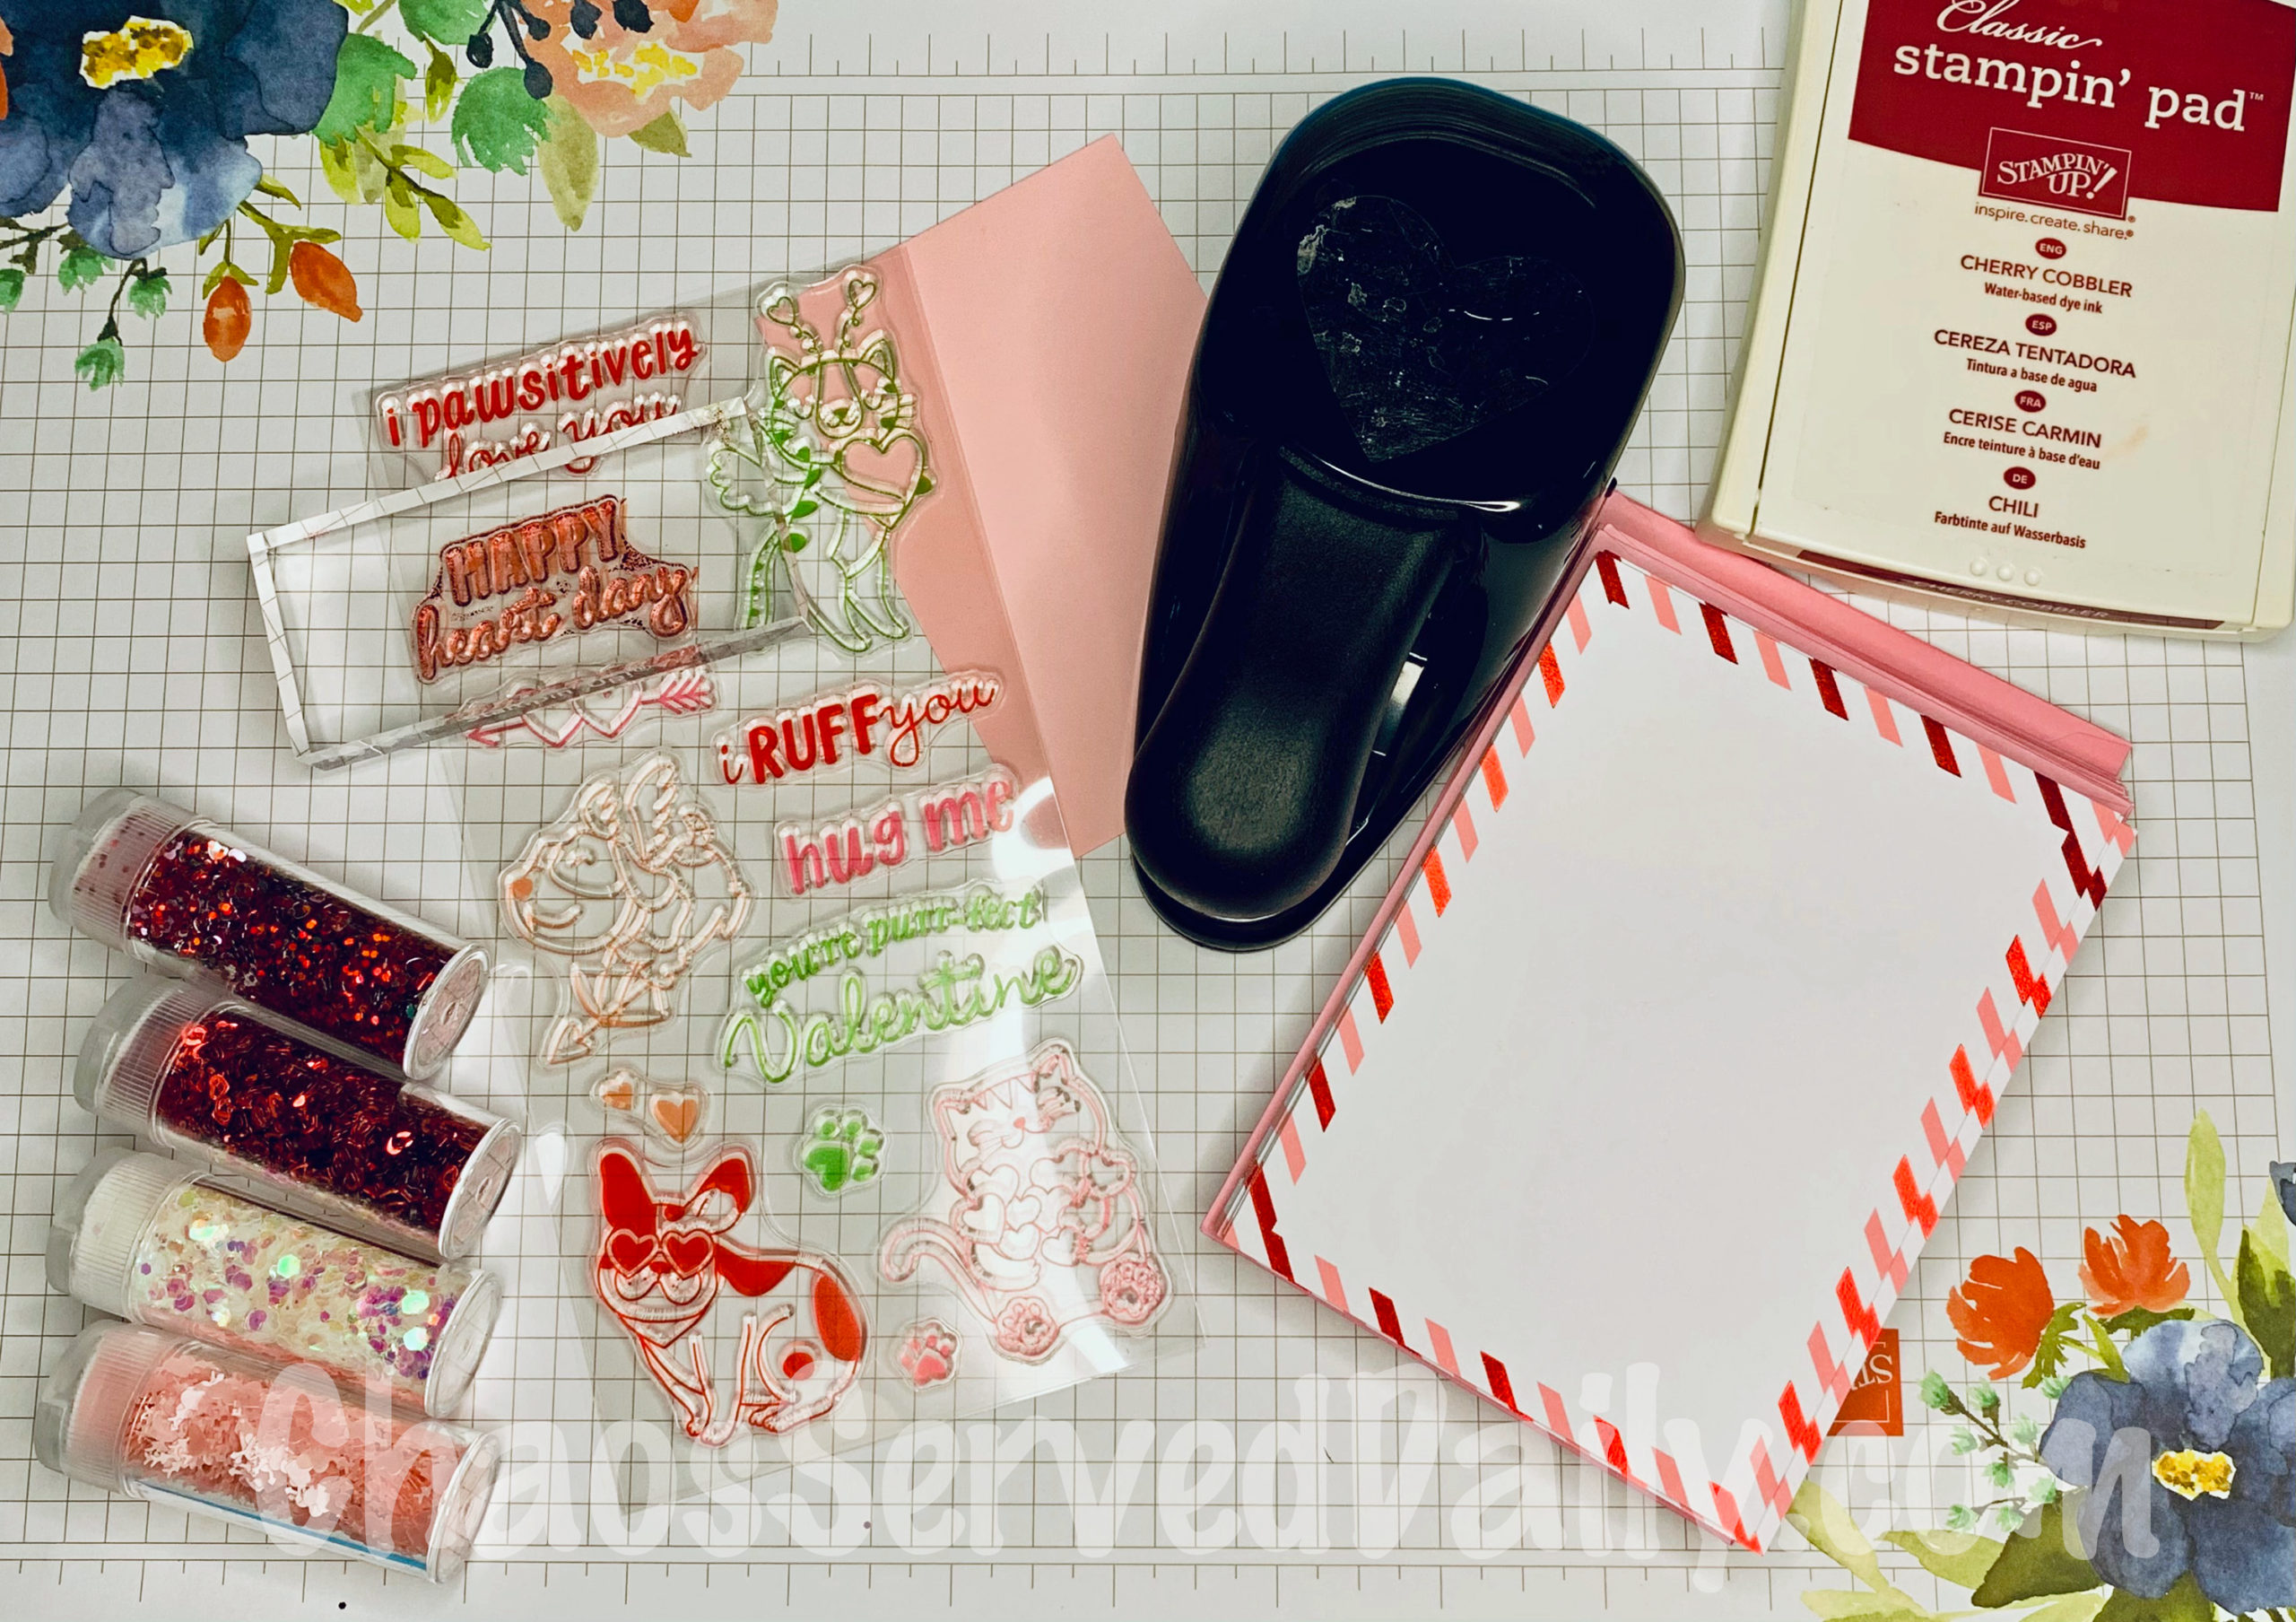
From left to right:
Those fun glitter confettis
A punny stamp set (this one’s from Michael’s) and a stamping block
Some cards and cardstock (also from Michael’s)
Cherry Cobbler ink (or your favorite red)
A heart shaped paper punch
A sheet of acetate (such as an overhead or sheet protector)
For adhesive: Foam strips and double-sided tape
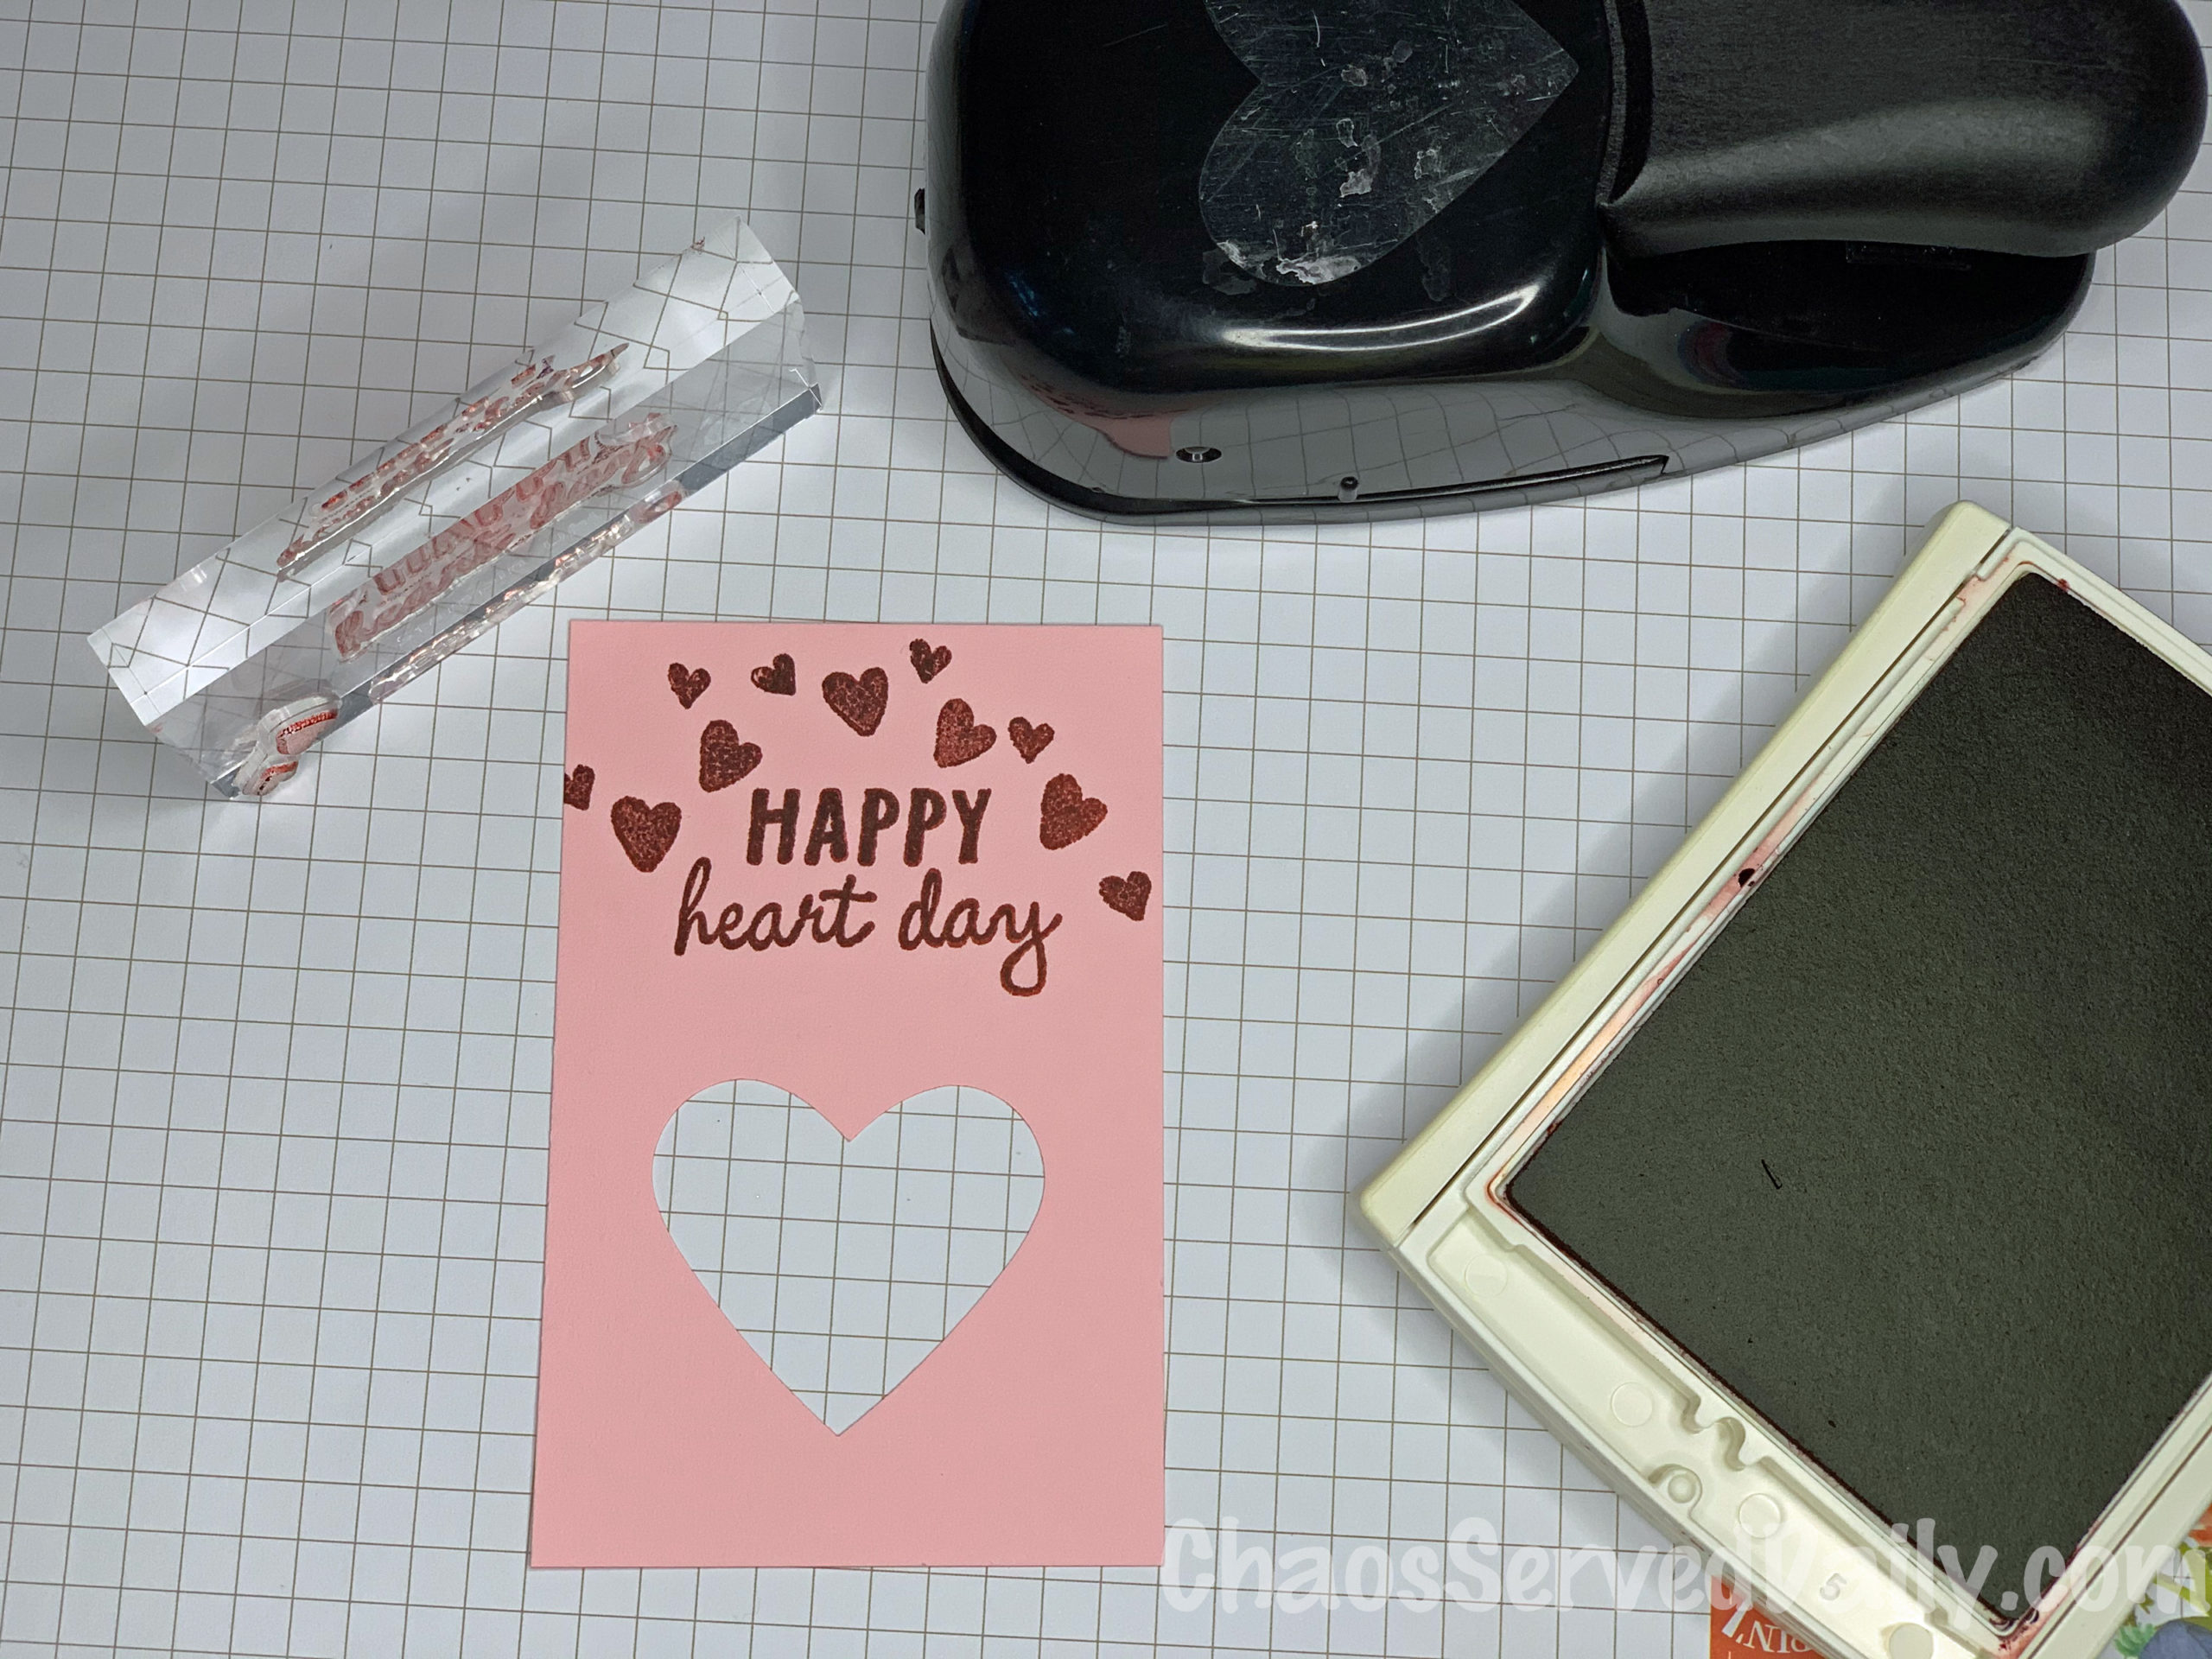
Cut your cardstock to 1/4″ less than your card or border (both length and width)
Punch out your heart shape, and stamp your sentiment and hearts
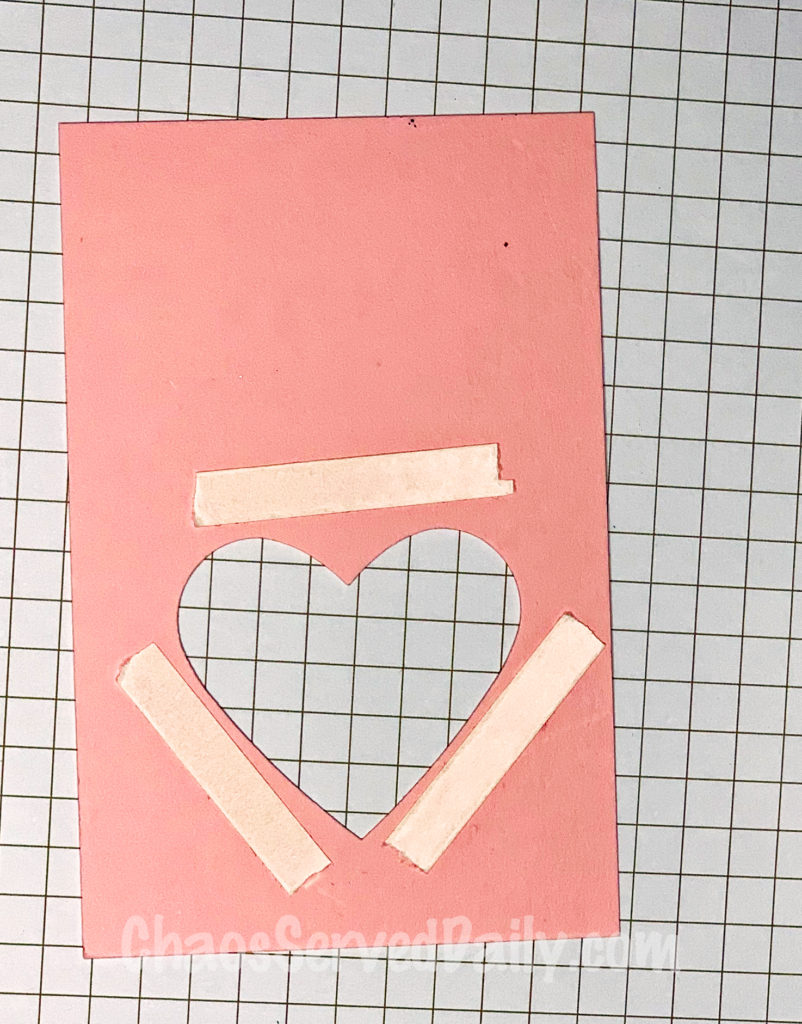
Cut a piece of the clear acetate sheet a little larger than the punched heart, but smaller than the cardstock
Use double sided adhesive (I like Stampin’ Up’s Tear and Tape Adhesive) to adhere the acetate to the back of the cardstock, making sure all of the punched out heart is covered.
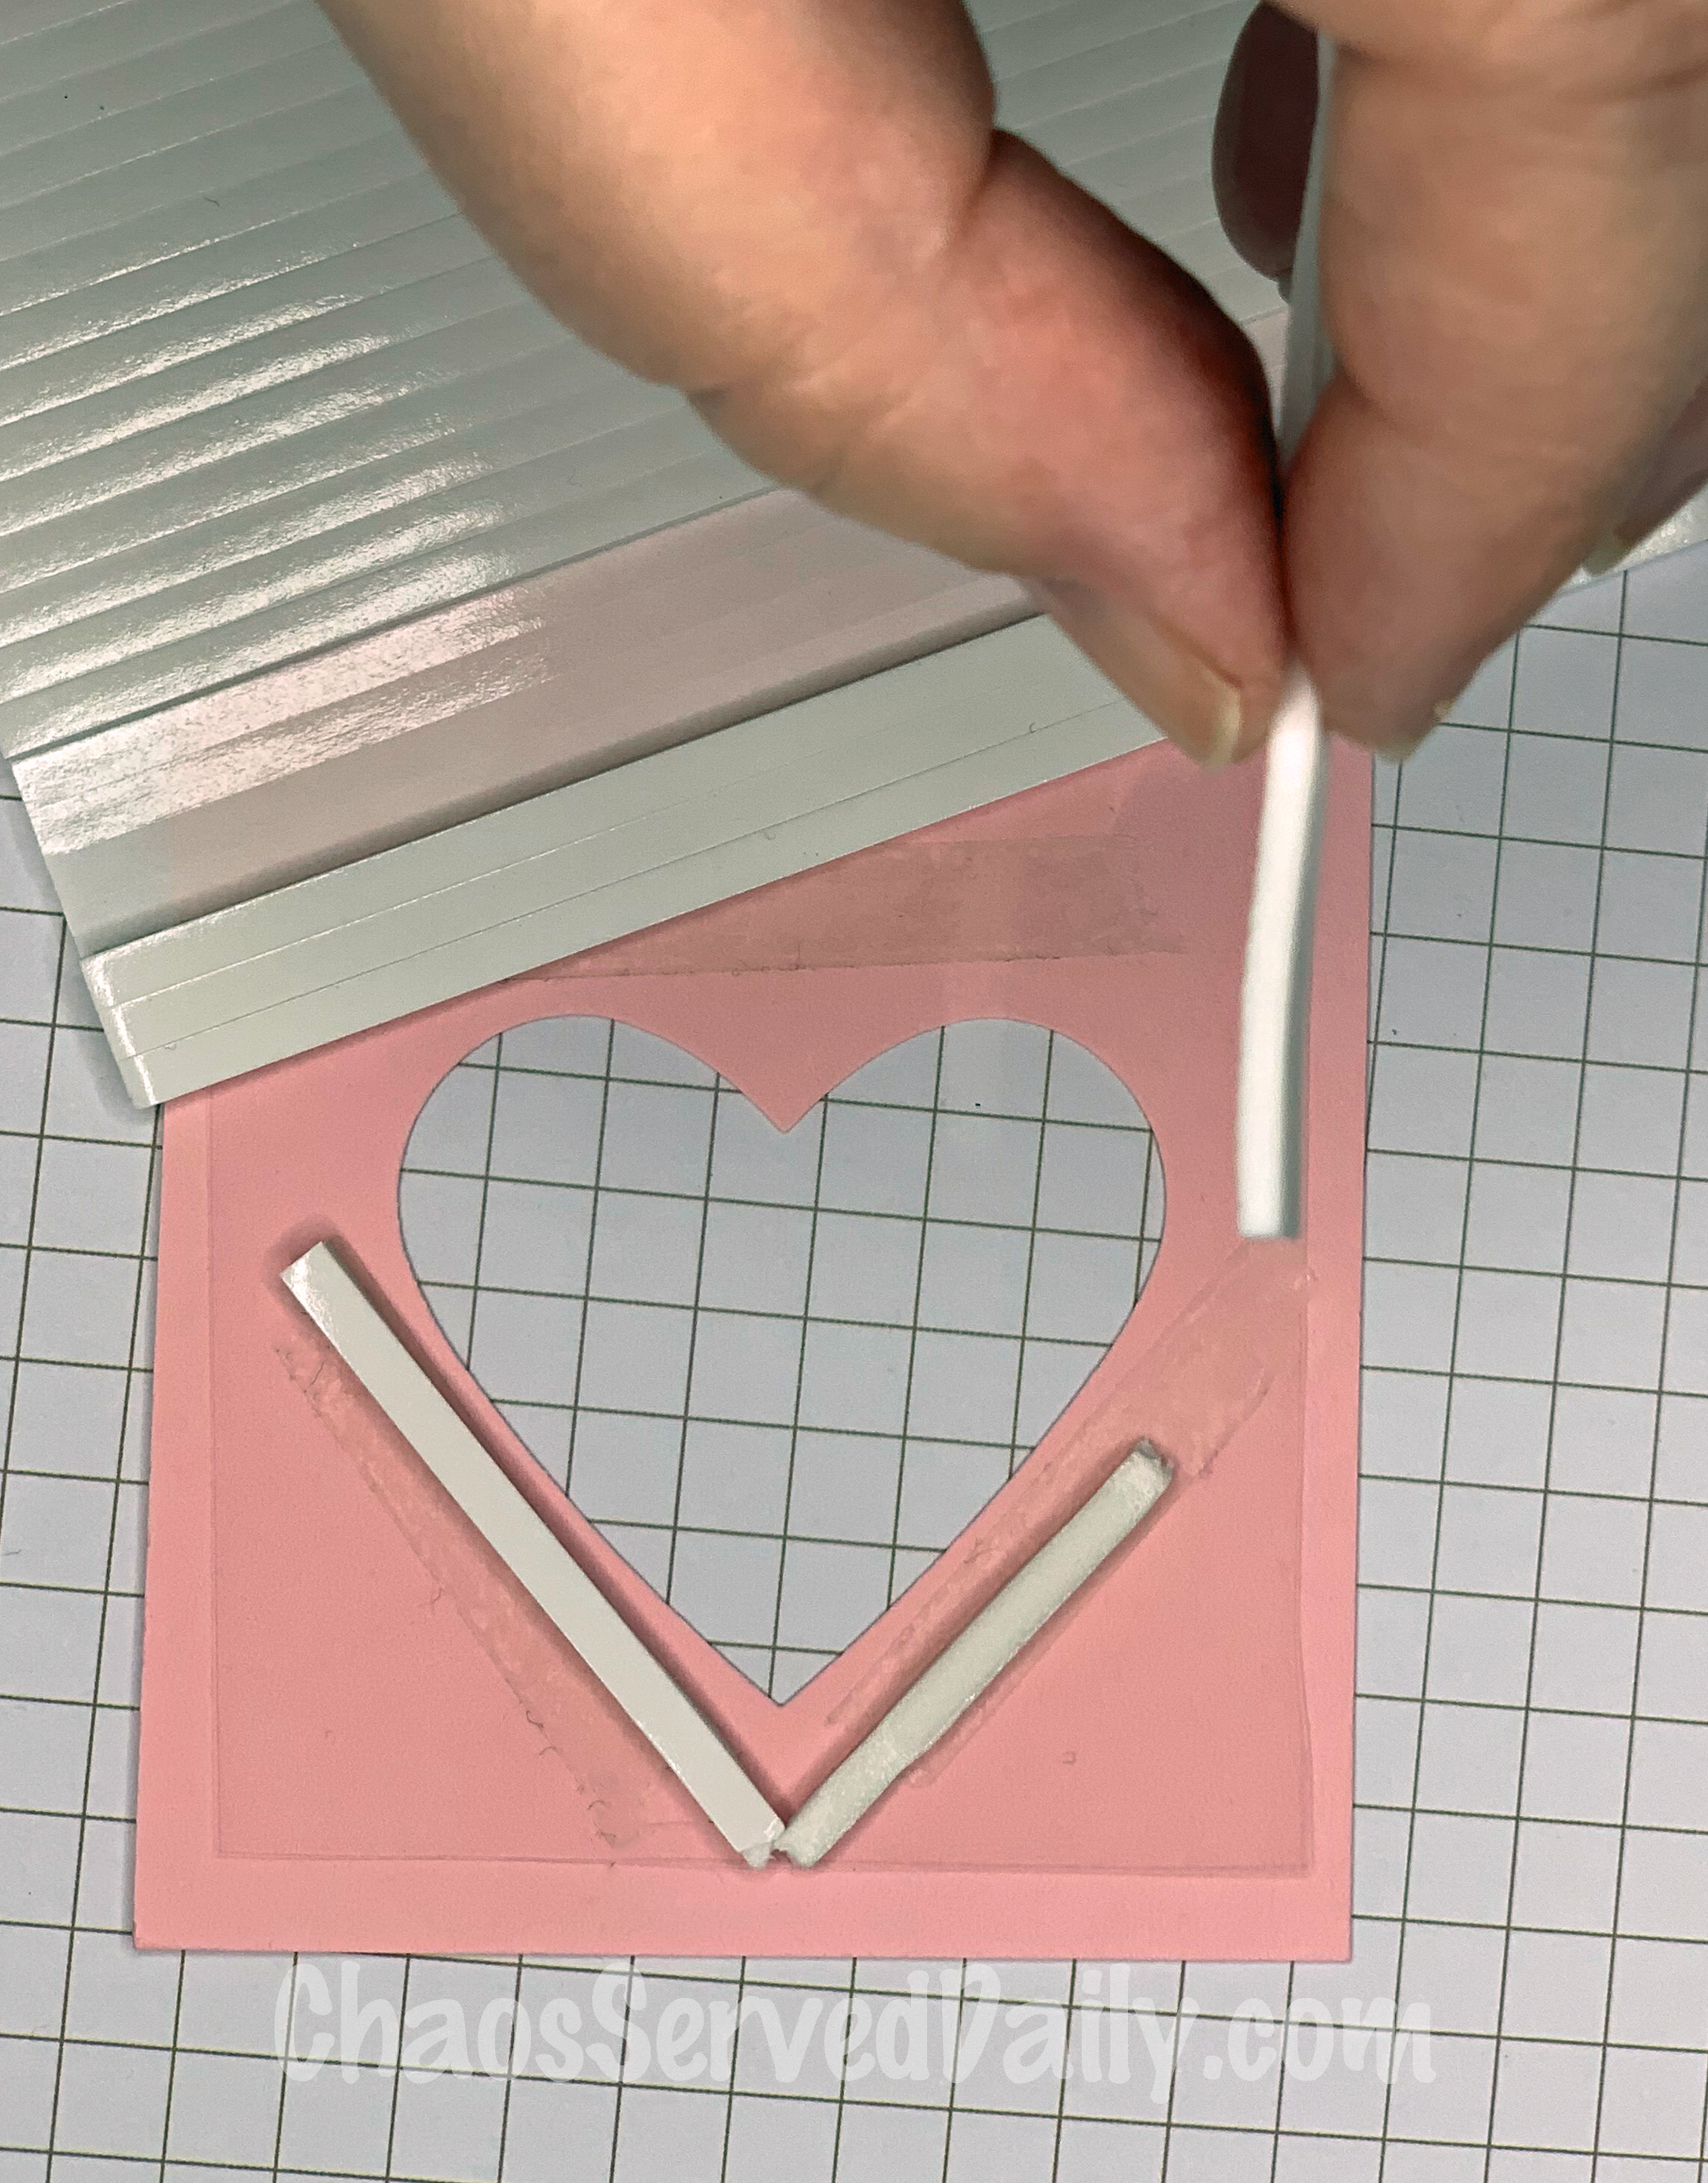
Using foam strips (again, I use Stampin’ Ups Foam Adhesive Strips), completely outline the punched heart, on the acetate sheet. Make sure there are no gaps where glitter can escape!
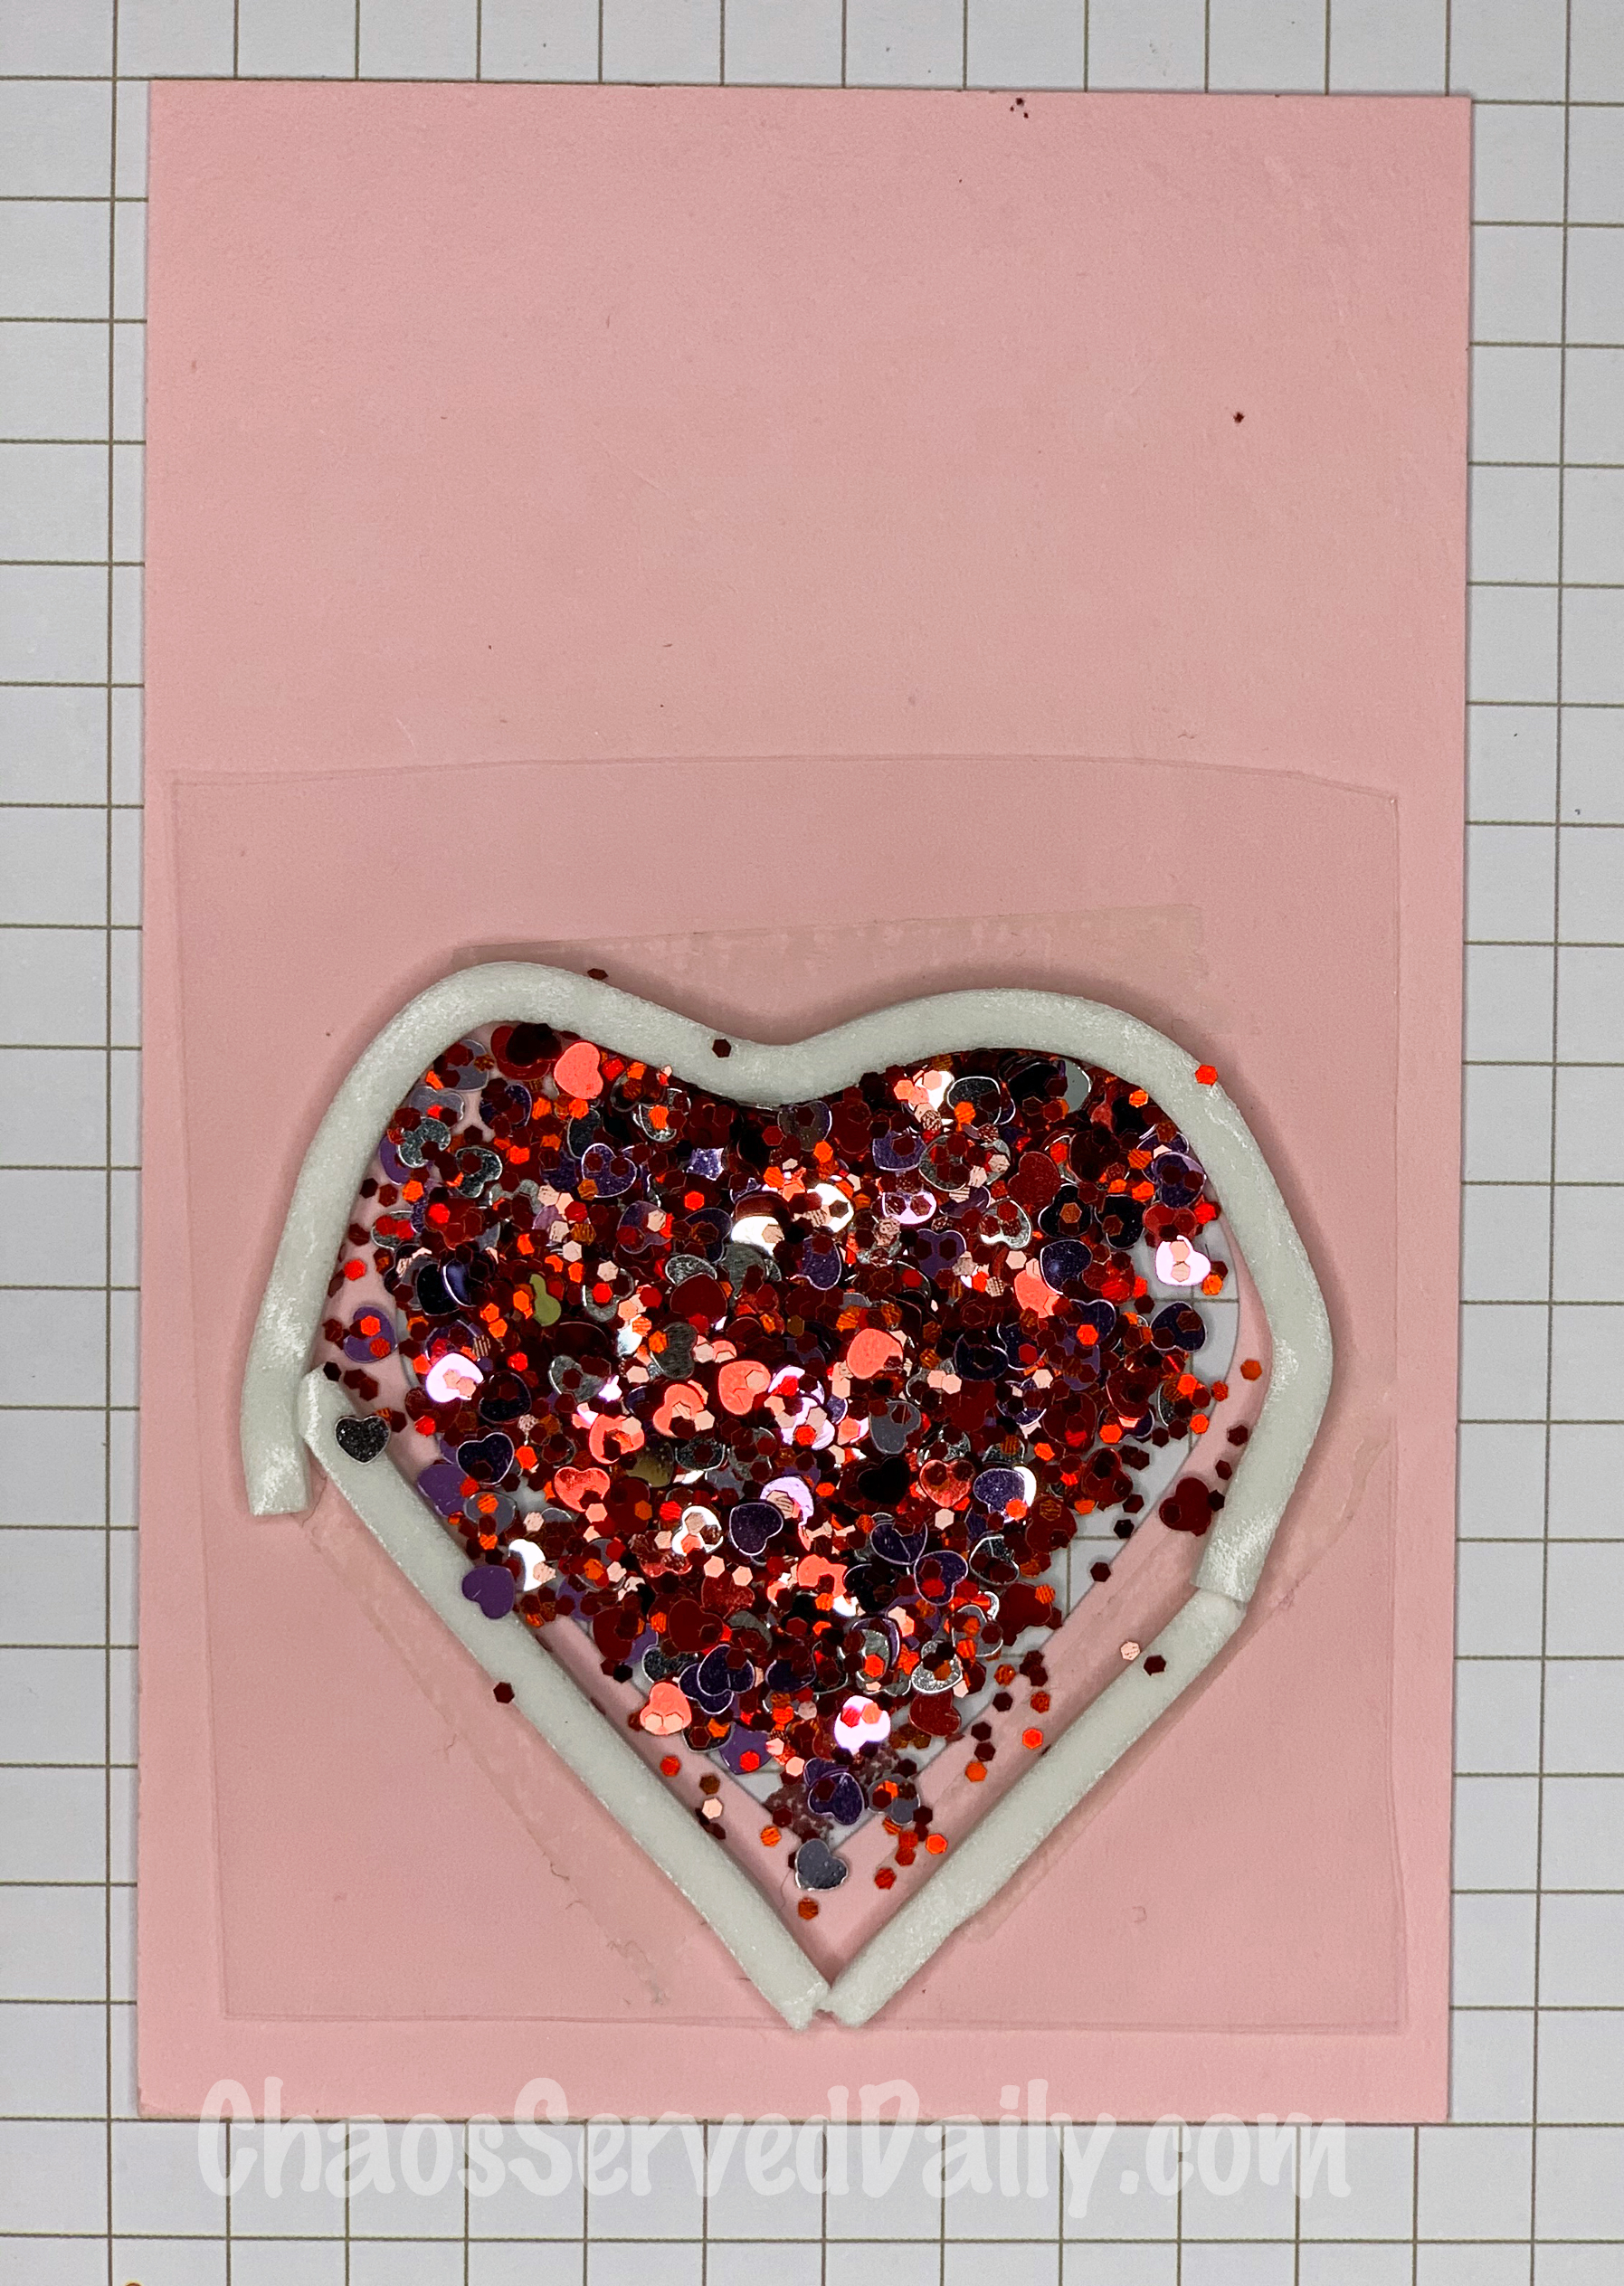
Once you’ve built a little fence using the foam strips, fill it up with glitter. It’s best to do that before you peel the top paper off the foam strips.
The most challenging part…centering your shaker on the card front. You can’t flip it, of course, or the glitter will go everywhere. So, that blurry pic shows the back of my card. I make corner marks on a grid sheet.
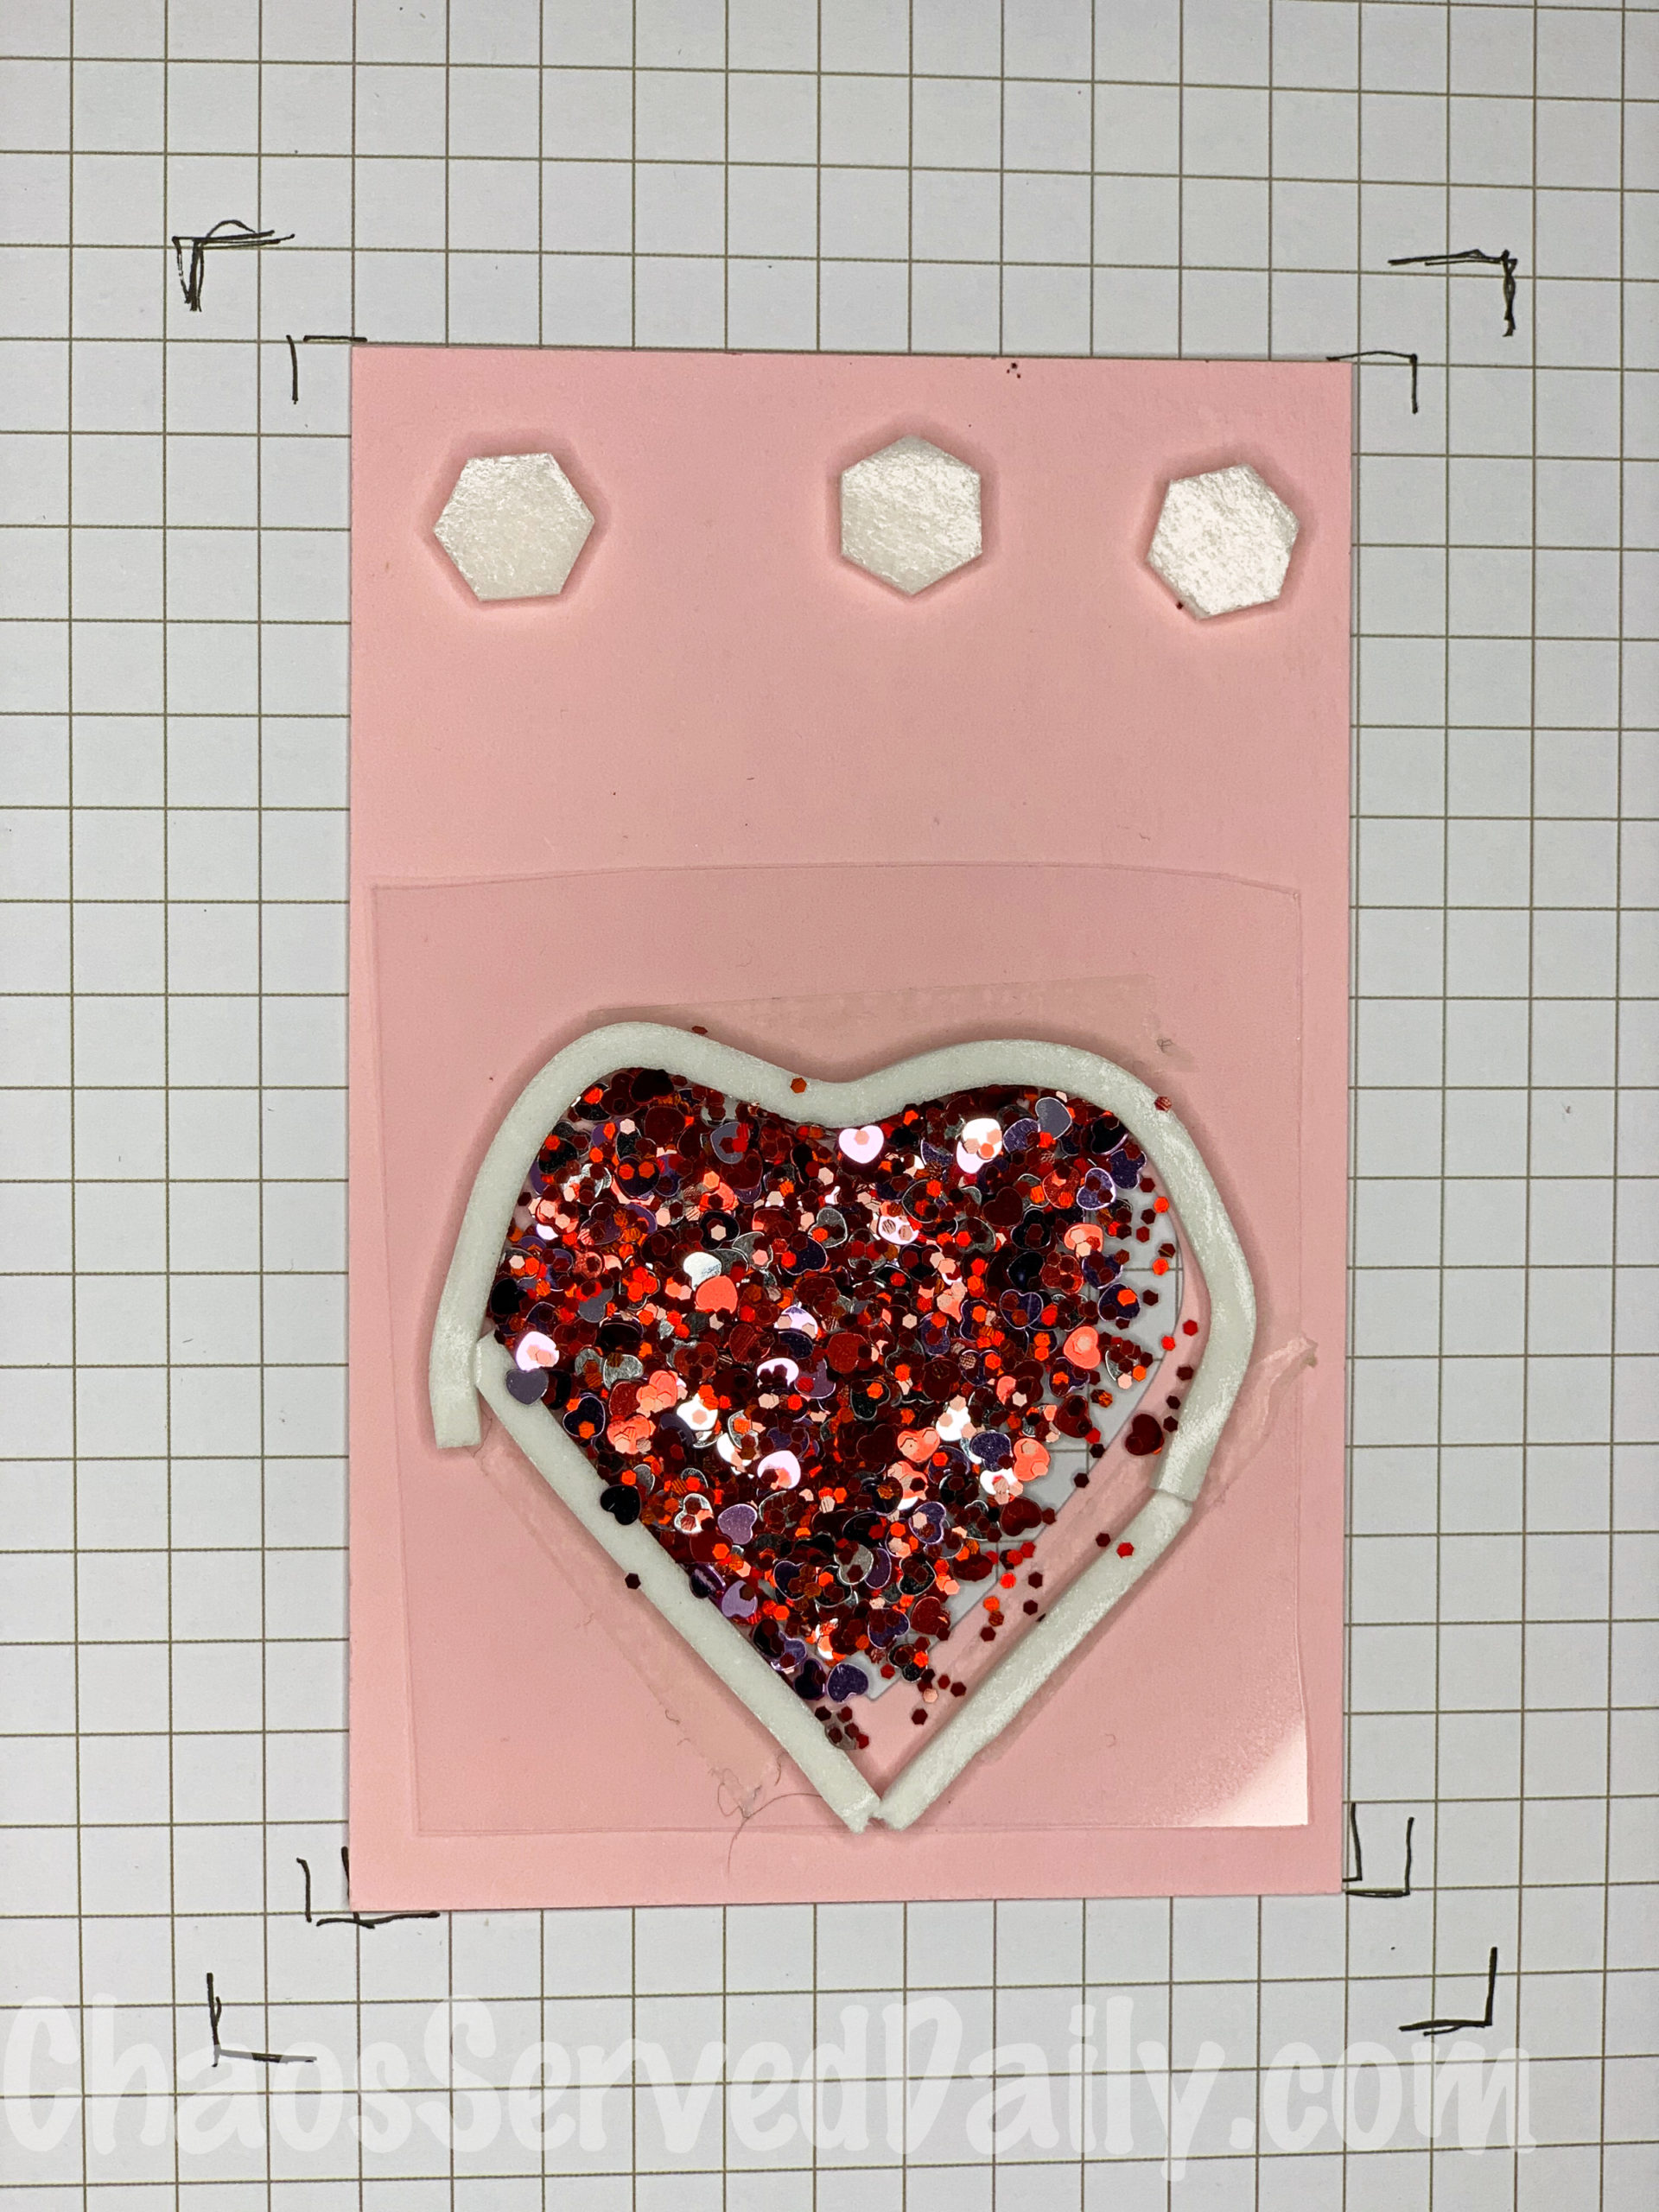
Then I center the glitter shaker part in those marks. No, this pic does not show a centered one! But I fixed it before finishing the card!
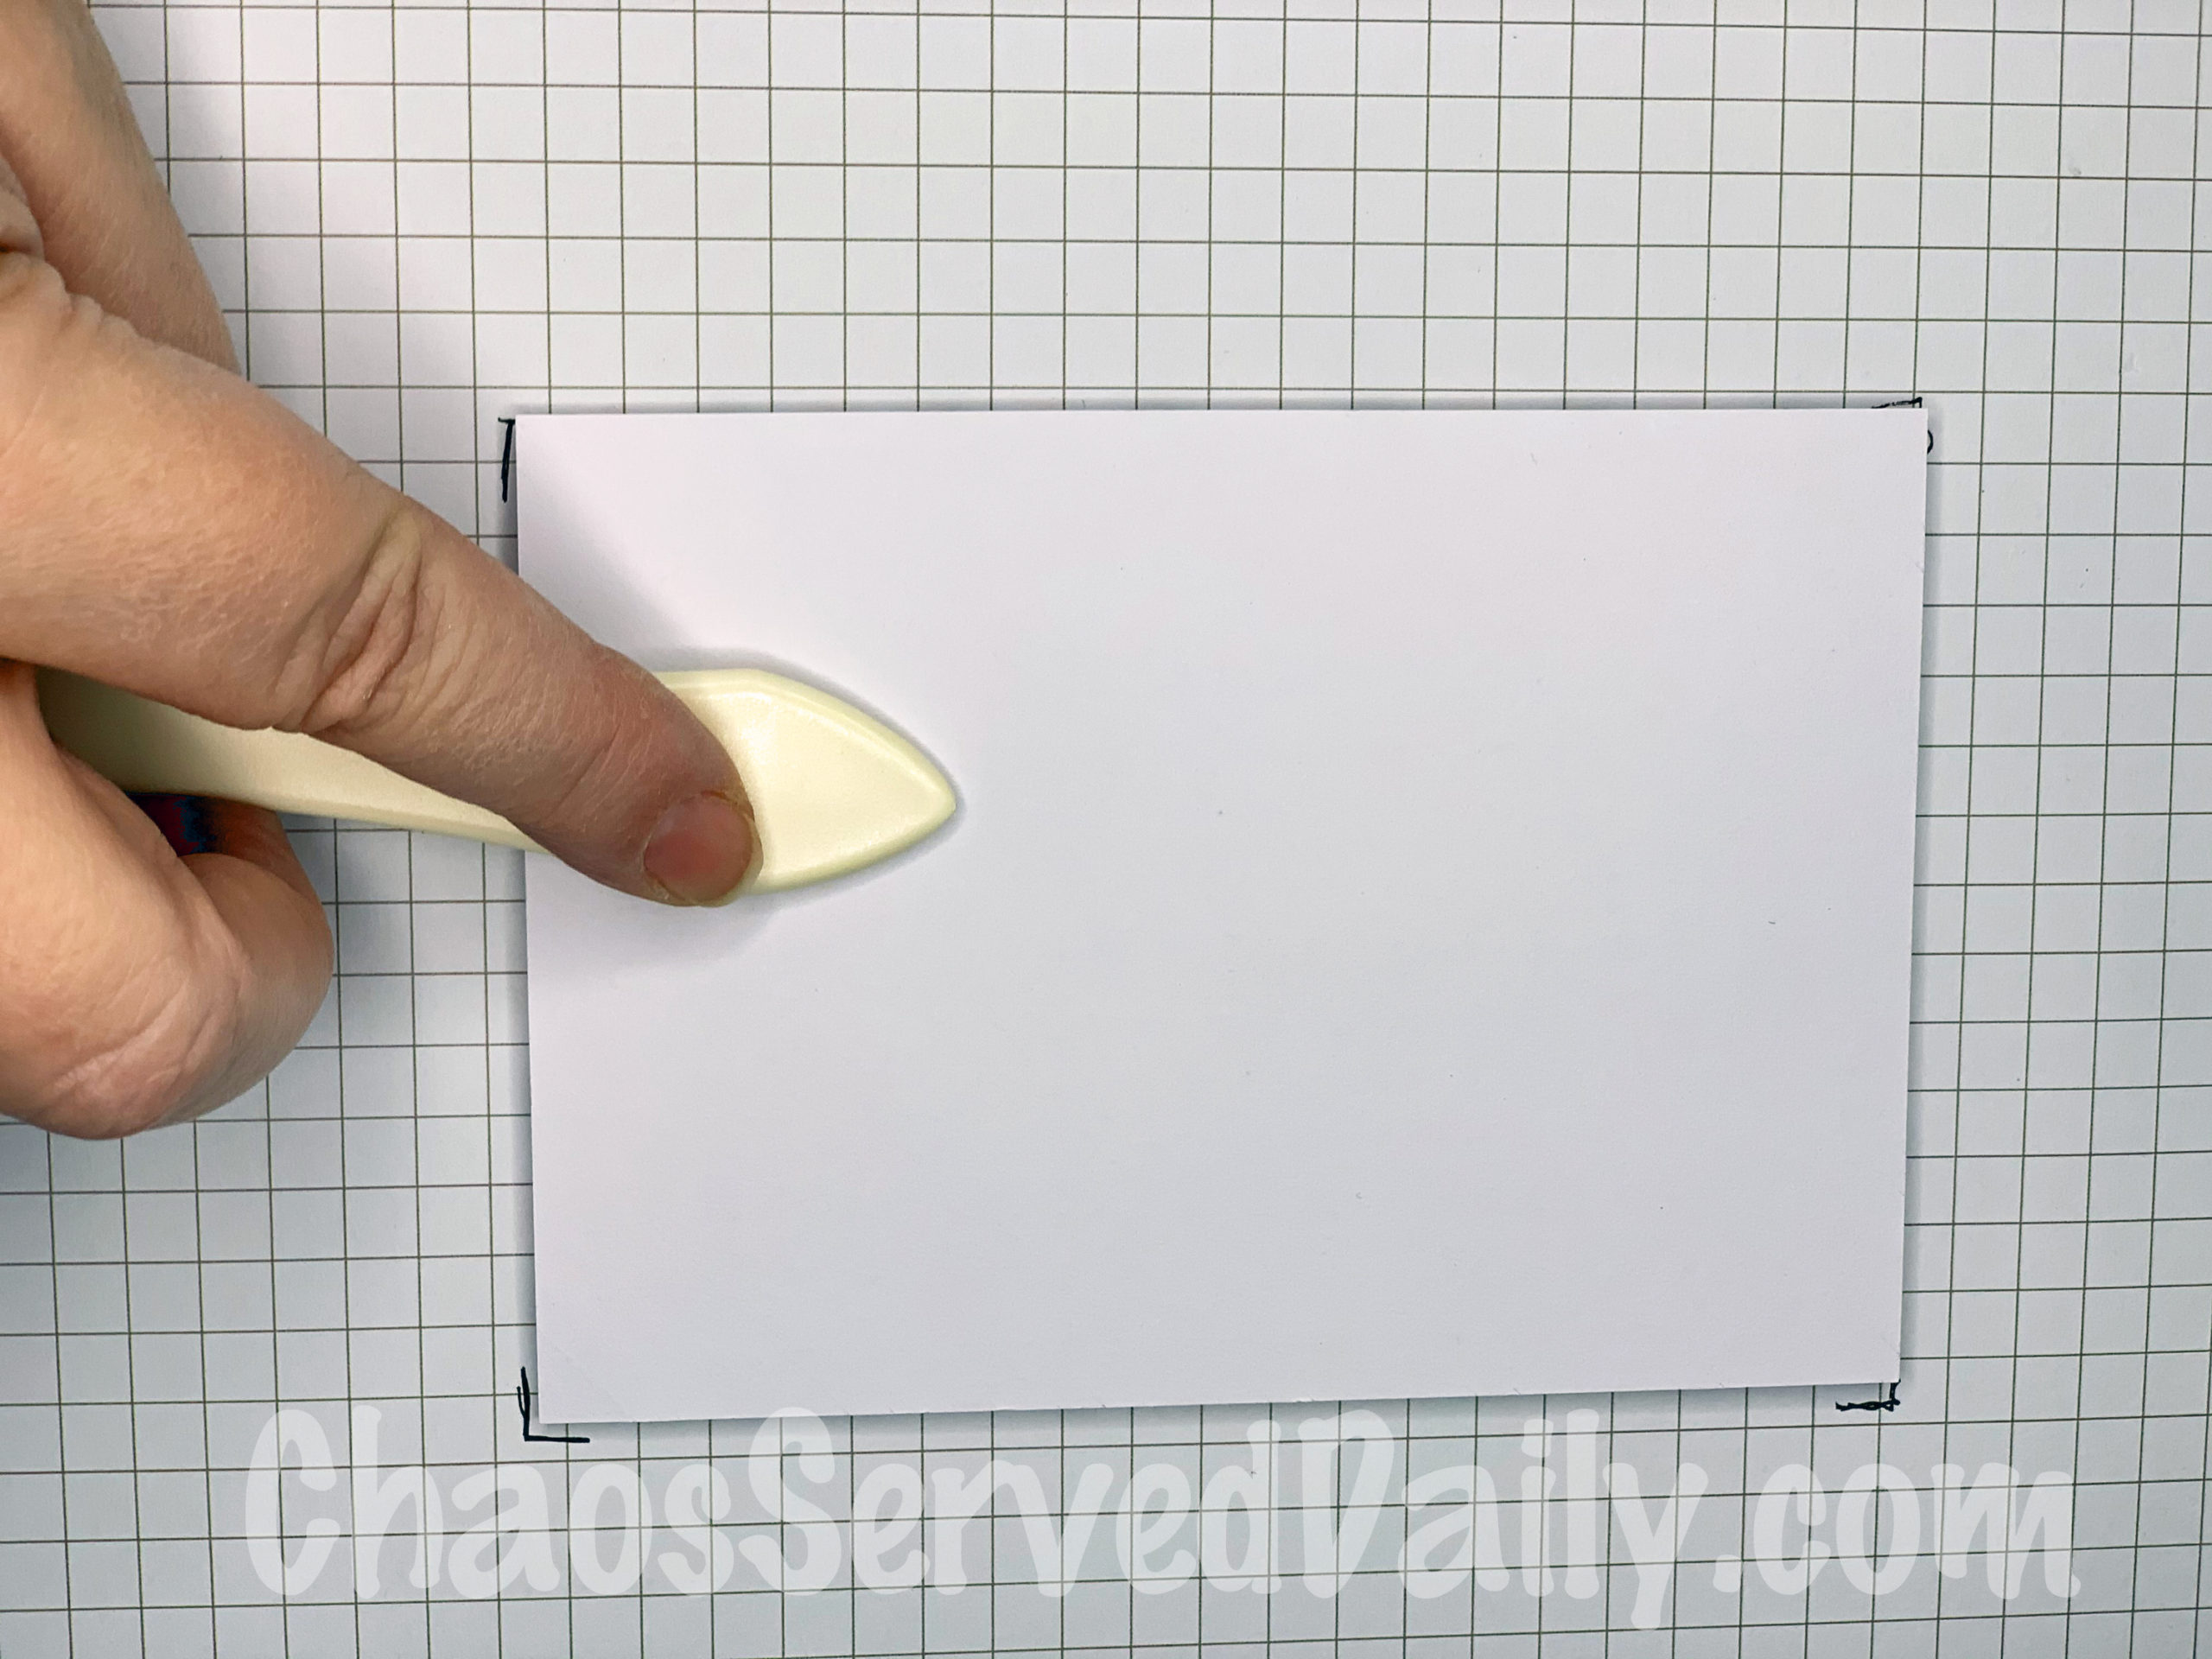
Then lay the card, facedown, on the shaker part, lining up the corners. Use a bone folder or your fingers to press it firmly. You need to really seal all of the foam strips around the glitter.
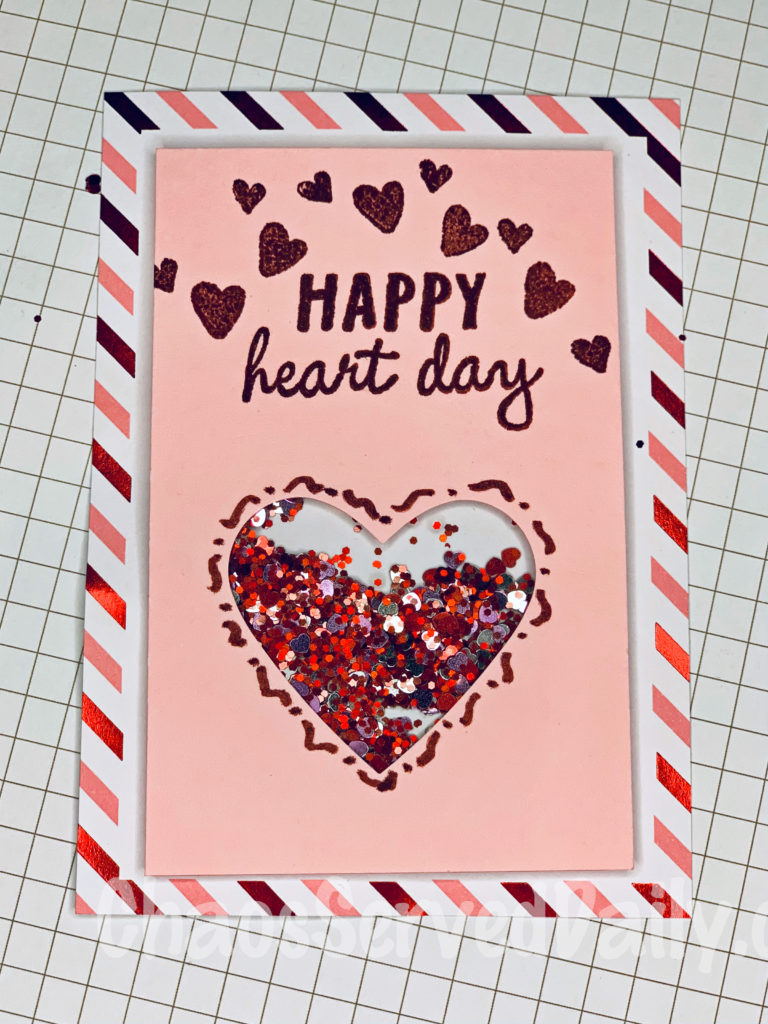
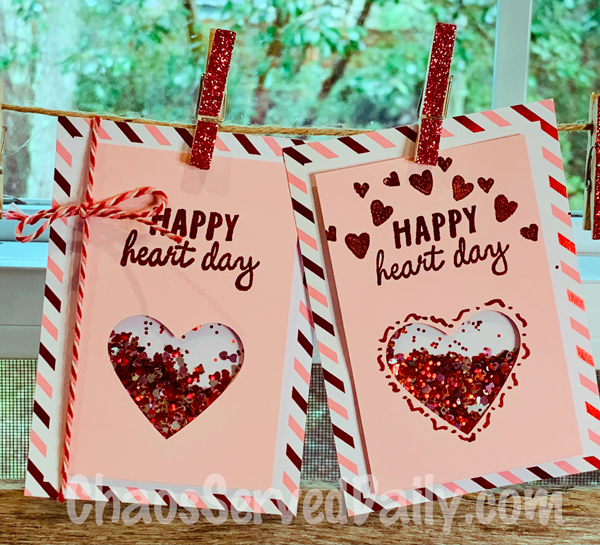
Ta-da! A cute, non-messy glitter confetti Valentine! I decided the heart shape needed a frame, so I just doodled one with a marker. For the one with baker’s twine, I didn’t exactly get the shaker piece centered…but, see…you can’t even tell with the twine added!
By the way, remember that’s it Sale-a-Bration at Stampin’ Up! It’s the best time of year to shop for all those gorgeous stamps and supplies…you’ll get free products with every $50 spent! The link is up there on the right, if you feel the need for a little retail therapy. The Sale-a-Bration choices are super cute this year!
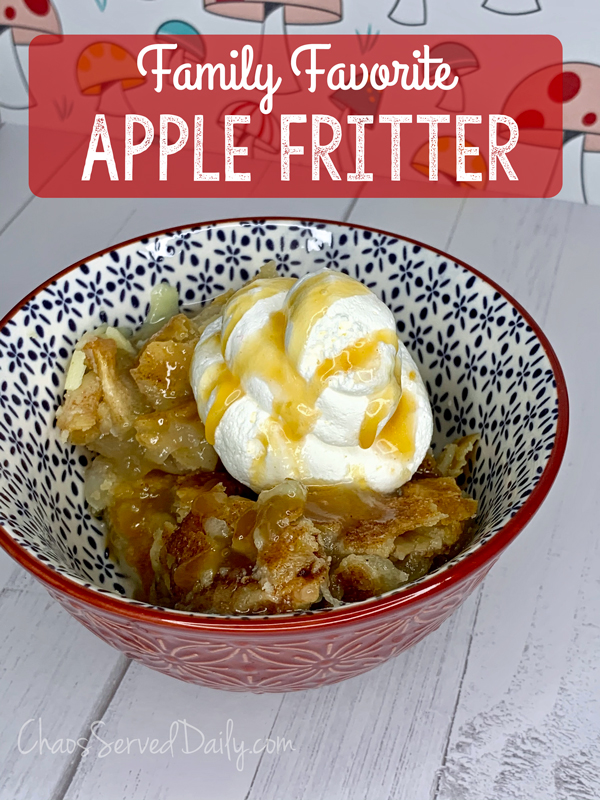
Before the comments about this not being an apple fritter, let me just say that in my family, it is! My mom is an amazing pie baker, and this is her recipe for an apple fritter, which she’s been making for at least 50 years. I know, because I’ve been lucky enough to have enjoyed it that long! My family decided we needed an All-American menu to celebrate the inauguration last week, and this was our hands down vote for dessert.
This is pretty simple. I think this is one of the rare times that my mom uses refrigerated pie crust. The main benefit of her homemade crust is the flakiness (and hers is the absolute best!), and with this recipe, your crust absorbs all the delicious syrup, so flaky is not an option.
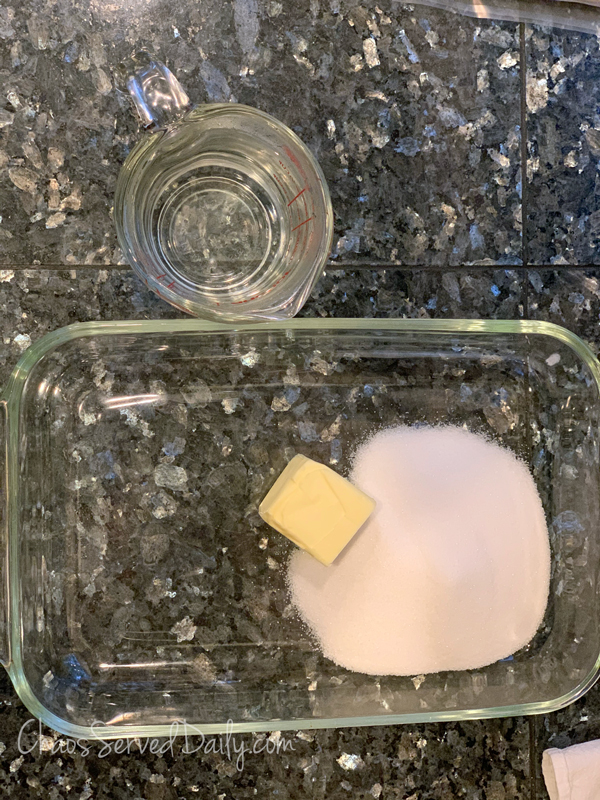
This bakes in a syrup, so make that by combining the ingredients in the pan you’re going to bake it in, then letting it melt together in the oven while it’s preheating and you’re making the fritter.
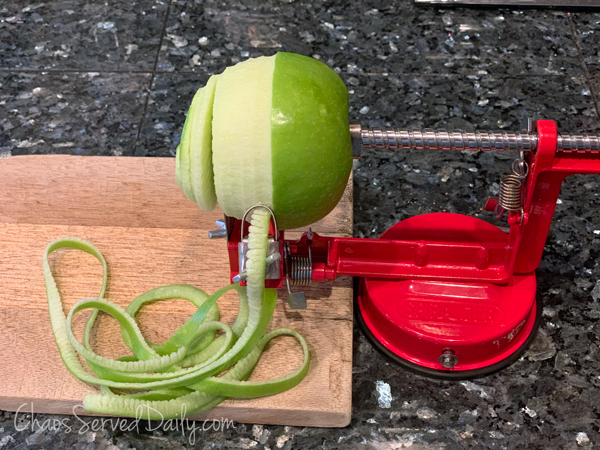
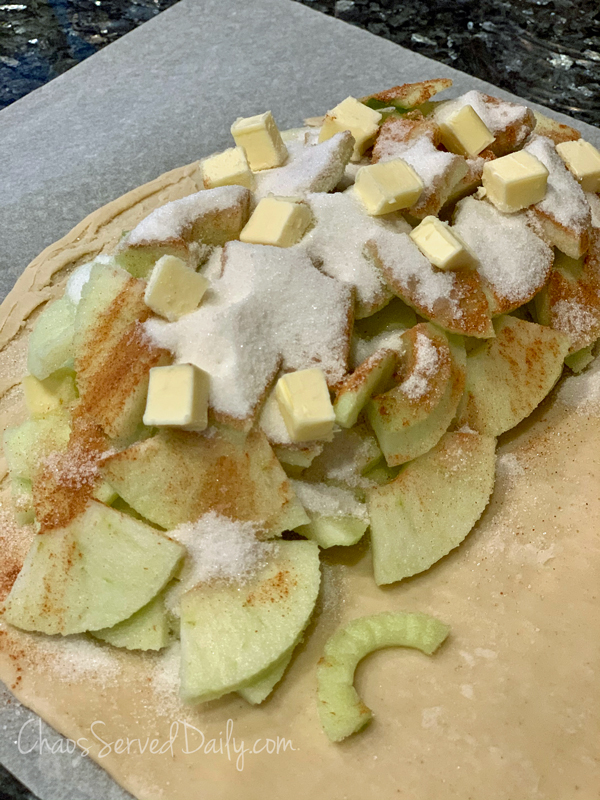
I probably didn’t need to get my apple peeler/slicer out for just 2 apples, but I do find it so satisfying to peel and slice apples so easily!
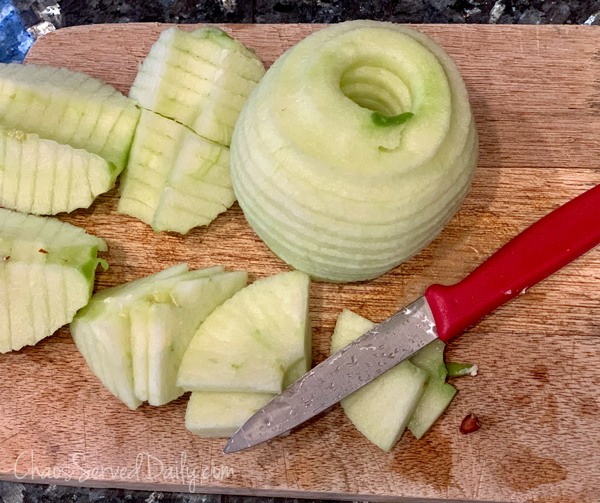
I cut the peeled and sliced apple into quarters, then.
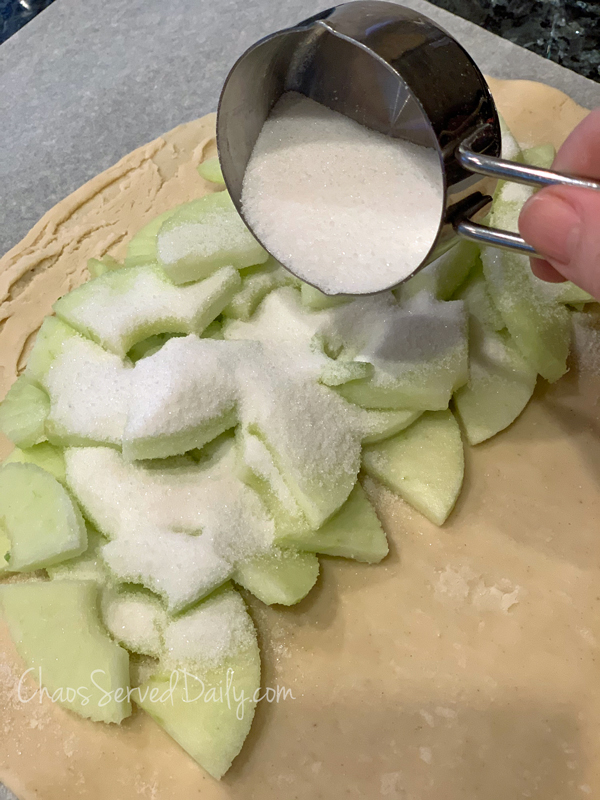
Layer half of the apples, sugar, spice, and butter onto half of the piecrust, leaving about an inch along the edge. Then repeat with remaining apples.
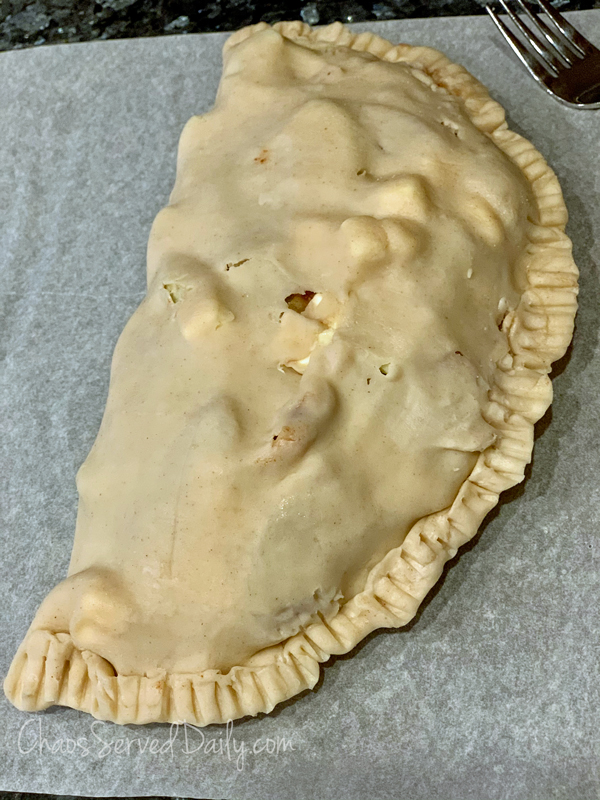
It will look really tall, but this will work! Fold the other half of the piecrust over, stretching it if needed. It will be needed, and it will crack a little, but that is fine.
Seal the edge and crimp with a fork. Sprinkle liberally with cinnamon and sugar.
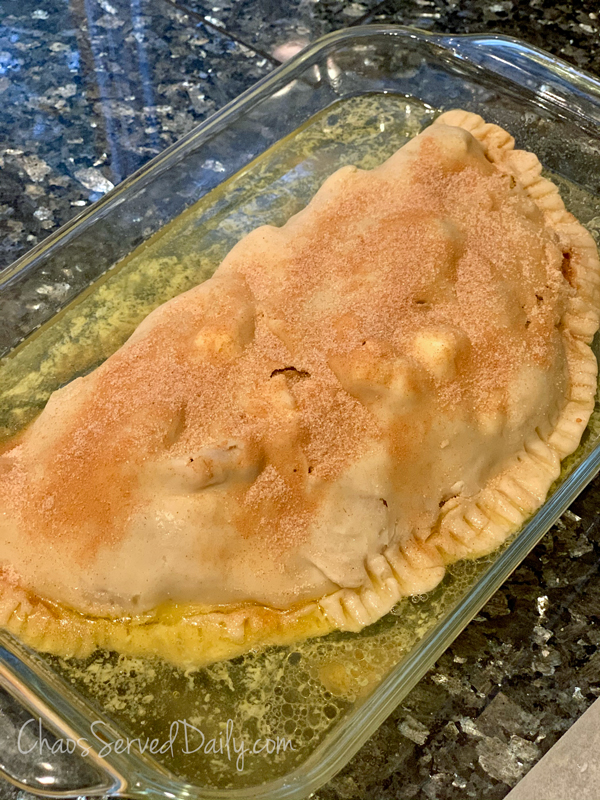
Lay it gently in the pan of hot syrup. The syrup will thicken as it bakes, so don’t worry if it seems thin.
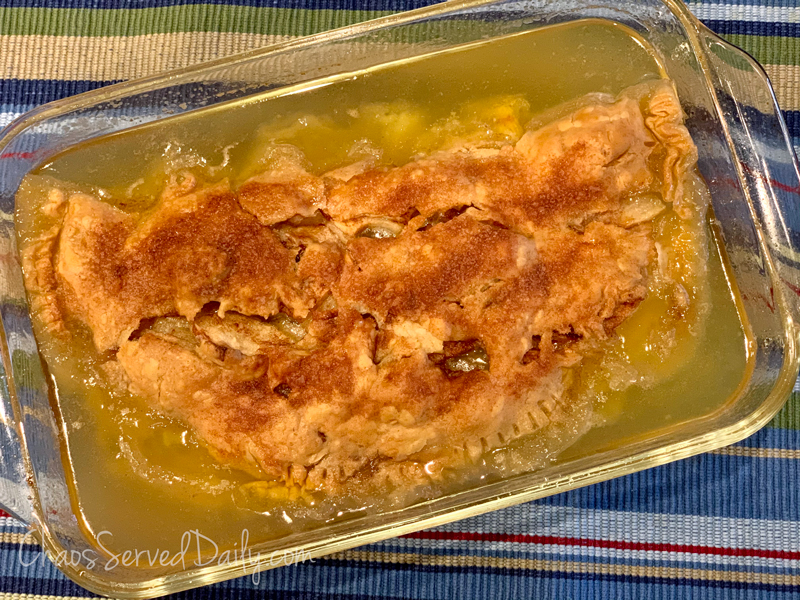
Bake it for 45 minutes to an hour, until the crust is nicely browned and the syrup is all bubbly and has thickened a bit.
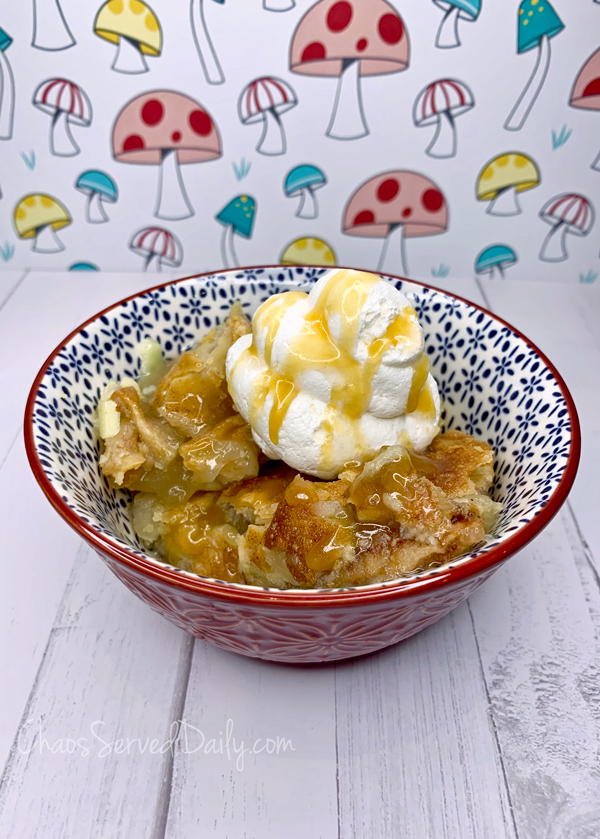
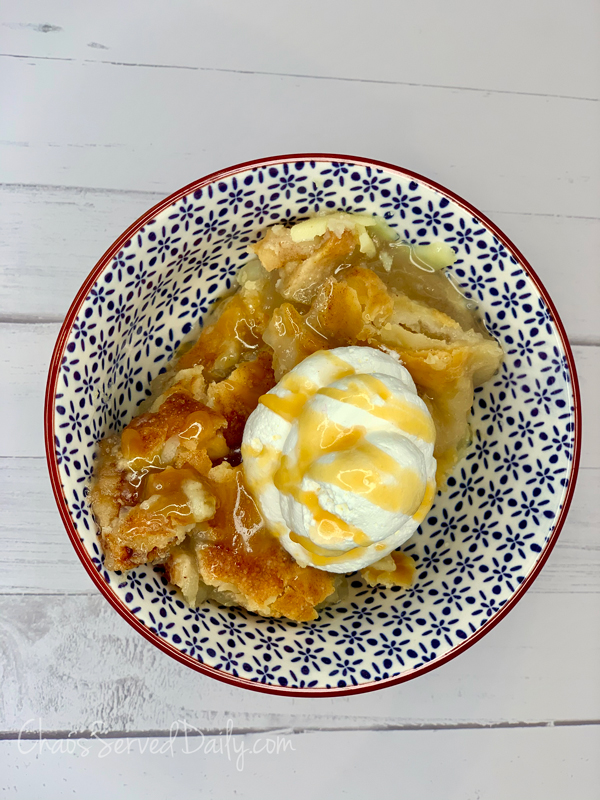
This isn’t a gorgeous, flawless pie…but the crust has soaked up that buttery, caramel-y syrup while baking, and it is just all-around delicious! Spoon it into bowls (while warm, or warm it briefly before serving), and top it with ice cream or whipped cream, along with some of the syrup drizzled over it. The. Best.
1 piecrust (from a package of refrigerated dough or homemade)
2 large apples, Granny Smith or Rome, peeled and sliced thinly
1/3 to 2/3 cup sugar, depending on the sweetness of your apples
2 Tbsp butter, diced
½ tsp Penzey’s Pie Spice or cinnamon
Preheat oven to 350°. In an 11×7 baking pan (I like to use a glass one), place the syrup ingredients: hot water, butter, sugar, and spice. Put that into the oven while it’s preheating, and leave it until the butter has melted. It should be ready by the time you have your fritter ready to go in it.
Unroll the pie crust, and layer the sliced apples onto half of it, leaving an inch around the edge. Put about half of them, then sprinkle with half the sugar, half the butter, and half the cinnamon. Repeat the layers. It’ll seem really high, but it will work!
Fold the other half of the piecrust over to make a large semicircle. You may need to stretch it, and it will probably crack…and that’s ok!
Seal the edges by rolling it up over itself a little and mashing it together, then crimp with a fork. It’s going to ooze a little, and that’s ok, too! Sprinkle cinnamon and sugar on top (let your conscience be your guide on how much), and gently lay it into the pan with the butter-sugar-water syrup.
Bake it for 45-60 minutes, until the top is nice and browned and the syrup is bubbling and thickened.
Remove from oven and let cool…but it’s awfully good a bit warm. Serve with ice cream or whipped cream, with the syrup from the pan drizzled over it.
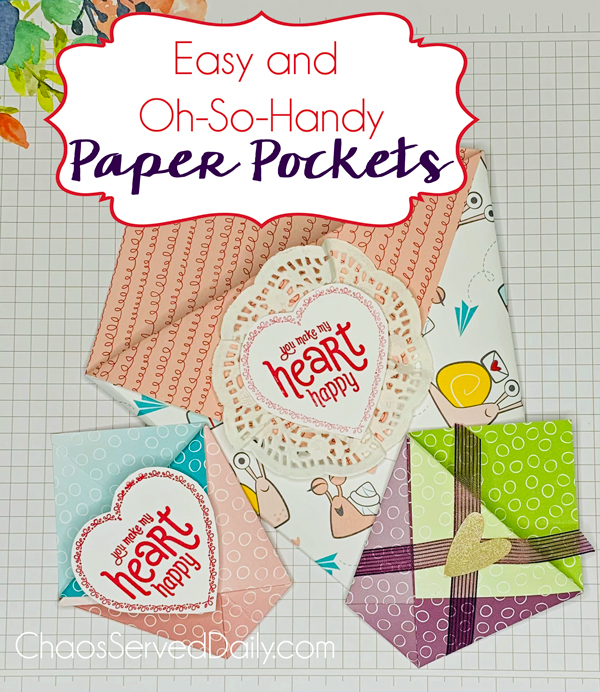
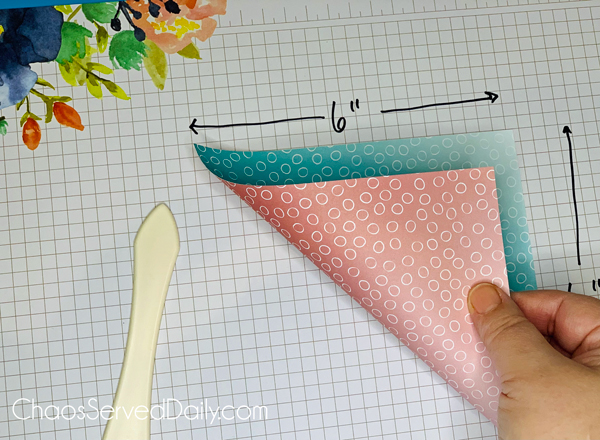
It’s juvenile, I know, but I think of the line from the old movie, “Airplane!” every time I fold a piece of paper. You know, when they hand him a map and say, “What can you make of it?” and he folds it into a hat. Or maybe you don’t, because your movie references are in this century. In any event, today I want to show you how to fold a square of paper into a nifty and handy paper pocket.
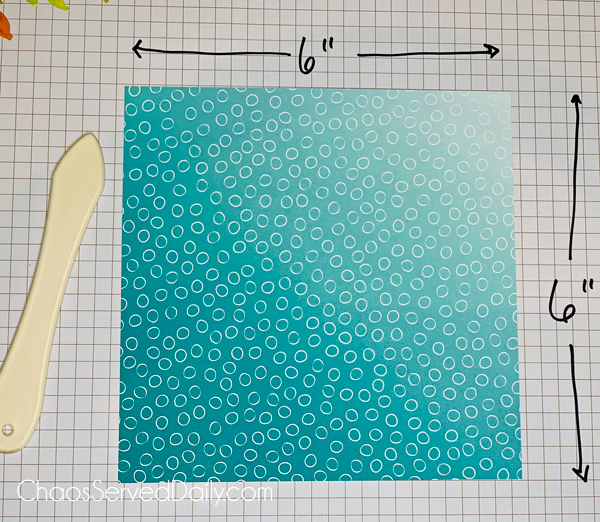
The supplies for this are simple…a square piece of paper, and you’re ready to go! Maybe a bone folder, as well, but a fingernail or hard edge works, too.
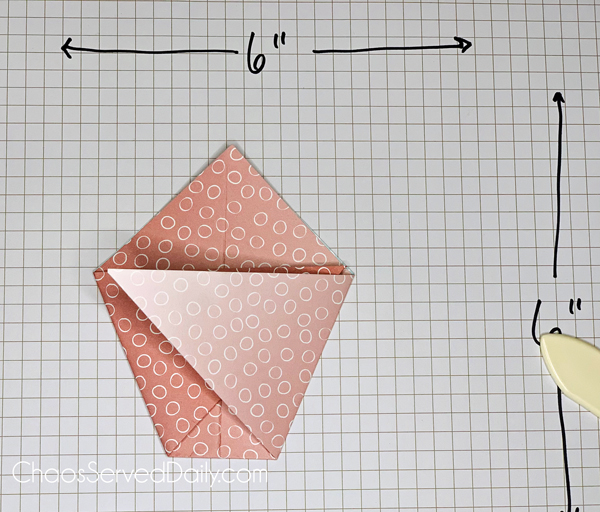
Fold your paper diagonally. Crease edge with a bone folder.
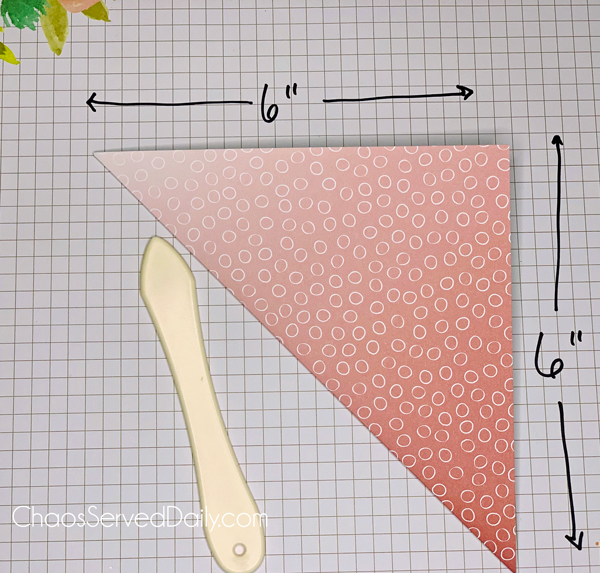
Turn the paper so the fold is at the bottom.
Fold the bottom left corner up to meet the other side, at a point that makes a horizontal edge.
Crease that fold.
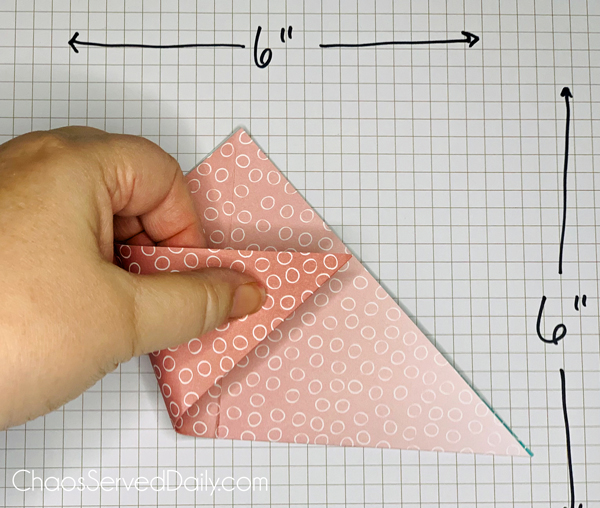
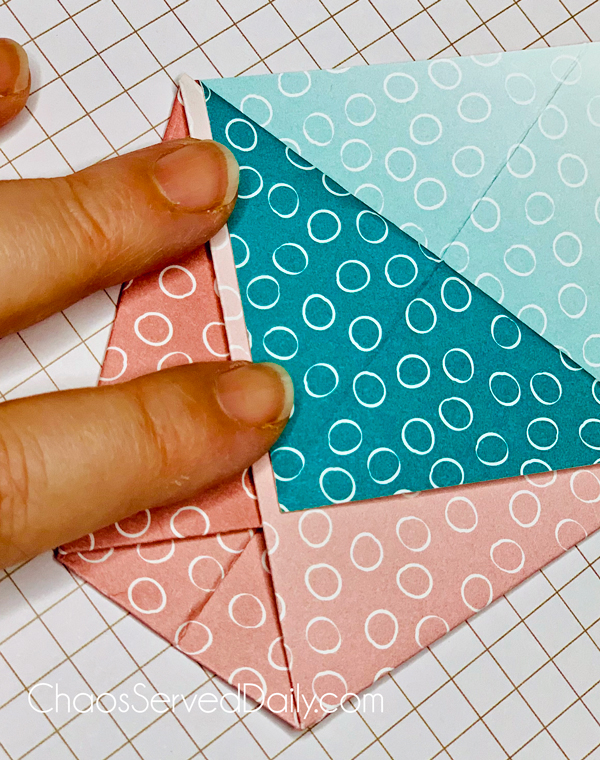
Repeat with the bottom right corner of the paper.
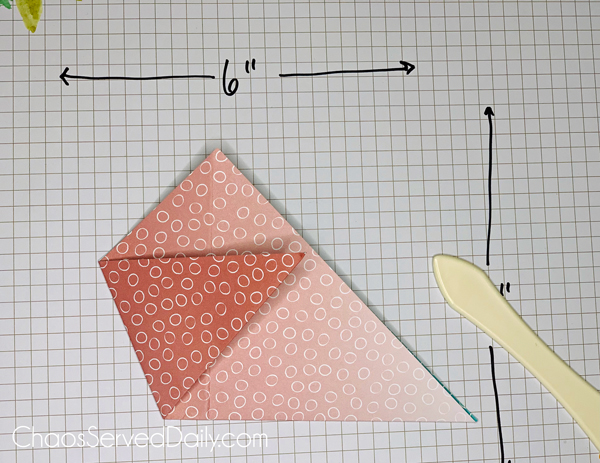
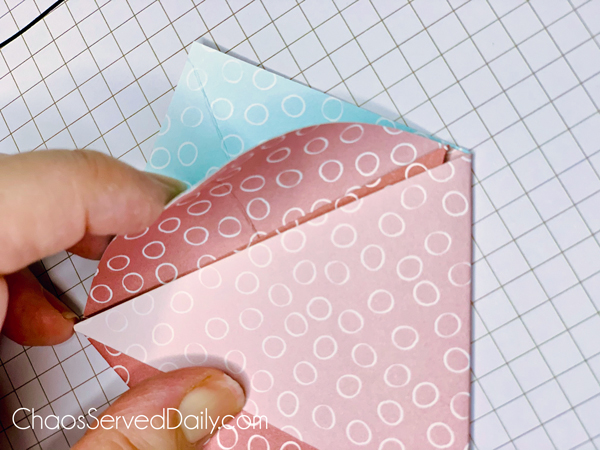
Pick up the top layer of the point and fold it down over the criss-crossed paper.
Crease that edge.
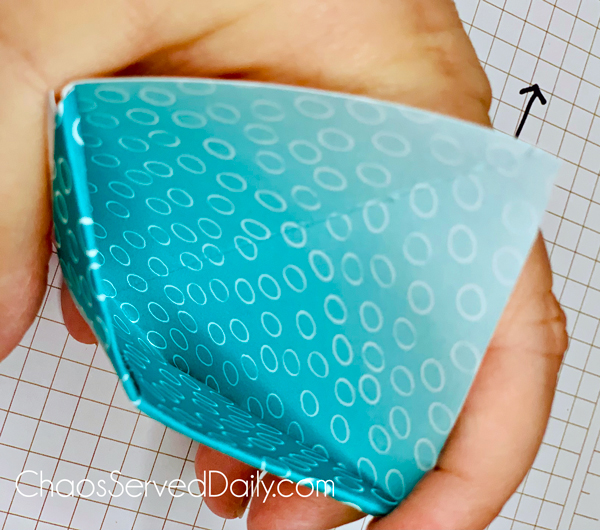
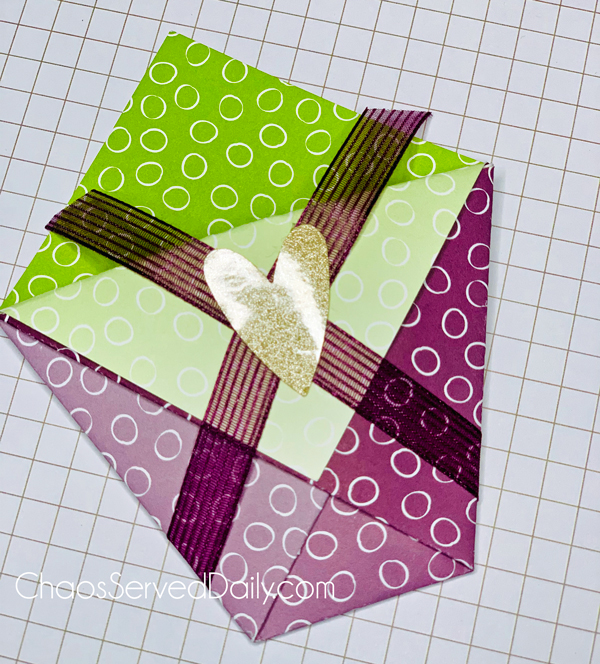
Pop open your pocket!
Embellish and fill as you would like! Here, I just crisscrossed a ribbon and secured it with a metallic sticker heart.
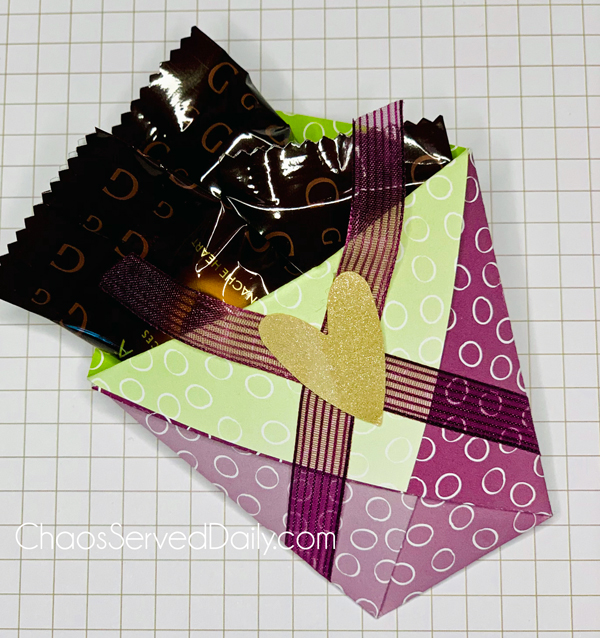
I’ve made these from 12×12 scrapbooking paper, 6×6 as shown here, a piece of notebook paper squared off, and even a napkin at a movie theater to divvy up a box of Swedish fish amongst my hooligans.
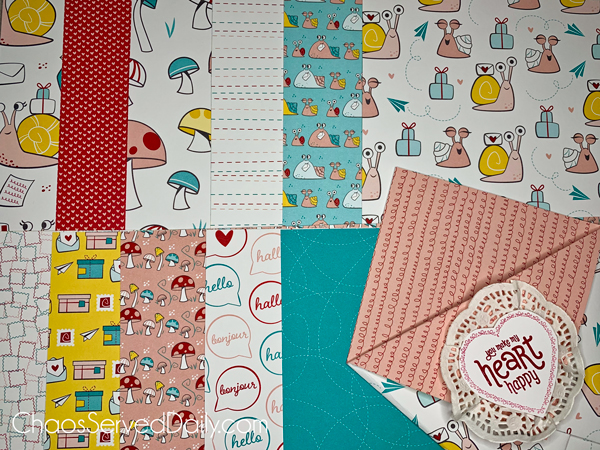
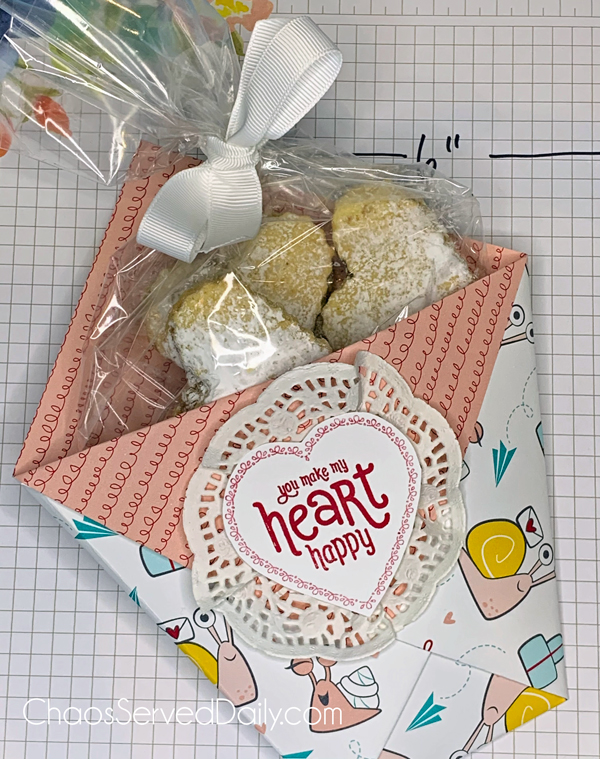
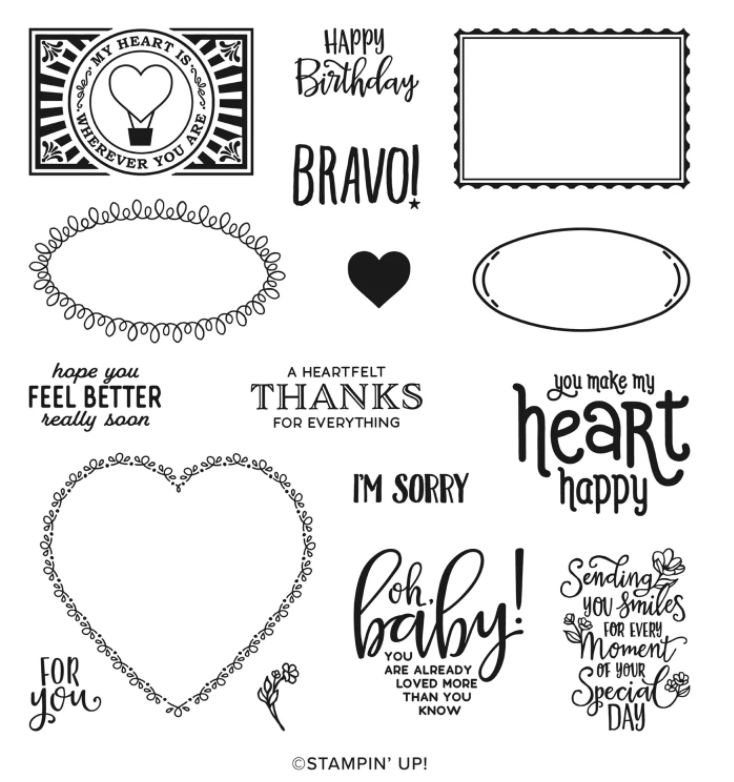
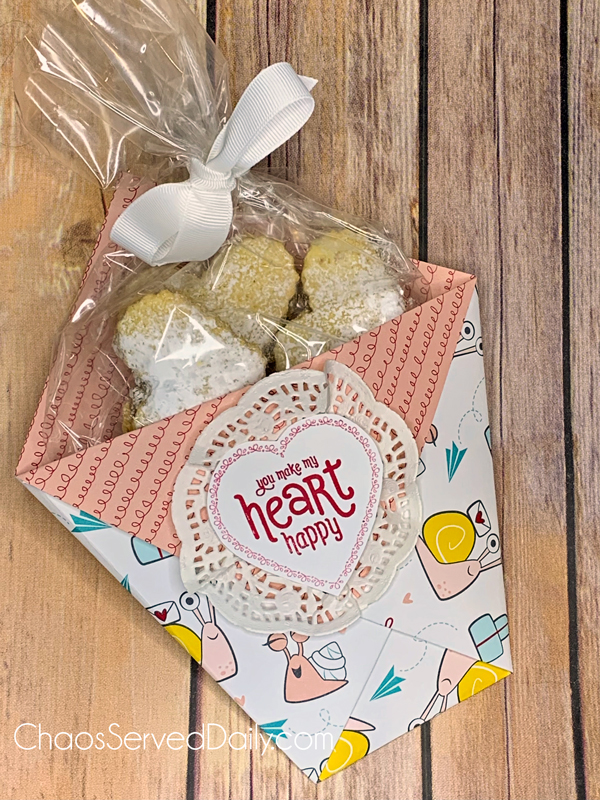
I love this Snail Mail DSP from Stampin’ Up! It’s whimsical, can be used for Valentine’s Day but also throughout the year, and the color combo is super fun and cheerful. I made a pocket for Valentine’s Day from it, and filled it with Alfajores from last week’s post. Easy-peasy!
To embellish this larger pocket, I used a stamp from the Punch Party Hostess Set. It’s only available during Sale-a-Bration, but really, when is a better time to shop at Stampin’ Up! Free products with every $50 you order…what could be better? You can shop 24/7 at my website…just click here!
155300 PUNCH PARTY HOST STAMP SET
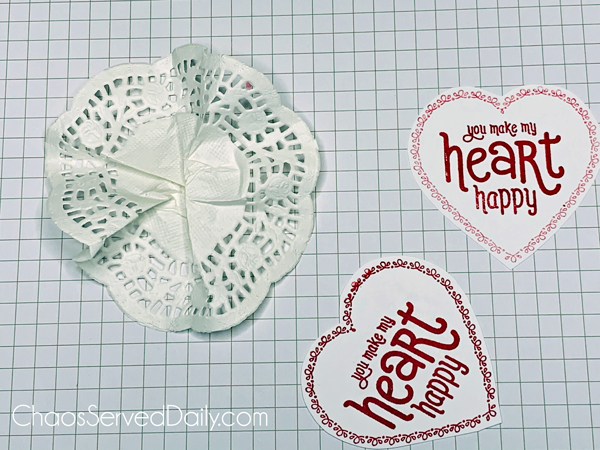
But back to embellishing this pocket! I used the sentiment and Lovely Lipstick ink, and then for the border, I tried it stamped, then stamped again (known as stamping off). It’s a good technique to know…you get the same hue, just less intense. I also kind of pleated a paper doily from the dollar store to make it look a little ruffled.
My grandparents often said something (or someone) was “as handy as a pocket on a shirt,” and, while I often bemoan a lack of pockets on my clothing, I can always fold one up when I need it!
Last year, my high schooler had to make traditional foods of Chile for his Spanish class. He shared that with me the night before his group’s presentation. Yay. Anyway, he did a little Google research and found some amazing (and easy) beef and cheese empanadas, as well as a cookie called Alfajores. We had the ingredients, so that was the choice!
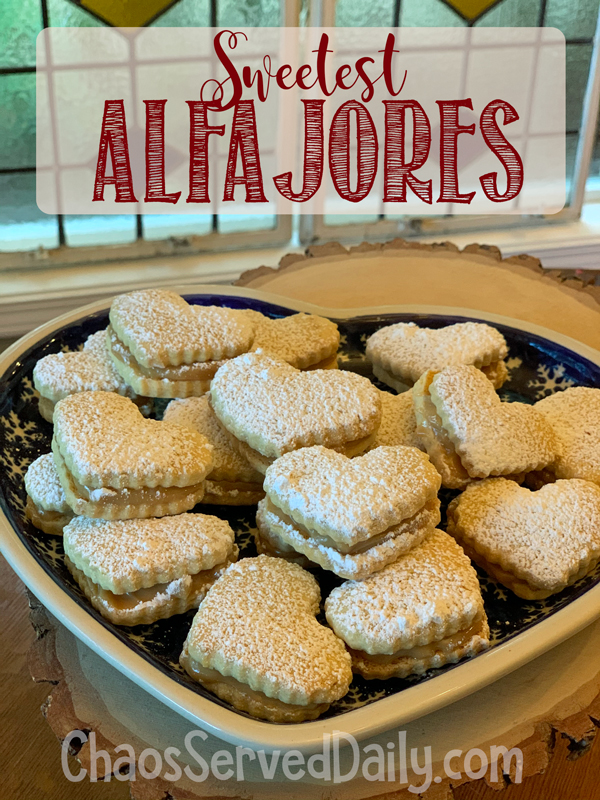
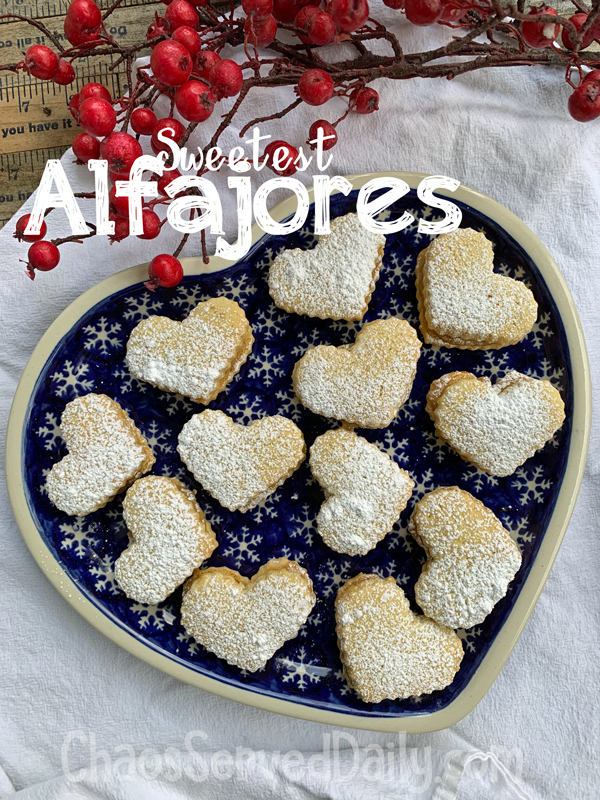
Alfajores taste like shortbread, but are even more tender. They’re sandwich cookies, and the center is dulce de leche (like caramel, but different!), which I tend to keep on hand and eat with a spoon. Sometimes I use apple slices instead of a spoon. But I digress. The ones we made last year were just round, but I thought some small heart-shaped ones would be fun for Valentine’s Day (or other romantic days, such as our anniversary, which is today!).
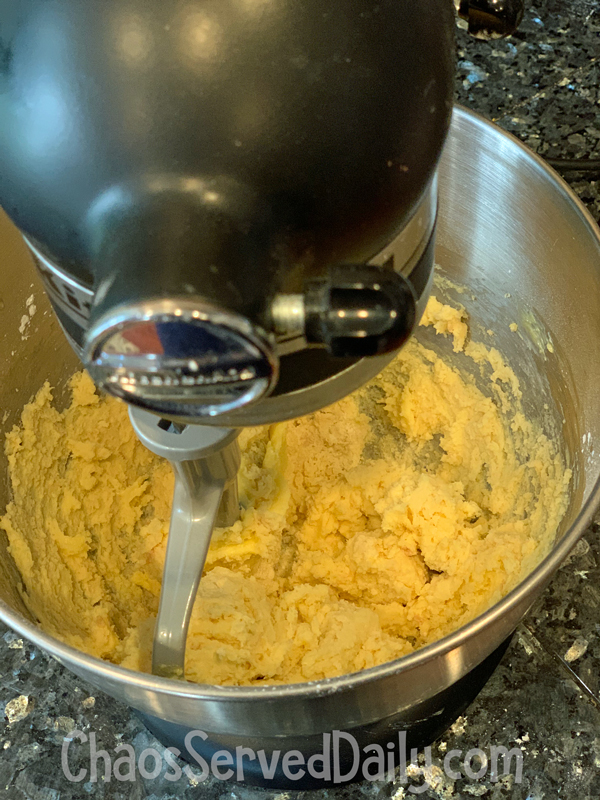
The dough is pretty standard…cream your butter and sugar, add the dry ingredients and other wet ones, then chill for an hour or so. What’s different is that it has egg yolks, which makes it more golden than some doughs, and it has cornstarch (that’s the secret to the tenderness). Also a bit of liquor, but who counts that?
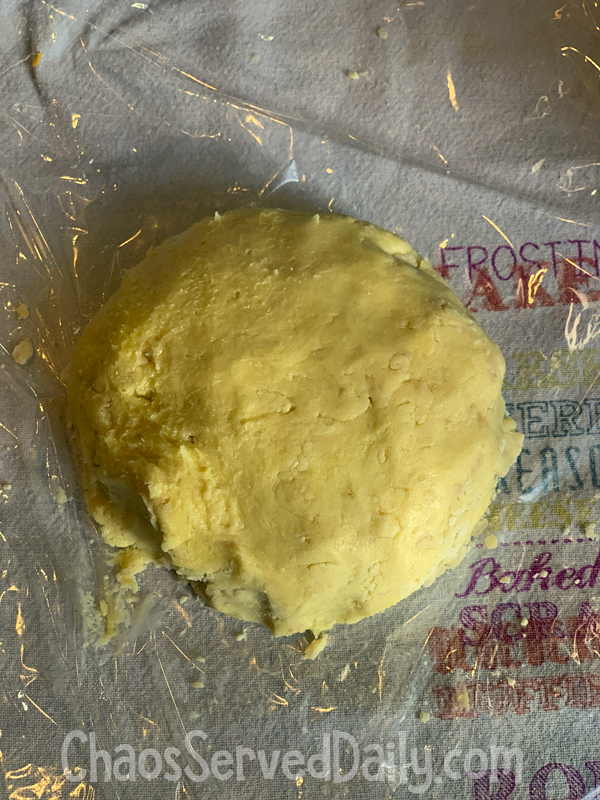
Mix, then flatten into a disk, wrap in plastic, and chill for an hour.
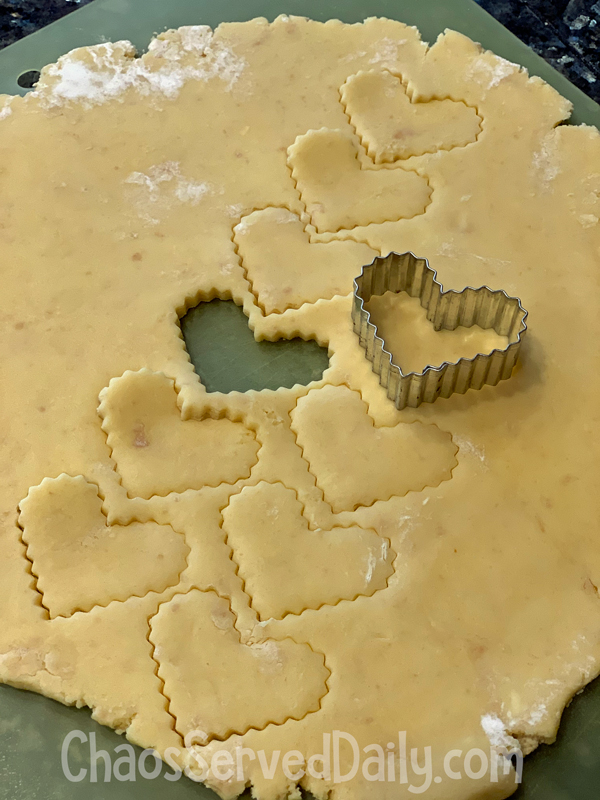
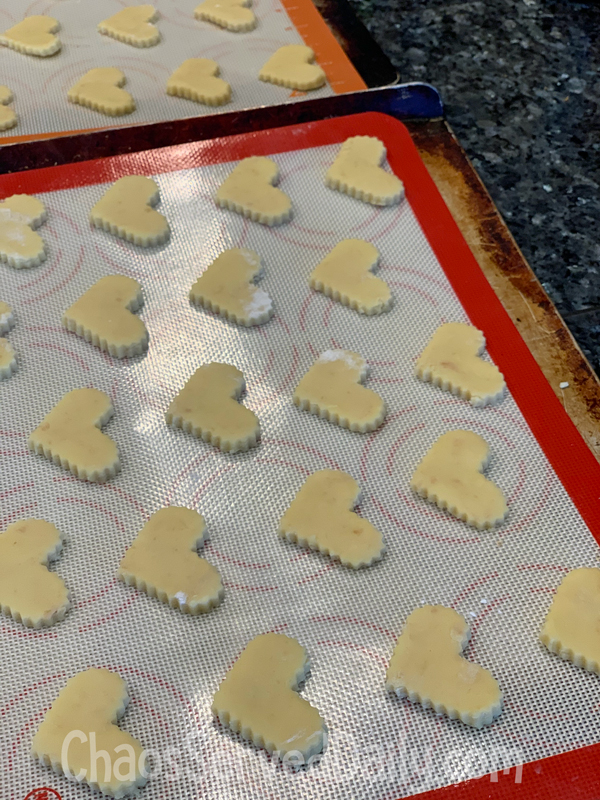
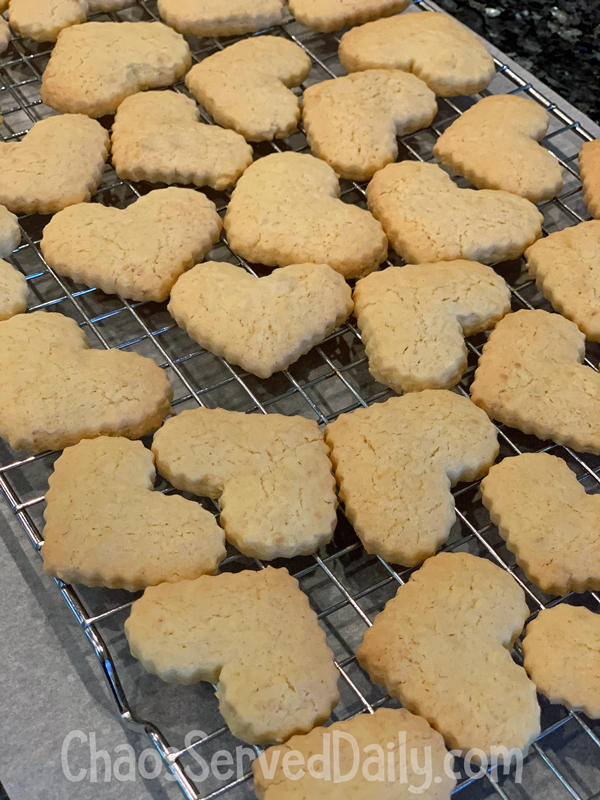
This rolls out really beautifully, and using a small heart cutter (about 2″ at the widest part), I cut 40 cookies. Try to minimize the number of times you roll the dough, as overworking will make it tough. I squeeze those cutouts as close together as I can! They’re not going to spread much, so they only need to be about 1″ apart on the cookie sheets.
Watch them pretty closely after about 10 minutes. You want the bottoms just beginning to brown, and the cookies to be firm. Cool them completely on a wire rack. When they’re cool, I match them up for the sandwiches. Even though they were cut with the same cutter, the thickness of the dough will mean they’re just a little different in size. But you can skip that step if you want!
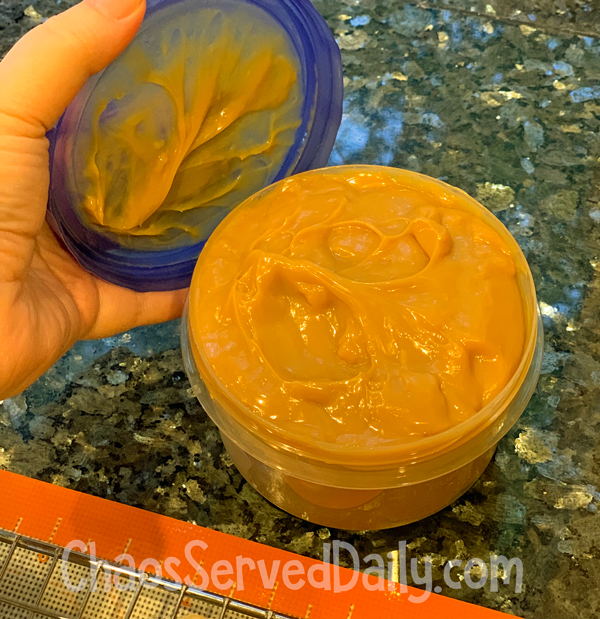
Now the fun part…filling them! I use La Lechera Dulce de Leche straight from a can. It’s heavenly. Unfortunately, every store in my town was sold out, for some reason. I used up the cans I had over the holidays. Not to worry, I just made my own. And it is so simple…canned sweetened condensed milk, water, and slow cooker are all you need. Here’s a link to a post I did a few years ago…it’s a nifty trick to know for caramel!
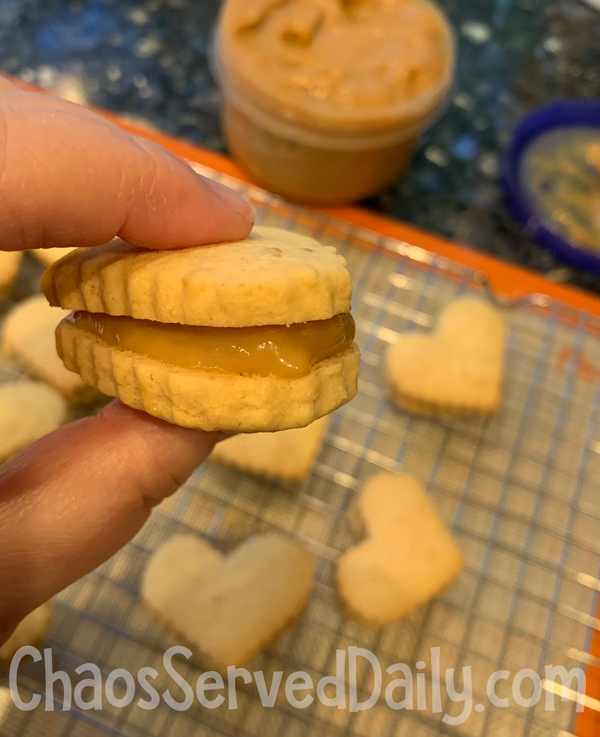
So, when you have your dulce de leche, spread about a tablespoon on one cookie, then top it with a matching one. When they’re all filled, dust them with powdered sugar, and enjoy!
What’s the difference between dulce de leche and caramel, you ask? Well, as I understand it, dulce de leche is milk with sugar added, while caramel is sugar with a little milk added. The dulce de leche is thicker than caramel, which is a good thing for these cookies, so they don’t lose their filling!
In the bowl of your mixer, cream butter and granulated sugar until light and fluffy (about 3 minutes), then mix in egg yolks, bourbon, and vanilla. Scrape down the sides of the bowl with a rubber spatula, then gradually add dry ingredients, just until dough is well blended. Pat into a disk, wrap in plastic wrap, and chill for at least an hour, or until it’s hard to the touch.
Preheat oven to 350 degrees.
Sprinkle your rolling surface with flour or powdered sugar, and roll to ¼” thickness. Cut out with 2” heart-shaped (or whatever you’d like!) cookie cutter and place on parchment lined cookie sheet. Leave 1” between cookies.
Bake 12 to 14 minutes, until the cookies are firm on top and beginning to turn golden on bottom. Cool completely on a wire rack. If you’d like, match cookies together by size for your sandwiches.
When cool, spread about a tablespoon of dulce de leche on the bottom cookie, then top with a matching one.
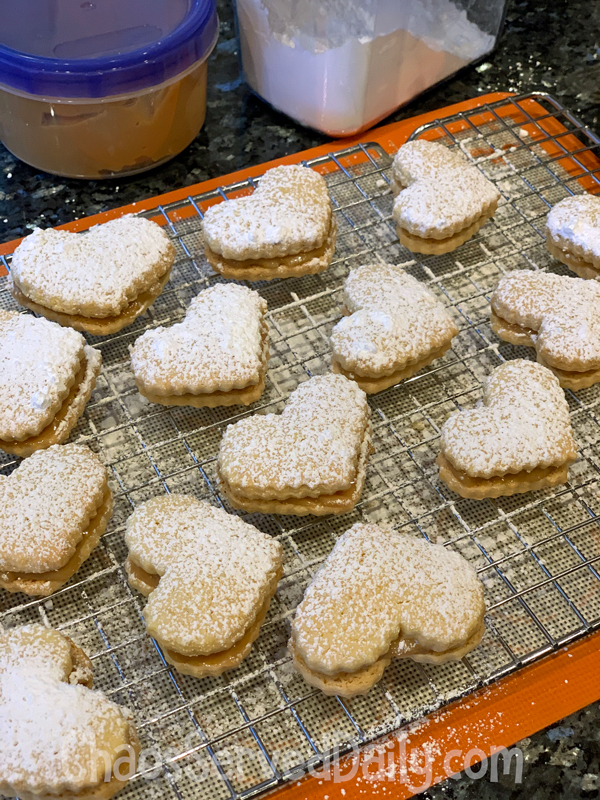
When all cookies are filled, dust heavily with powdered sugar and enjoy!
I know, I’m skating perilously close to being rude by not having sent thank you notes for Christmas yet. But I’m playing the pandemic card yet again, and just getting around to writing (and having the kids write) thank yous.
Because we have so many generous people in our lives, we needed a bunch of notes to send. So I came up with a few different designs, all variations on the same theme…simple stamping with embossing and a few fun embellishments to dress them up a little. I was obviously in a purple mood while designing!
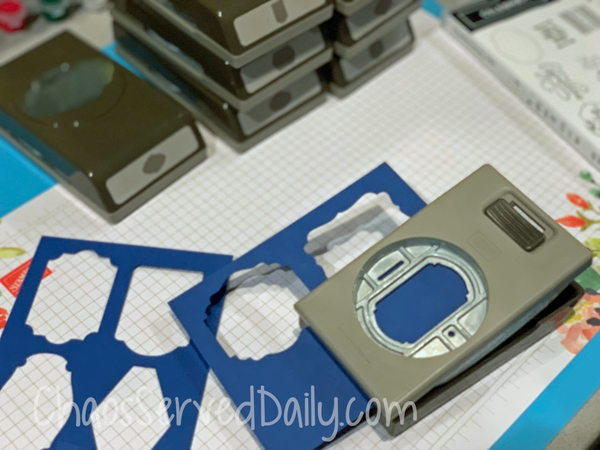
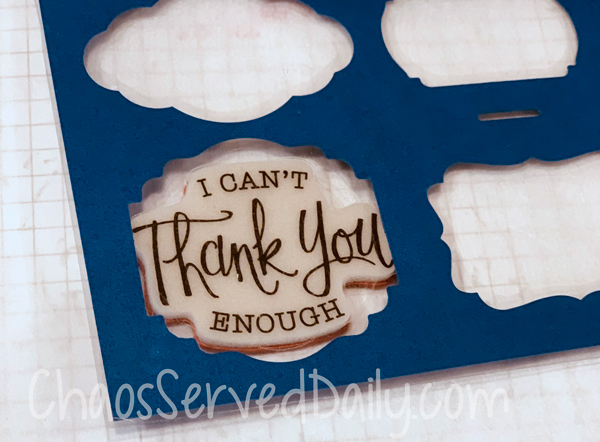
The fun part about these is that there are two things I wanted to show you: a punch template and the impact of embossing.
Making a punch template is certainly not a novel idea, but I thought I’d share it, anyway. I seem to spend way too much time when designing trying to figure out if a certain punch fits a certain stamp. So I decided if I had templates, I wouldn’t have to go through my entire punch drawer every time.
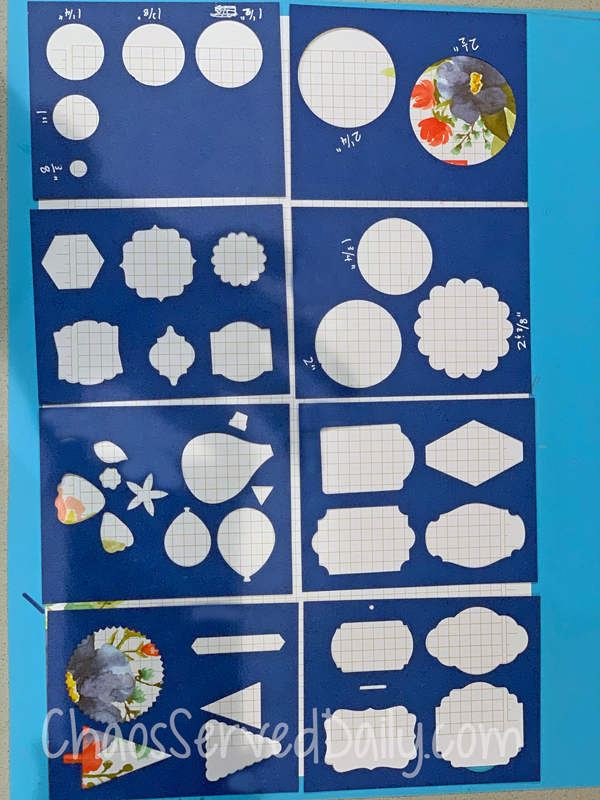
As you might imagine, these are simple to make. I cut cardstock into quarters (4.25″ x 5.5″), and I tried to group my punches so that similar ones are on the same card. After punching them in the cards, I wrote sizes where I thought I needed them (mostly the circle punches). Then I used laminating sheets to laminate them and make them a little sturdier.
I may use a hole punch in the corner of each one and join them with a binder ring, but for now, they just stay in my toolbox on my craft desk, where I can easily access them, as I did for some of these cards.
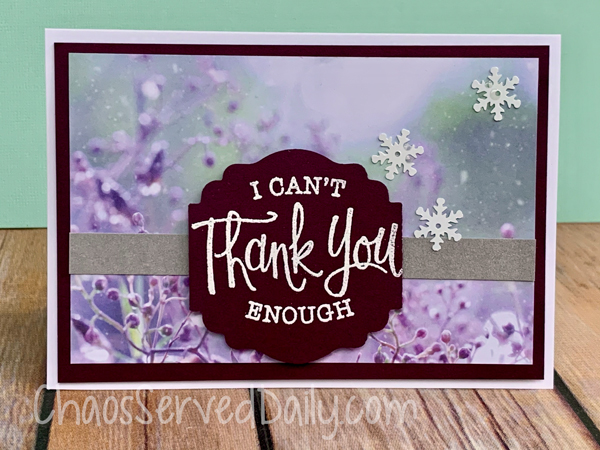
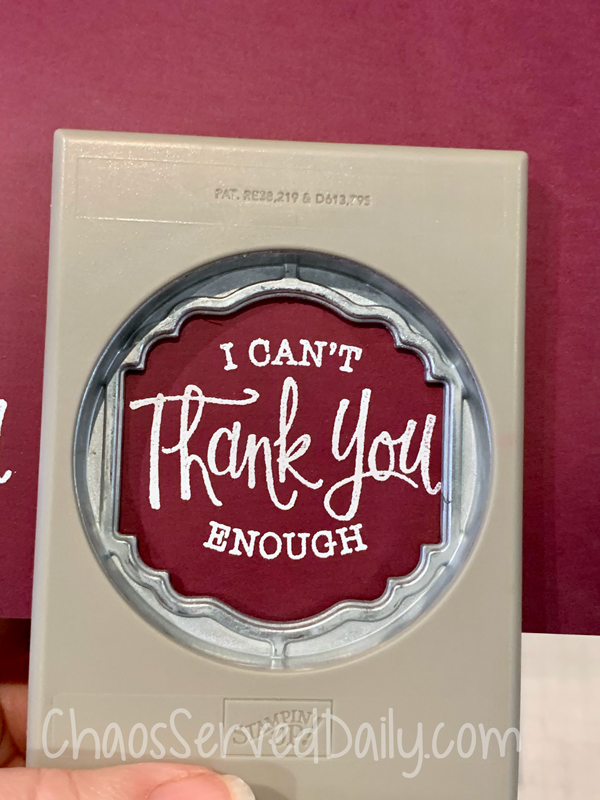
Supplies: From Stampin’ Up!: So Sentimental Stamp Set, Blackberry Bliss Cardstock, Whisper White Notecards, Feels Like Frost DSP, Whisper White Craft Ink, White Emboss Powder, Label Me Lovely Punch. From elsewhere: Snowflake confetti, silver cardstock, adhesive and foam tape
I think Blackberry Bliss may be my favorite all-time color from SU!. It looks a little too dark in this photo, but it’s really a lovely combination. With the templates, I was able to determine which punch worked best without needing to even stamp. That decided, I simply stamped on the Blackberry Bliss cardstock using Whisper White Craft Ink and Whisper White Emboss Powder. I stamped and embossed first, then punched. Some people would punch first, but I’m not that confident I’ll stamp it exactly where I want it.
The notecards (which are such a timesaver, if you haven’t ever used them) are 3.5″ x 5″. The Feels Like Frost DSP is 6×6, so I cut 1 sheet into 2 pieces 3″ x 4.5″, which would leave a 1/4″ border all the way around. I matted those DSP sheets on Blackberry Bliss cut to 3.25″ x 4.75″. Then just a 1/2″ x 4.75″ strip of silver cardstock for a little shine, and I assembled it using foam tape to pop the layers a little. To finish it off, I attached some snowflake confetti pieces. Sequins would have been good, instead, if you don’t have snowflakes.
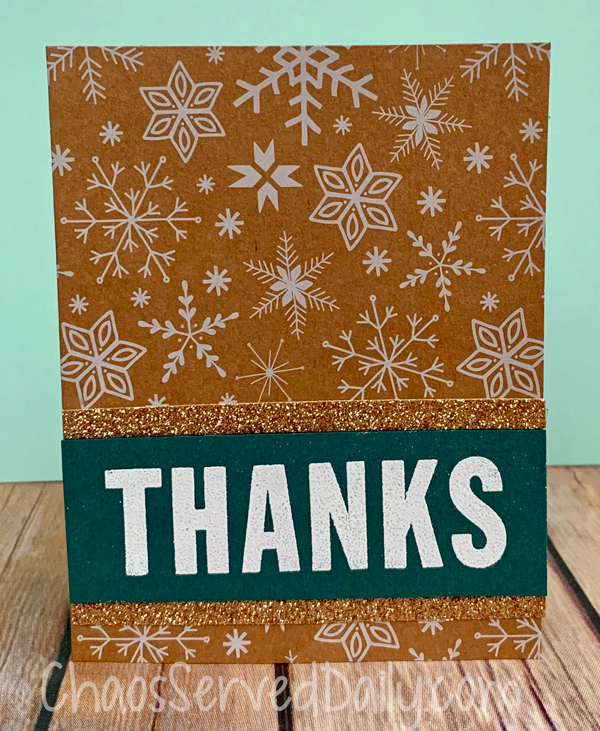
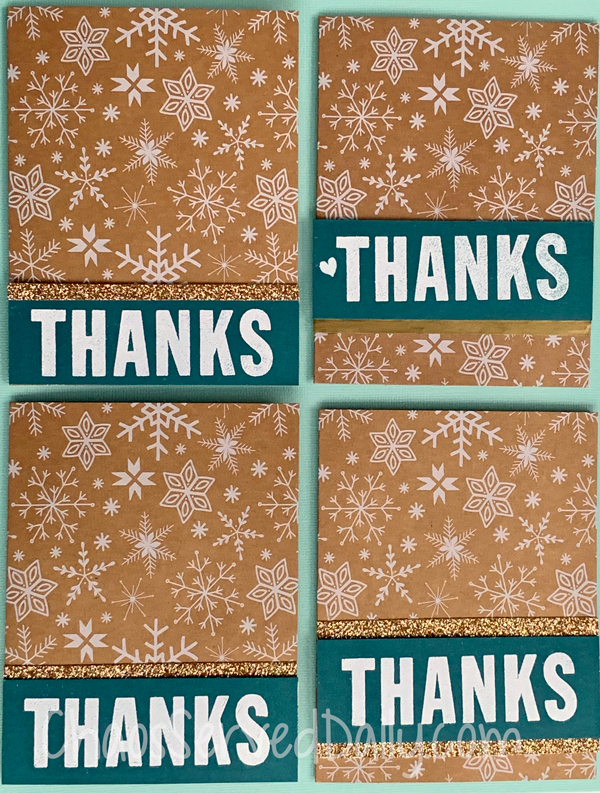
These work fine for me, but I wanted something that didn’t say “I” for the hooligans to send, since they all write in the same card. I had this big THANKS from Simon Says Stamp…I think it’s from the November kit. The stamp set is Big Thanks Autumn, and I checked…it’s still available!
Supplies: Simon Says Stamp Big Thanks Autumn Stamp Set, Stampin Up! Whisper White Craft Ink and White Emboss Powder. From elsewhere: Snowflake notecards, Gold Glitter Cardstock, adhesive and foam tape
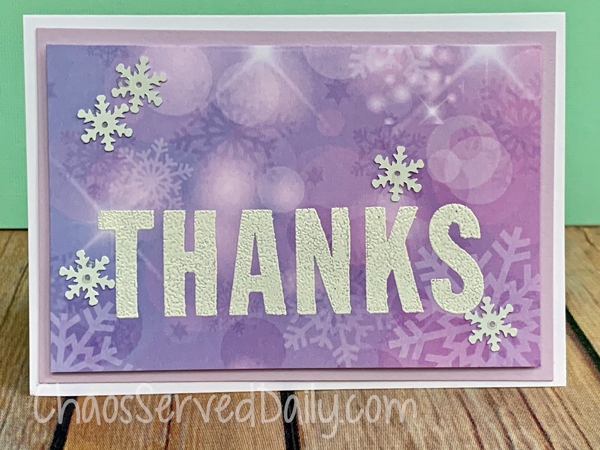
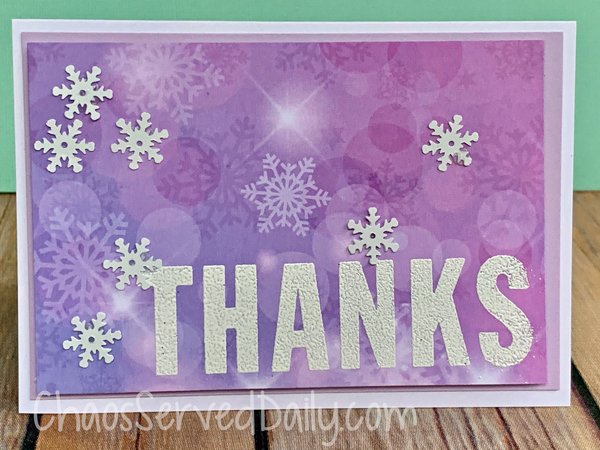
Supplies: Simon Says Stamp Big Thanks Autumn Stamp Set, Whimsy Stamps Blurry Flurries Designer Paper, Stampin Up! Highland Heather and Pretty Peacock Cardstock, Whisper White Notecards, Whisper White Craft Ink, White Emboss Powder. From elsewhere: Snowflake confetti, adhesive and foam tape
For these, the kids helped with the embossing. They love anything with power tools, and I guess the heat gun for embossing counts. If you’ve never embossed, it’s an easy way to make a big impact. I think it’s pretty magical, too, watching the powder melt. Here’s the basics of embossing…I’m sure there are tons of videos to watch on it, if you need more visuals.
Use an Embossing Buddy first! That’s a little cloth bag full of some sort of powder. Run it over your cardstock before stamping to take off any static that might grab onto embossing powder. If you don’t have an embossing buddy, worry not! You can just run a fabric softener sheet over your cardstock, instead.
Use craft ink or Versamark ink, so it’s not quick drying. Stamp your image, making sure it’s a good juicy image.
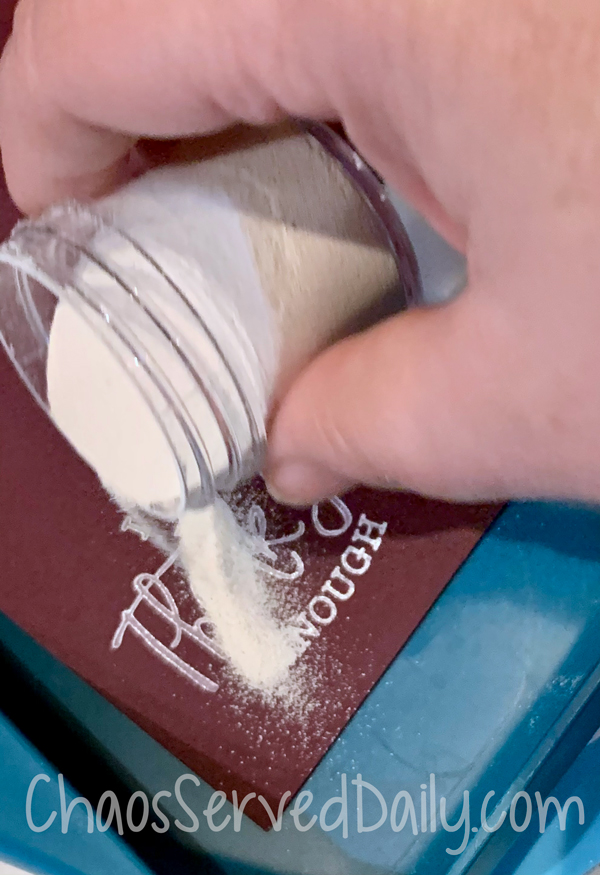
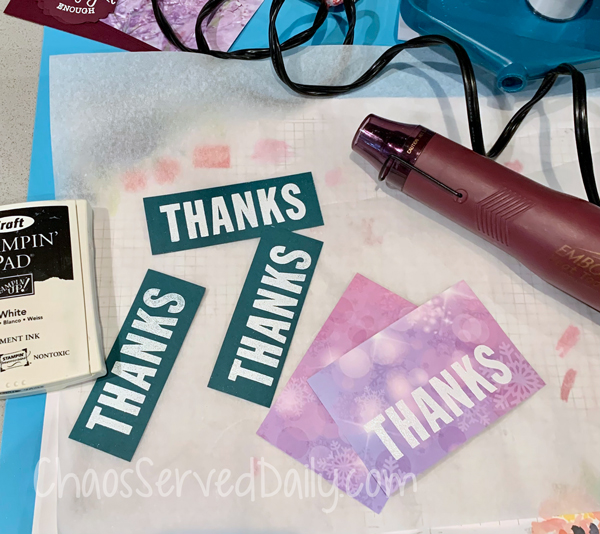
Liberally sprinkle your stamped image with embossing powder…pretty quickly, before the ink dries. Like within a minute or two, so you can stamp several images, in case you mess one up somehow. I speak from experience, sadly. I use a tray with a funnel at one end to sprinkle over, so that I can easily funnel it back into the embossing powder jar. But you can also just use a piece of paper, folded in the middle (hamburger style) and pour it back into the jar using that as a funnel. Take a good look at your image now…if there are little grains of powder not on the image, use a small paintbrush to brush them off. A speck of powder becomes much more noticeable after you heat it.
Now the fun part…heat it with the heat gun until it’s a little shiny and melted. Keep the heat gun moving…it just takes 30 seconds or so. Move the heat gun around to be sure all of the image has embossed. You may want to use a chopstick or tweezers to hold the paper in place as you’re embossing…it gets rather hot!
There you are…embossing like a boss!
After stamping and embossing the various “thanks”, we just layered the purple backgrounds onto Highland Heather cardstock (cut in the same sizes as above). Then we added a few snowflakes, and the cards were done!
For the Snowflake Kraft Cards, I cut pieces of gold glitter cardstock 1/2″ x 4-1/4″ and adhered them just under the edge of the embossed sentiment. I couldn’t decide which placement I liked best, so I made a variety!
We’re fortunate to have so many people to thank, and I’m glad for the opportunity to have a little creative time. I hope your first week of 2021 is going well…I’m just excited that everyone is kinda sorta back where they belong. Maybe the kids will even leave the house for school eventually!
Happy 2021! Now let me ask…are y’all as tired as I am of cooking? Or maybe not cooking itself, but the planning of meals? And the shopping? After being at home, restrictions so takeout is our only option for restaurants, and then the holidays, I have had it! My family pitches in with the cooking, but they don’t seem to get how exhausting all the planning is…and I love planning, organizing, and making lists. Anyway, today I’m sharing a fabulous recipe from one of my friend’s parents (she said I could!), and our weekly menu. Granted, that may or may not shake out to be what we have, but it’s a start!
First, our menu:
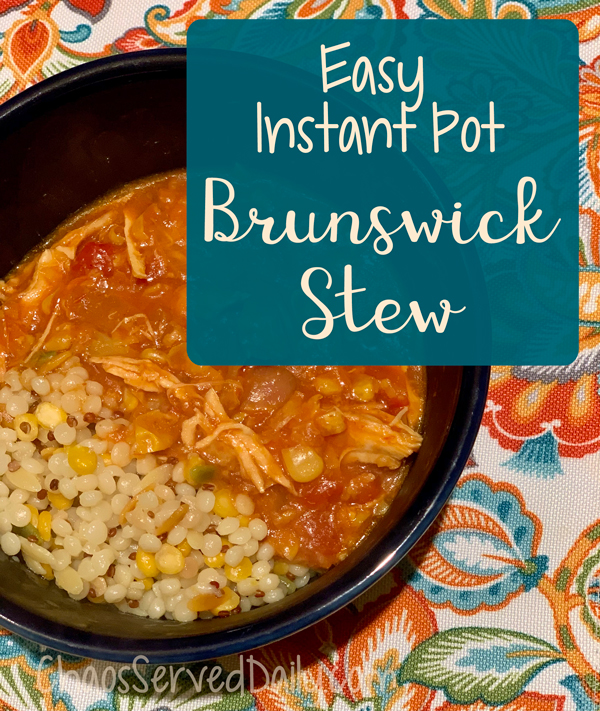
Monday: Brunswick Stew with Harvest Grains and a veggie platter
Tuesday: Pasta with Peas and Bacon along with cheesy garlic bread (pesto and mozzarella on a purchased cauliflower crust and baked). Maybe a salad. Maybe not.
Wednesday: Asian Turkey Lettuce Wraps with Vegetable Fried Rice(Trader Joe’s) and Soy-Sesame Cucumbers (thinly sliced cucumbers with a little soy sauce and toasted sesame seeds)
Thursday: Broccoli Cheese Soup with Baked Potato Bar (everyone tops their own with whatever they find in the frig)
Friday: Dripped Beef Sandwiches with Sweet Potato Fries and Chopped Veggie Salad (romaine and whatever veggies I have…carrots, bell peppers, cucumbers, sugar snap peas, green onions)
So there you go…hopefully some of those will tickle your fancy! They’re all very kid-approved meals, and don’t take long to get on the table (minus the slow cooker time, that is!).
I think I mentioned that one of the changes we’ve made during Covid is that every family member cooks one night each week. So I post the week’s menu on the frig, and everyone signs up on Sunday for the week. My kids are teens, but only the middle one has ever really been interested in cooking (mostly because he eats pretty much nonstop and got tired of waiting on me, I think). I try to come up with menus that I know everyone can make with little or no input from me, because the whole point is to free up some of my time!
Now, on to the recipe for Patty’s Easy Brunswick Stew. I’m sure this is not totally authentic (I’m pretty sure it originally had squirrel or possum or such in it), but Patty’s dad made this when she was a child, so it’s vintage!
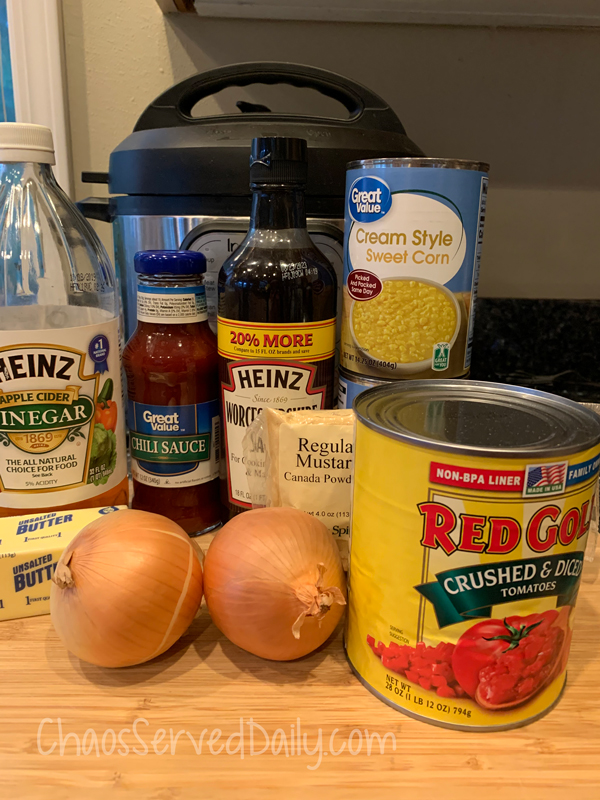
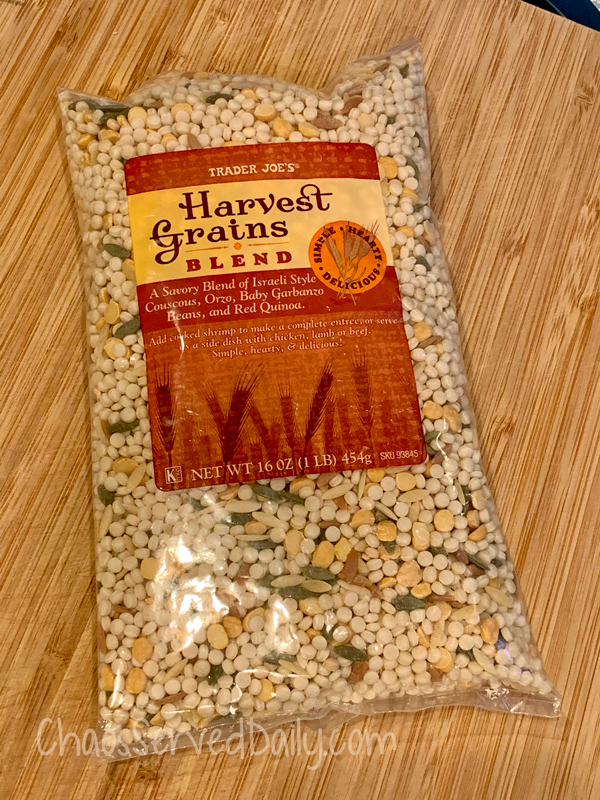
As I said, it’s easy…the recipe she gave me was just a “put it in the crockpot and forget it,” and the Instant Pot version I came up with isn’t much harder. I had to do the Instant Pot version because I never remember to thaw my chicken the day before. The ingredients are all pantry, except the chicken (and BBQ pork, if you’re using that). This first pic is the stew ingredients…the Harvest Grains blend is cooked separately and a base when serving.
1-2 tablespoons olive oil, to coat bottom of instant pot
6 boneless chicken breasts (about 2 lbs), or a mix of chicken and cooked bbq pork
2 (15-ounce) cans cream-style corn
1 (28-ounce) can crushed tomatoes
1 (12-ounce) bottle chili sauce
1 (14 1/2-ounce) can chicken broth
¼ cup Worcestershire sauce
¼ cup butter, cut up
2 tablespoons balsamic vinegar
1 teaspoon liquid smoke (optional)
2 teaspoons dry mustard
2 tablespoons brown sugar
½ teaspoon black pepper
½ teaspoon hot sauce (or more, to taste)
Pour oil into Instant Pot, and turn on Saute. When hot, saute the onions until translucent, about 4 minutes. Turn off pot, and lay chicken (and pork, if using) on top of onions.
Mix all other ingredients in a large bowl, then pour over chicken and onions.. DO NOT STIR or the tomatoes may burn and cause a malfunction. And no one needs that during dinner prep. Yes, I do know this from experience.
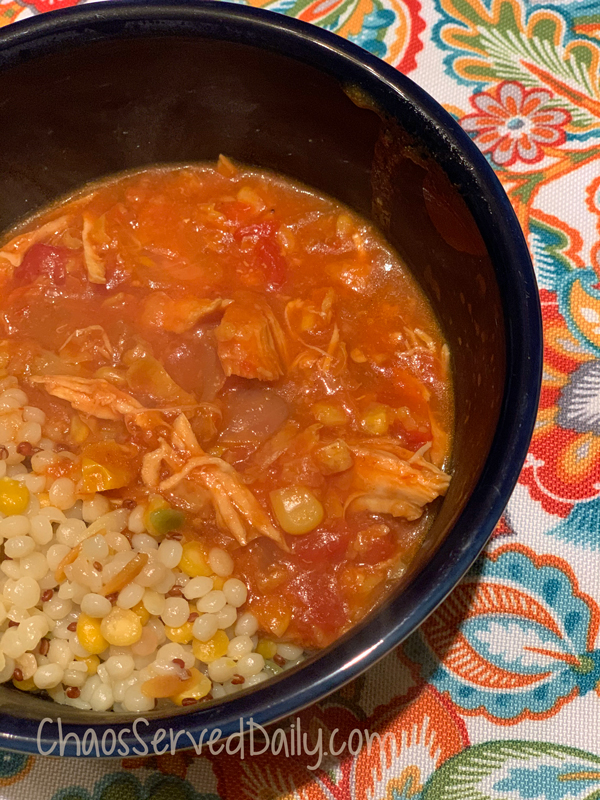
Set pot to High Pressure for 18 minutes. Let sit for 15 minutes, then quick release. Remove chicken breasts and shred.
Our family eats this over couscous or Trader Joe’s Harvest Grains Blend. It’s also good over grits, but I can’t convince my foolish children of that.
Crock Pot directions: Add onions to slow cooker, then layer chicken (and pork, if using). Mix all ingredients in a large bowl and pour over. Stir it if you want…it won’t burn! Cook 3-4 hours on low, or 5-6 hours on high.
Tips:
This makes a lot, but freezes well. I let it cool, then double bag it in ziptop freezer bags and freeze it flat. Thaw in frig overnight, then reheat on stovetop.
Sometimes I make this with just chicken, but if I have some leftover BBQ pork or beef, I add that as part of the meat. Do whatever is easiest for you (and cleans out your frig!).
First off, I hope you had a fabulous, relaxing, and safe Christmas! I haven’t posted in a couple of weeks…I was OBE (overcome by events) as Christmas approached. So despite my intentions to post a cheery Christmas message, that didn’t happen. But I DO have some fun ideas for New Year’s Eve, since it may look a little different for many of us this year. Our days of going out on NYE ended once we had kids, anyway, so it’ll be a usual evening at home for us, and we’ve come up with some fun traditions over the years.
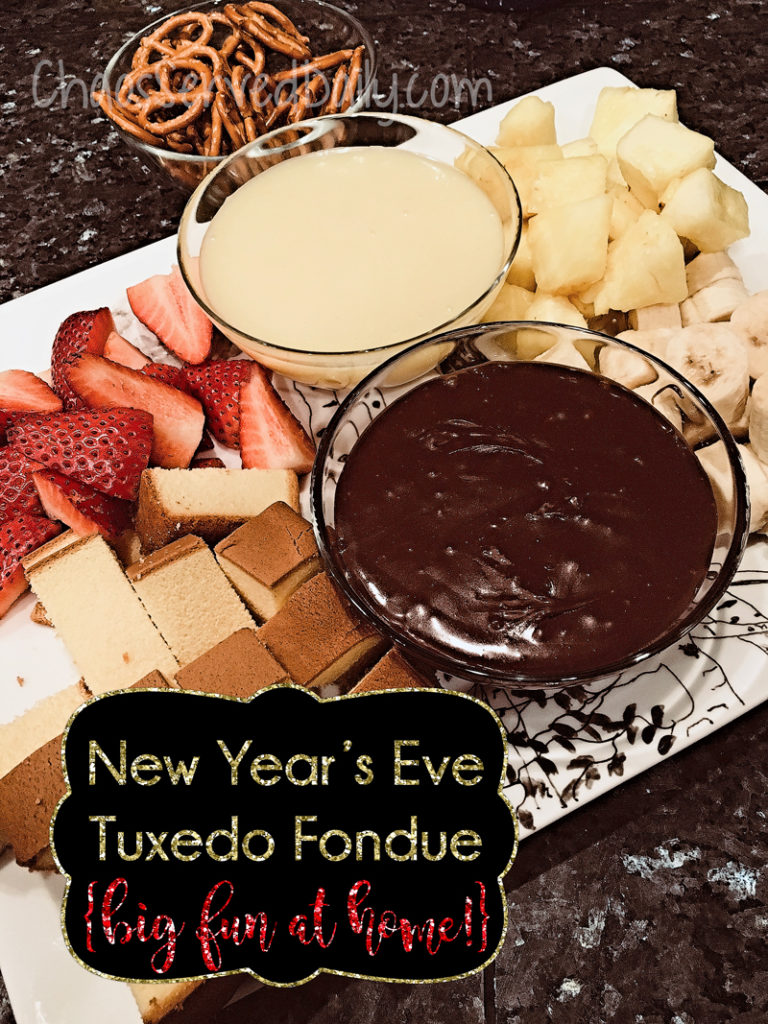
We love having fondue nights, and, to be honest, I often buy a couple of packages of the fondue at the grocery store and just heat those, adding dippers such as veggies and charcuterie. I haven’t had great luck making fondue at home, probably because I get impatient with shredding cheese. But for dessert fondue, it takes just a few minutes to assemble our favorite Tuxedo Fondue (and there’s no cheese shredding involved).
Tuxedo Fondue
(dark chocolate and white chocolate fondues for dipping)
Dark Chocolate Fondue Ingredients:
1 cup dark chocolate chips
2 tablespoons butter
1 can (14 oz) sweetened condensed milk (NOT evaporated milk)
2 tablespoons water
1 teaspoon almond or vanilla extract
Combine chocolate chips, butter, sweetened condensed milk, and water in medium, heavy-bottomed saucepan. Stirring constantly, cook over medium-low heat until smooth and thickened, about 5 minutes. DO NOT BOIL. Remove from heat and add almond or vanilla.
Serve in fondue pot or ceramic bowl. If serving in glass bowl, let cool to barely warm before pouring into bowl to prevent breaking the glass.
White Chocolate Fondue Ingredients:
12-ounce package white chocolate chips
½ cup heavy cream
2 tablespoons butter
Combine heavy cream and butter in medium, heavy-bottomed saucepan over low-medium heat. Bring to a simmer, stirring constantly. Remove from heat and stir in white chocolate chips. Continue stirring until smooth.
Serve in fondue pot or ceramic bowl. If serving in glass bowl, let cool to barely warm before pouring into bowl to prevent breaking the glass.
Serve with fruit (apples, bananas, strawberries, pears, pineapple),potato chips, pretzels, gingersnaps, poundcake…anything else that would be good in fondue!
Pro tip: If you are super talented, or have a helper, pour the two fondues into a bowl at the same time, then swirl at the top and bottom edge to make a yin-yang pattern.
Even though our kids are teens now, they love playing Minute to Win It games, and we always play some board games and watch movies…usually disaster movies, since they’re my secret vice. Yhttps://app.box.com/s/nbj7rb2b40w68tiqkdiwun0n30oaab10ou can find lots of Minute to Win It type games that use basic household supplies (such as red Solo cups…there are a lot of those in these games!) online. One of our favorite lists is here, at SignUpGenius.
Whatever you’re doing NYE, I hope you have a fun-filled evening, doing exactly as you please as we send this year out the door and welcome in 2021!
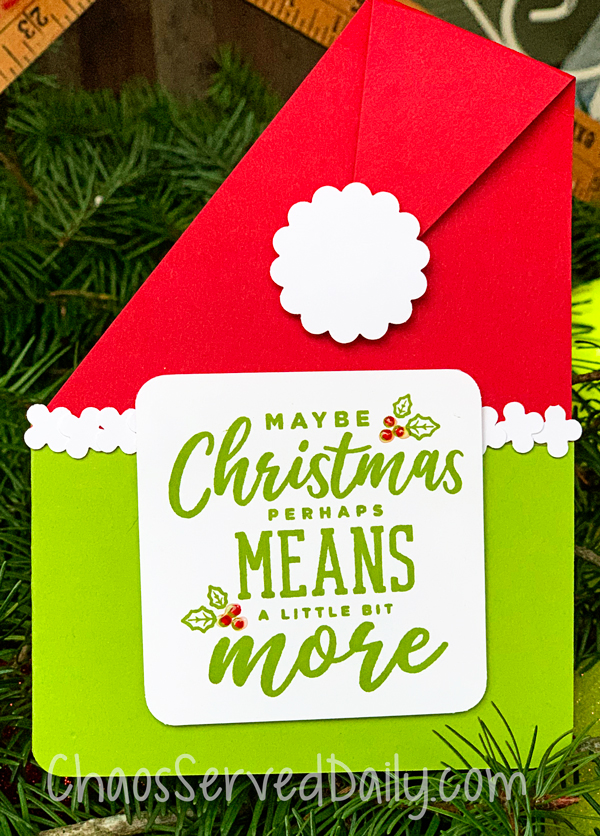
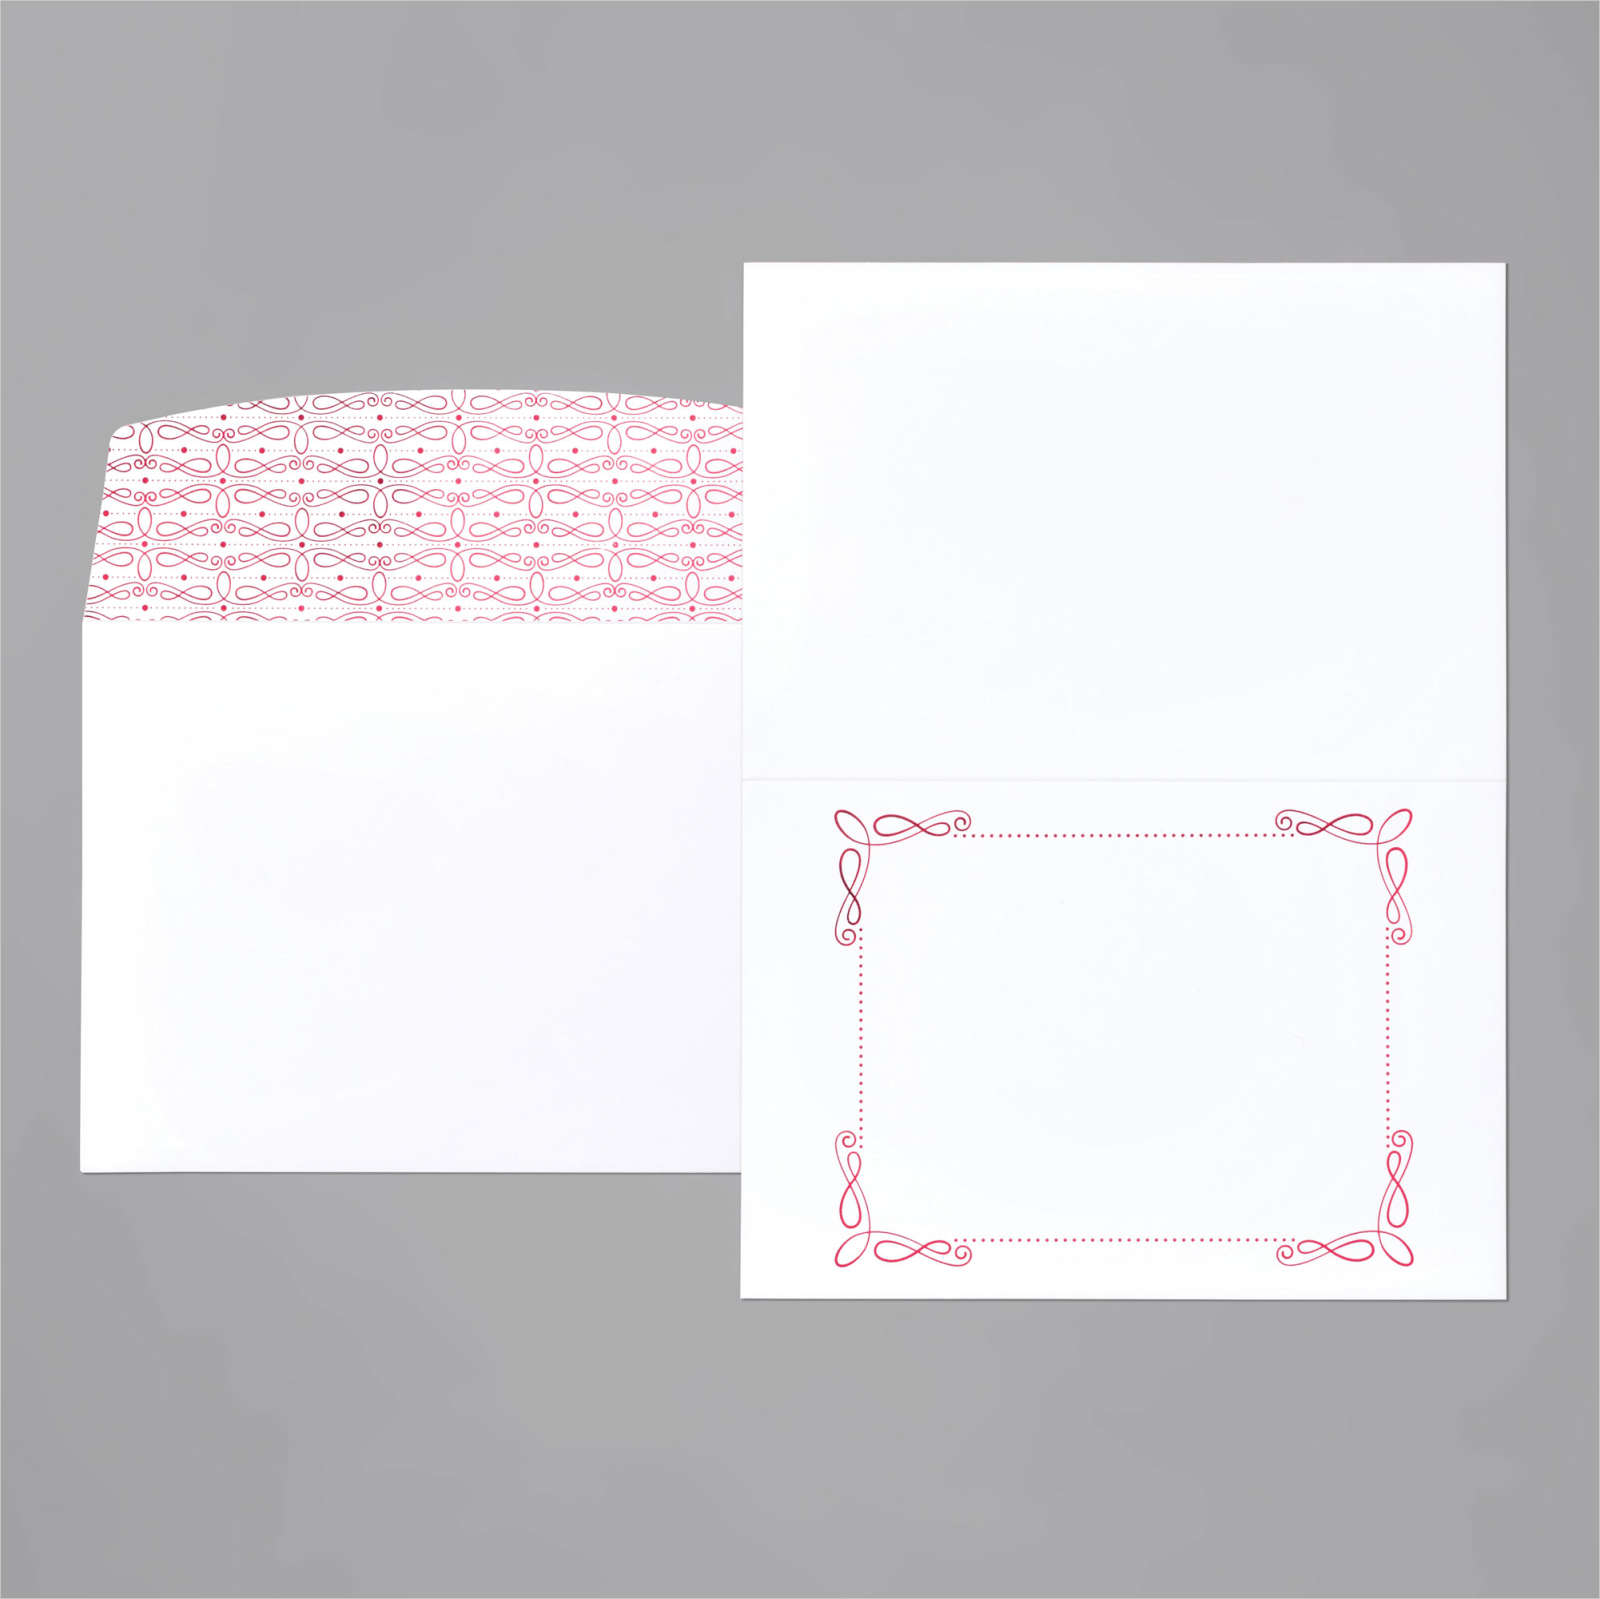
Made using Green Apple, Real Red, & Whisper White Cardstock; Perfectly Plaid DSP, Wonders of the Season Cards and Envelopes, Real Red, Granny Apple Green, and Shaded Spruce Inks; and Christmas Means More stamp set, all from Stampin’ Up!
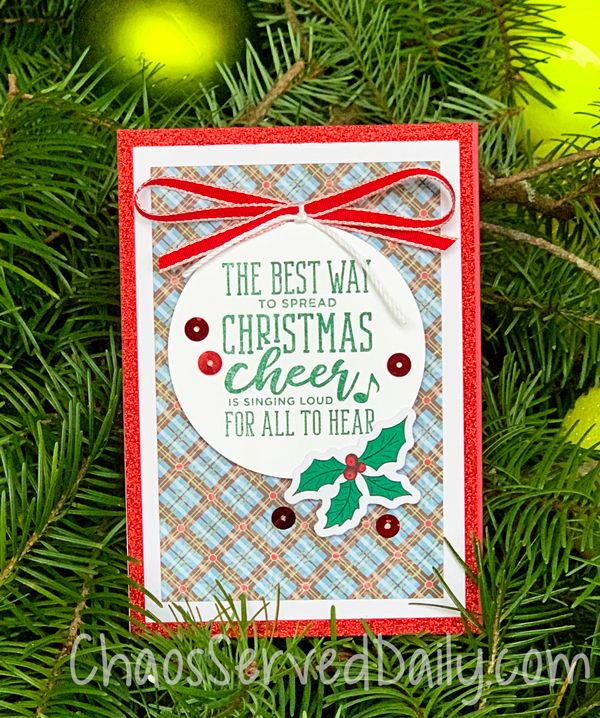
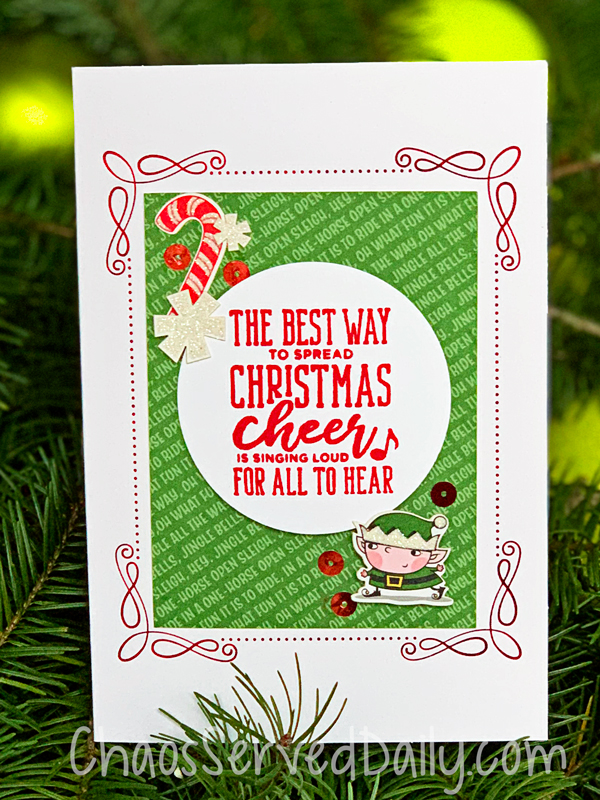
Yes, I finally found a little time to create a few Christmas cards! I know it’s late, but I just love this set of stamps from Stampin’ Up! The quotes are from some of our favorite Christmas movies, and they just make me smile. It’s retiring soon, so I wanted to share it, in case you want to order it before the end of the year…after all, these movies are classics, so the stamp set will still be perfect for next year. And who knows, if you order now, you may still get it before this Christmas.
Personally, I think that given the “ahem” challenges of 2020, we can all send Christmas cards whenever we want…even the Wise Men didn’t arrive until Epiphany, so we’re doing fine. Anyway, I used these really pretty cards and envelopes, and they are on sale right now! There’s all sorts of stampin’ goodness on sale, so hurry over and check it out, if you’re a crafter!
I also used embellishments and cardstock from a scrapbooking set from last year. If you haven’t ever used those for cardmaking, they are amazing timesavers. You know the ones I mean…they’re already cut into sizes for scrapbooking, they all coordinate, some have perfect sentiments on them, and they usually come up a few sheets of self-adhesive diecuts (that’s a fancy way to say stickers). You can find them at Stampin’ Up! (on sale!), but also at any craft store.
It felt great to spend a little time being creative…maybe I’ll get another chance sometime over the Christmas break! I hope you’re finding time to do something you love today!
As I may have mentioned just a few times before, I do not like to make cookies. One of the best things about having older kids who like to be in the kitchen is that they have assumed most cookie baking responsibilities. That leaves me free to make what I really enjoy…candy! Maybe it’s the chemistry involved, with the candy thermometer and timing and sugar reacting. Or maybe I just have a sweet tooth.
Whatever the reason, Christmas just seems to be the time I make a lot of candy. This year, I’m putting packages in the mail earlier than usual, and it’s been raining and humid lately (go figure, PNW in fall!), so I couldn’t make any brittles or divinity. Those don’t work well in humid weather.
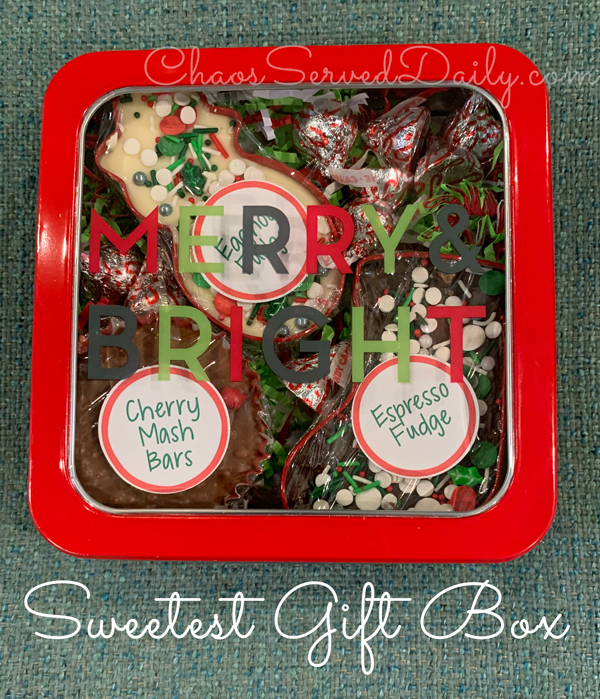
I ended up deciding on three different types of fudge…espresso, eggnog, and cherry mash. I planned to use the standard Fantasy Fudge recipe from the back of the marshmallow creme jar, but I discovered that someone used all of my semisweet chocolate chips making edible cookie dough. Apparently frequently. On impulse, I had grabbed 2 bags of espresso chocolate chips the last time I was at the commissary, so I decided to use a bag of those. Y’all…it’s delicious. Not too heavy on the coffee taste, but not as cloyingly sweet as regular fudge can be. I’ve included that recipe down below.
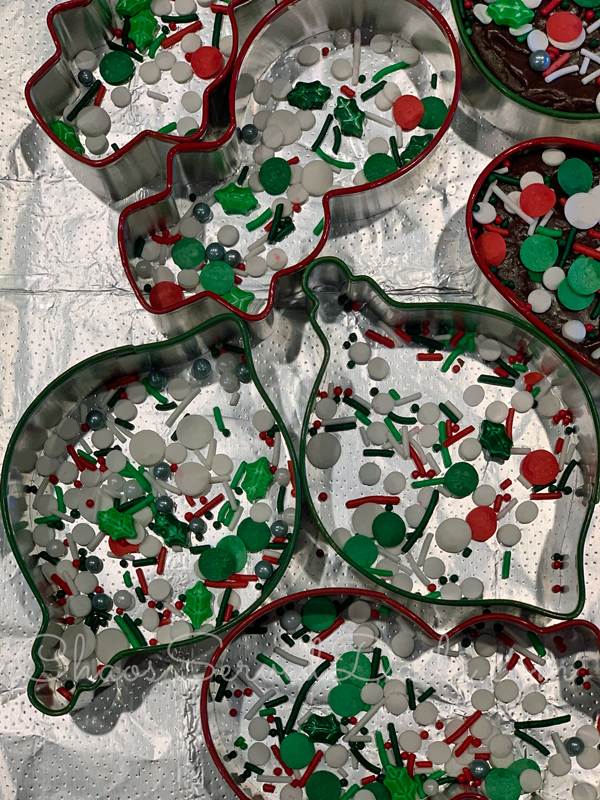
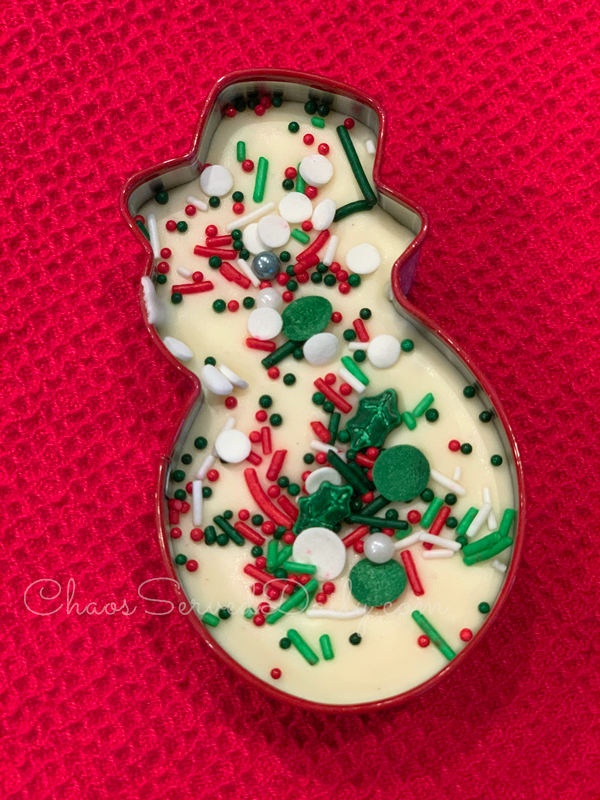
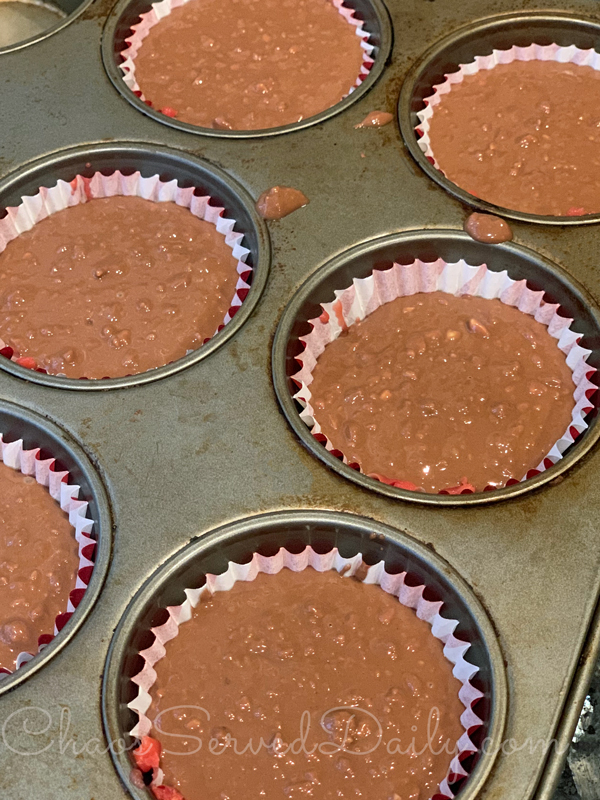
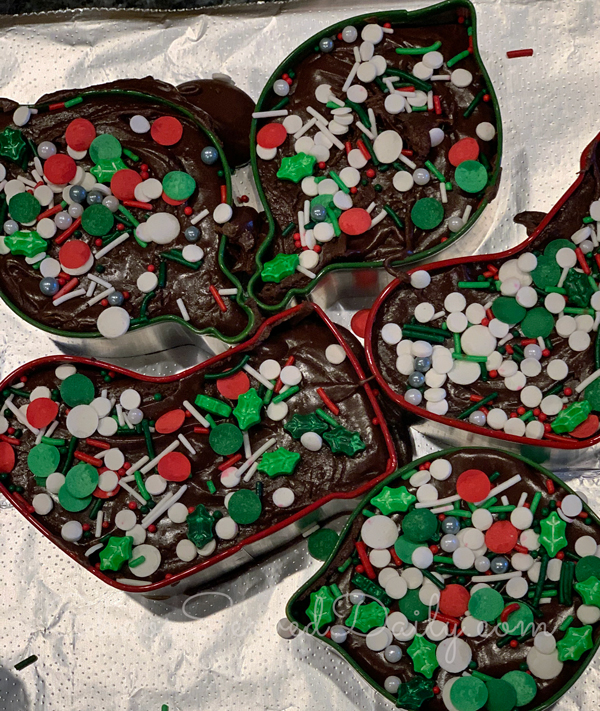
We’re sending packages and later, delivering gifts, to several friends and family that are one- or two-person households, so I was looking for a fun way to package these treats. Then I remembered that a couple of years ago, we poured the hot fudge into metal cookie cutters, sprinkled on Christmas sprinkles, and gave those individually with coffee gift cards to teachers. A perfect solution!
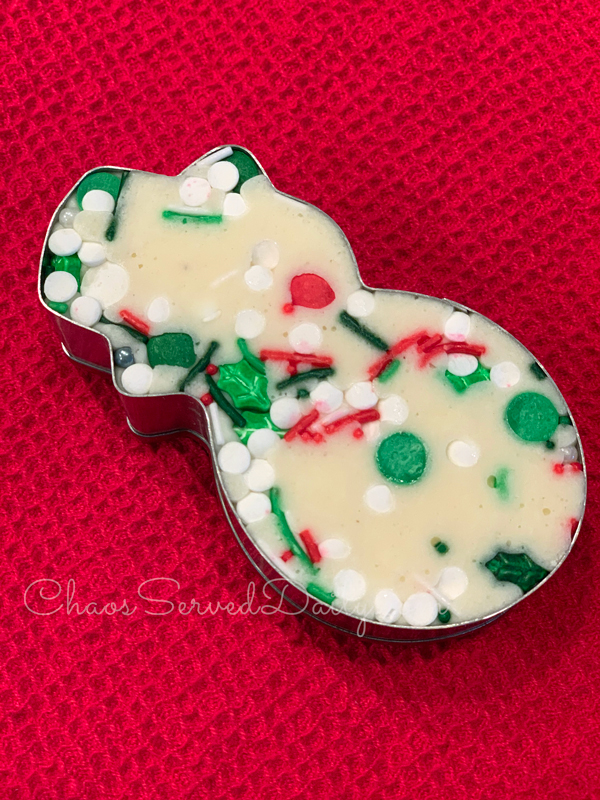
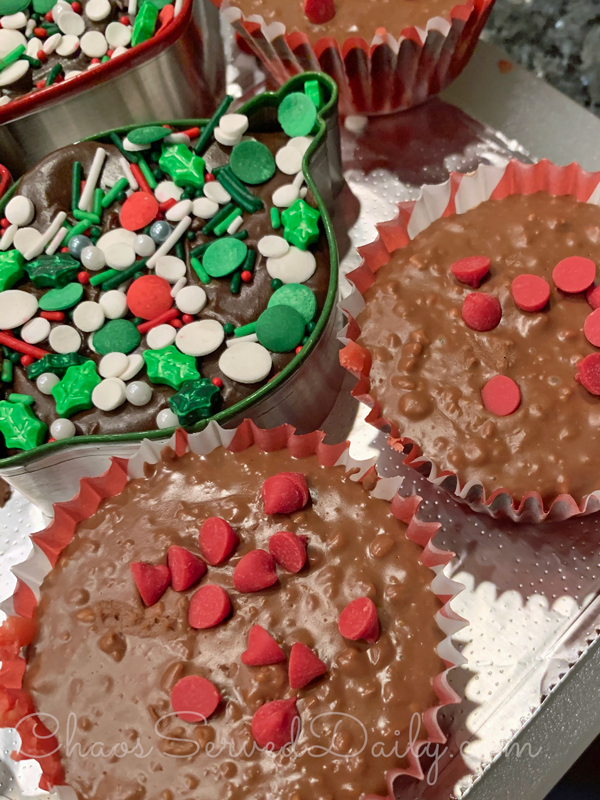
I washed and dried the metal cookie cutters and placed them on a foil sheet on a cutting board. I put a pretty heavy layer of sprinkles in the bottom of the cookie cutter, then made my fudge. As soon as it was smooth, I used a small ladle to fill the cookie cutters…it doesn’t take a lot! Then, while it was still hot, we added lots more sprinkles on top.
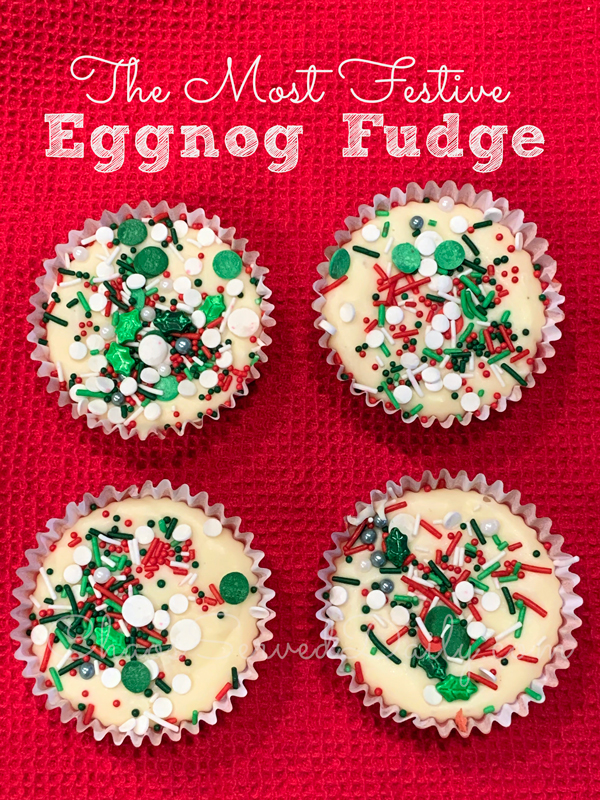
For the Eggnog Fudge, I used this recipe from Shugary Sweets...so easy and delicious! It’s made the same way as the Espresso Fudge, but with less sugar since it has actual eggnog in it. The recipe says to pour the hot mixture over the other ingredients in a bowl and use a mixer, but I didn’t. I just melted the white chocolate chips, rum extract, and nutmeg in after turning off the heat, then added the marshmallow creme until it was smooth. I didn’t want another bowl to wash.
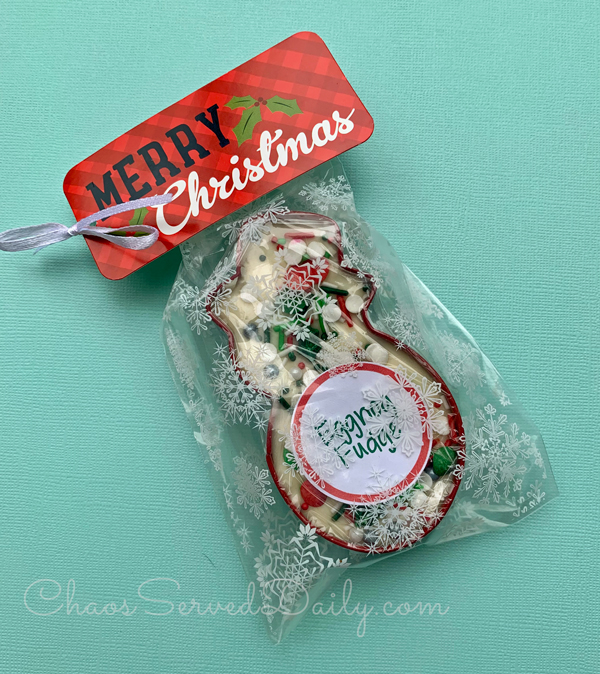
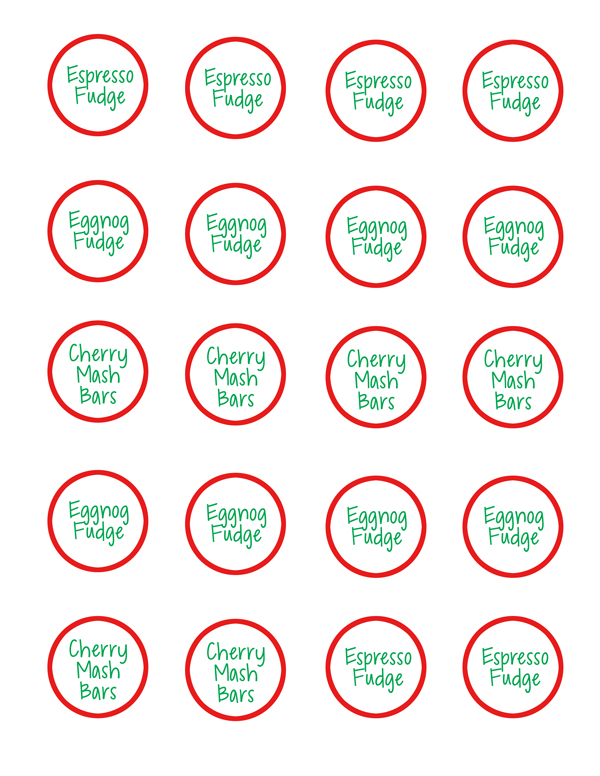
When they were completely cooled, I wrapped each fudge-filled cookie cutter in clear plastic wrap and labeled them. Then they went in tins or seasonal ziptop bags to keep them fresh while shipping. They’re also cute in individual bags, with or without a coffee card attached.
I made some Eggnog Fudge gifts in cupcake papers, too, as I ran out of cookie cutters and still had a LOT of eggnog fudge to put somewhere.
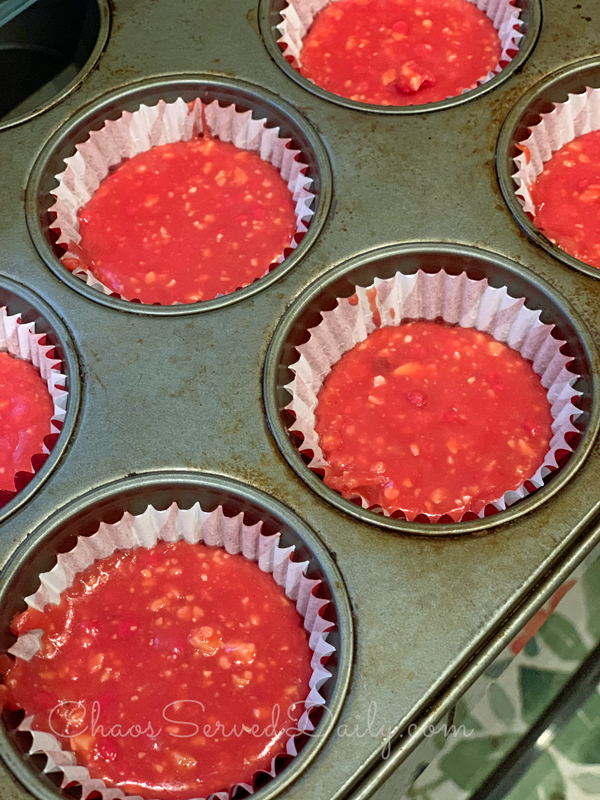
The Cherry Mash recipe comes from the back of the cherry chip package. Those cherry chips are the hardest thing to find around here. I found some on Amazon, but had to pay well over market price! But it is my mom’s favorite candy…and the hooligans and hubs like it immensely, too. So it’s worth it!
With the chopped peanuts in the Cherry Mash bars, I wasn’t sure how well they would work in cookie cutters. Instead, I put cupcake papers in a standard muffin tin, and filled each a little less than halfway with the cherry mixture while it was hot. I added the same thickness of the chocolate-peanut butter layer when it was smooth and melted. After the chocolate layer cooled for about half an hour, I sprinkled on a few cherry chips, just to be fancy.
After those were completely cooled, I wrapped them in plastic wrap and labeled them individually, as well.
2/3 cup evaporated milk (not sweetened condensed milk)
10 oz package of espresso chocolate chips
7 oz jar of marshmallow crème
1 tsp vanilla extract
Directions:
Butter a 9×13-inch pan, or line it with foil.
Mix sugar, butter, and evaporated milk in a large, heavy saucepan over medium heat, stirring with a wooden spoon to dissolve sugar. Bring mixture to a full boil for 5 minutes, stirring constantly.
Remove from heat and stir in chocolate chips until melted and thoroughly combined. Beat in marshmallow crème and vanilla extract. Transfer fudge to the prepared pan and let cool before cutting into 1” squares.
Yields 117 squares.
Just in case you’d like to print out labels like these. I uploaded a printable! They’re sized for a 1-1/2″ circle punch. Grab that printable here, or by clicking on the image below.
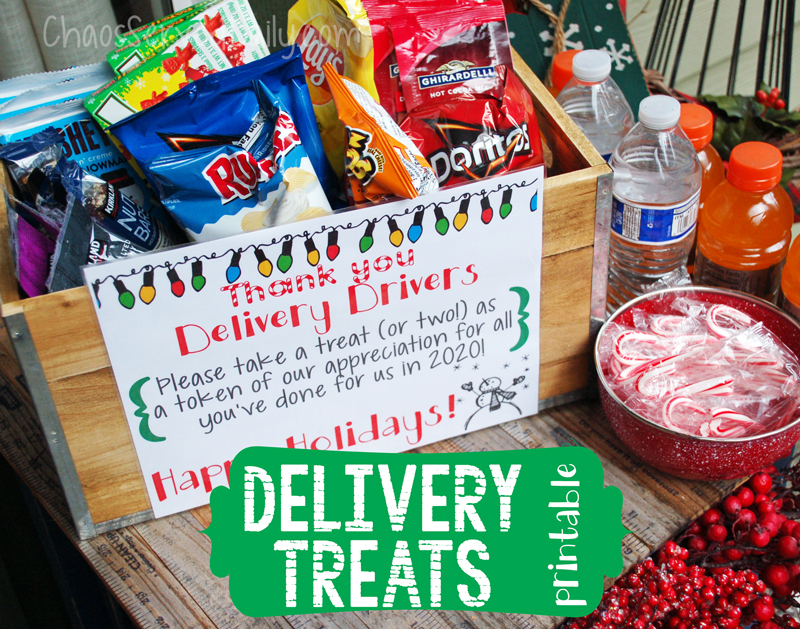
This is a far from original idea, but in this year of home deliveries, we wanted to do something to thank all of the delivery drivers who have often been our only link to the world (or at least that’s how it seemed!). We put out a cooler of cold drinks and crate of snacks last summer, for the same reason, but I wanted to create a new sign for Christmas.
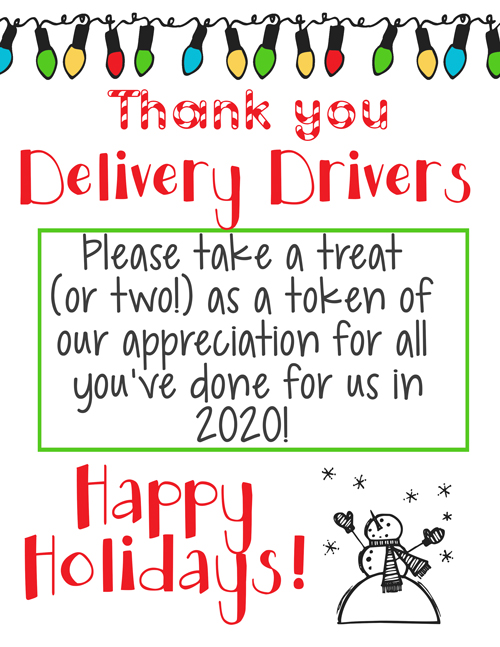
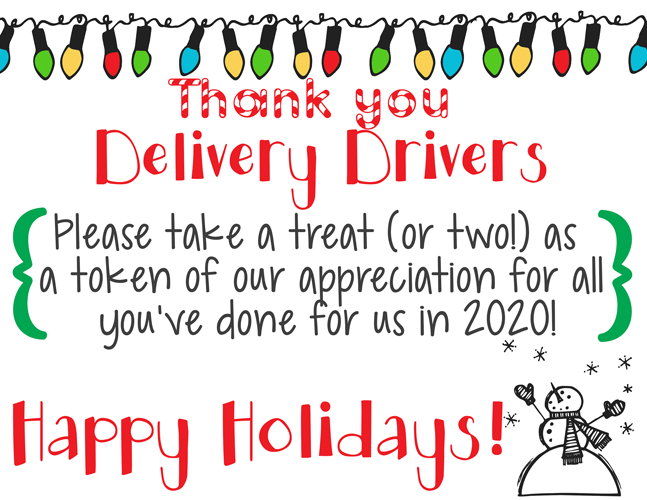
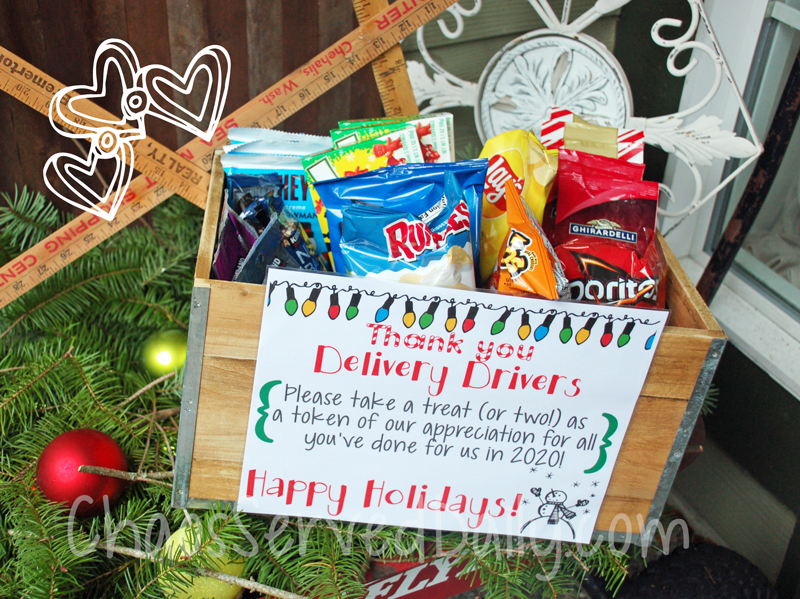
I made two versions, portrait and landscape, so you can click on the image of the one you’d like. We filled our crate with chocolates, sour gummies, nuts, chips, and granola bars, with drinks and candy canes next to it (because it wouldn’t all fit). The crate was too deep, so we just filled the bottom with crumpled packing paper to lift everything up.
It seems odd not to put out individual gift bags for our UPS, FedEx, and postal carrier…but we’ve had so many deliveries, with Amazon and food deliveries thrown in, too, this year, that I have no idea how many different people are actually delivering happiness to our house! This is a VERY small token of how much we appreciate them, so if one of your loved ones is a delivery person of any kind, give them an extra hug from us!
Thanks for stopping by my blog! The hats I wear include wife (to a retired Army field artilleryman), mom to three super busy teens, and high school math teacher. In my “free time” I love cooking, reading, creating (mostly papercrafts), photography, travelling, and exploring the PNW with my family…you know, all the usual things!
I hope you’ll find some inspiration, entertainment, and something that makes you smile here. I look forward to hearing from you!