Fan Favorite Sausage and Tortellini Soup

This Sausage and Tortellini Soup is one of my most visited, commented on, and downloaded recipes…so I thought I’d repost it. This hearty and delicious soup will leave body and soul contented, y’all, and it’s come to the rescue many a time when I just couldn’t make a plan for dinner ahead of time and hordes of hooligans were about to descend from the school bus. I almost always have the ingredients on hand, so this makes regular appearances on our cold-weather menus. As well as being a quick weeknight meal, it’s a cozy Sunday night, football-watching favorite supper!

0712-Tortellini-Soup

Sausage and Tortellini Soup

  • 2 onions, finely chopped
  • 1 lb bulk (not link) Italian sausage
  • 8 cups beef broth
  • 1 Tbsp basil
  • 2 Tbsp dried parsley
  • 1 clove garlic, minced
  • ½ tsp black pepper
  • 1-9 oz package cheese tortellini
  • 2 cups fresh baby spinach leaves
  • Grated Parmesan for garnish

1. In Dutch oven or stockpot, brown sausage and remove from pan with slotted spoon. Add onions to pan and saute until softened, about 5 minutes. Add cooked sausage, beef broth, basil, parsley, garlic, and pepper and bring to a boil. Reduce heat and simmer ten minutes.

2. Add tortellini and spinach to pot and simmer until tortellini is cooked though (it will float when it’s done), about 5 minutes.

3. Serve with Parmesan sprinkled on top.

Click here for a printable version

And here’s what we ate this week:

For the Beef and Bean Burritos, a kid just browned ground beef and a diced onion, then added a can of drained and rinsed black beans, and stirred in about a cup of mild salsa. We warmed tortillas and filled them with the beef mixture, shredded lettuce, and cheese. It was a delicious, spur-of-the-moment meal at the end of a busy day.

I love our new program of each kid cooking dinner once a week! Other kid-made meals from this menu were Pumpkin, Black Bean, and Turkey Chili and the Easy-Peasy Skillet Lasagna. I highly recommend getting your kids involved in meal-prep early, and teaching them to make a whole meal.

But that’s another soapbox for another post!

Posted in recipes | Tagged , , , | Leave a comment

A Fun Christmas Snack Duo

I optimistically make healthy menu plans for the week, especially now that activities are cancelled and we’re home every night. But by the weekend, we often have a big lunch, either takeout or leftovers, and then no one really wants a real dinner. So we have a lot of snack dinners and movie nights then. Usually one of us makes a charcuterie tray, some fruit, chips and salsa, you know the drill. But during the Christmas season, I sometimes like to relive the days when we entertained and made fun foods. The hooligans are gratifyingly impressed when I do. Really!

This Veggie Ranch Christmas Tree is a fun twist on the traditional veggie ranch pizza. I think it’s a 20- or 25-year-old recipe from Pampered Chef. It seems as though I first made this tree version at Ft. Drum, in the late 90s. Man, I’m old! Anyway, it’s quick to put together from easy ingredients. I didn’t even make a recipe for it, it’s so easily personalized. Here’s how:

Veggie Ranch Christmas Tree

Ingredients:

  • 1 can of crescent rolls
  • 8 oz block of cream cheese
  • 1 packet of ranch dressing mix
  • Assorted fresh veggies (I use bell peppers, carrots, and broccoli here)

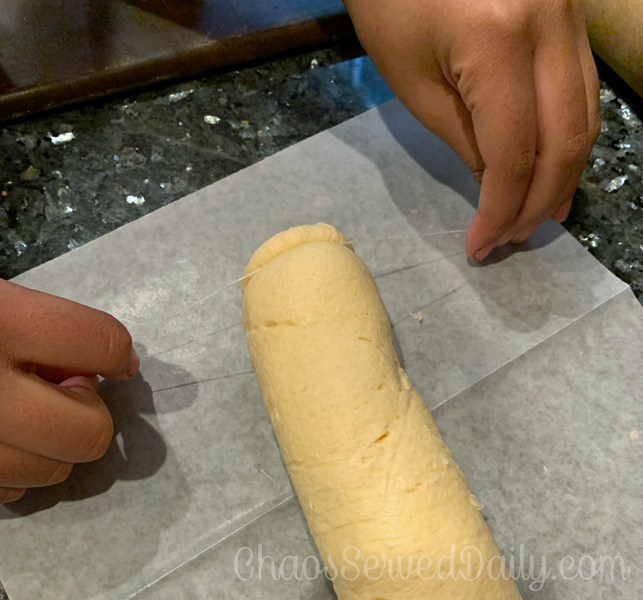
To make the crust: Preheat the oven to 375. Take the rolls out of the package, keeping them rolled. Slice crosswise into very thin (about 1/4″) spirals. You can use dental floss, wrapped around and pulled tight, as my assistant did in the first photo. You can also use a thin, sharp knife, taking care not to crush the circles.

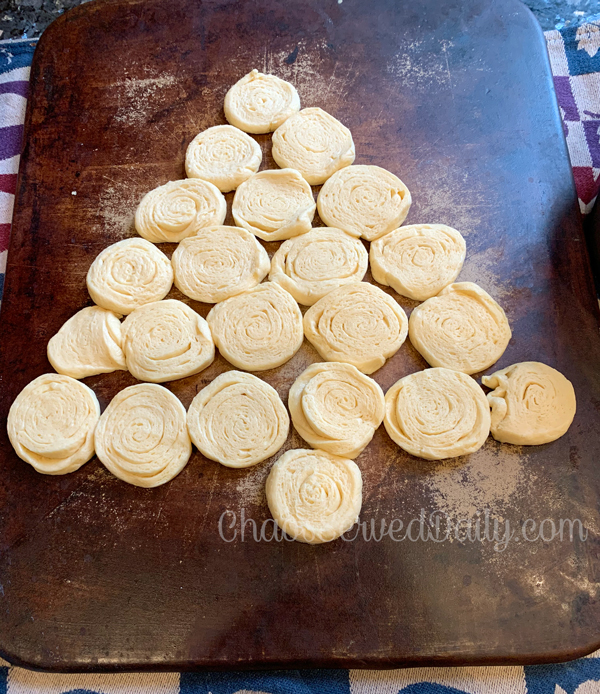
Place the spiral slices on a baking sheet or stone, in the shape of a Christmas tree.

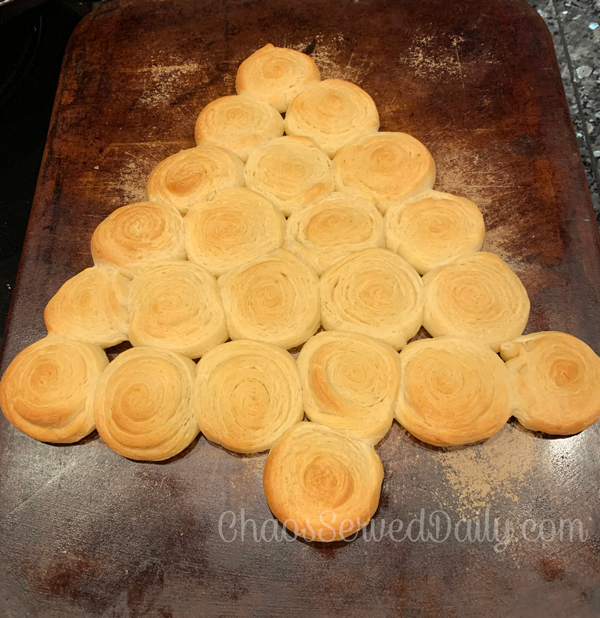
Bake 9-12 minutes, until golden. Remove from oven and let cool almost completely.

For the filling: In the meantime, soften 8 oz cream cheese (not whipped, just a block) and stir in the ranch dressing mix. Spread that evenly over the cooled crust.

Use sliced and diced veggies to decorate like a Christmas tree, and cut out a star using a small cookie cutter and yellow bell pepper. This is best eaten the day made, as the rolls tend to get tough in the frig overnight.

There you are…be appreciated for your artistry!

Another snack we really enjoy is Merry Munch Snack Mix, or pretty much any sweet and salty mix.

Merry Munch

You can also check out this post from 2014, with several other seasonal snacks. As for me, I’m off to pick up more ingredients, now that I’ve been reminded of all of those other treats!

Posted in Christmas, recipes | Tagged , , | Leave a comment

Soul-Warming Russian Tea Redux

Click here or on the photo for the printable recipe

I’m always on the lookout for fun neighbor gifts, or a little something to add to a gift for friends. This delicious Russian Tea totally fits for either of those, and it’s a great treat for yourself, as well. I made a Costco run yesterday, and I was freezing by the time I left the warehouse. As soon as I was home with everything unloaded (not put away, but there’s time for that later!), I made myself a steaming cup of comfort. Bonus…my hands were toasty, too, from holding the mug as my core warmed up! I love a multitasking drink.

Russian Tea Mix (recipe link)

Ingredients:

  • 2 cups white, granulated sugar
  • 2 cups orange-flavored breakfast drink (such as Tang)
  • 2/3 cup presweetened lemonade mix
  • ½ cup instant tea (unsweetened, plain or with lemon)
  • 1 Tbsp ground cinnamon
  • 1 Tbsp ground cloves

Directions:

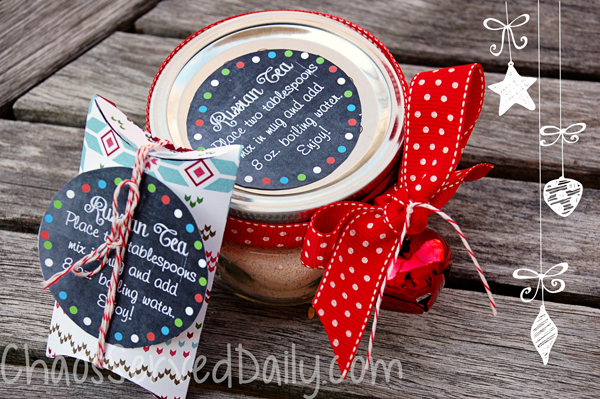
Combine all ingredients in a large bowl.  Package in cute containers, or store in an airtight container in your pantry.

Makes 4-1/2 cups

Directions to include with the mix:

To serve, place 2 heaping tablespoons mix in a mug. Add 8 oz boiling water and stir well.

I also created some super cute labels you can download here to print and include. For small gifts, I use small ziptop bags and put in about 1/4 cup…that’s 2 servings. They fit well in pillow boxes, so you can tuck them into a gift basket or use as party favors (when we have parties again). For larger gifts, such as for neighbors, I like to use glass jars, anywhere from 1 cup to 2 cup volume, depending on the size of the family.

These labels are sized to punch out with a 2-1/2″ circle punch, and download 12 to a sheet.

This drink just smells like the holidays to me. It was one of my grandmother’s favorites, and the smell whisks me right back to her house at Christmas. I hope it will become a favorite of yours, too!

Russian Tea post first created on 11/21/12, and updated on 12/3/20.

Posted in Christmas, crafts, gifts, Printables, recipes | Tagged , , , | 3 Comments

Secret Code Ornaments

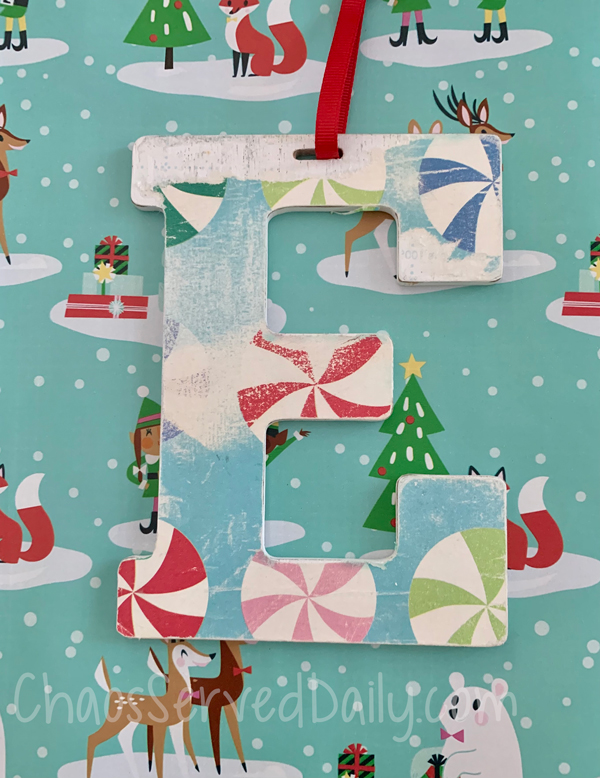
Last year’s ornaments

When the hooligans were young, I began wrapping all of the gifts for each of them in the same paper, because, really, it’s ridiculous to put a gift tag on every gift for little ones. Back then, it was pretty easy to tell whose was whose. Princess Thundercloud was always pink, the eldest was red, and the middle kid was green or blue. That worked great for several years, but now that they’re teens, they think it’s fun to try to guess which paper belongs to them. So it’s more of a challenge. Sometimes I use their favorite color, but sometimes it’s completely random, just to throw them off track.

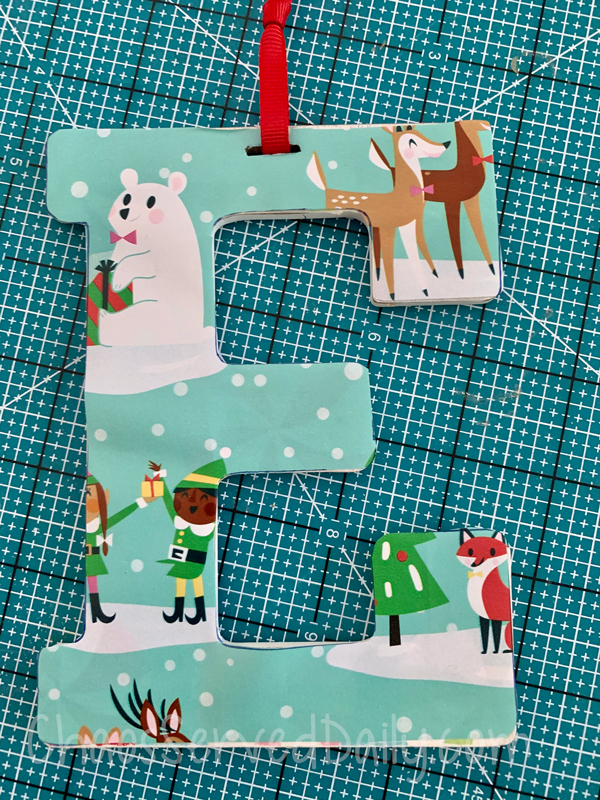
To prolong the suspense, I have a little craft that’s quick and easy to make! I bought inexpensive wood ornaments (I think from the dollar spot at Target), and I cover the ornament with their paper for the year. Then I slip that into their stocking, which is the first thing we open on Christmas morning, while waiting for everyone to get up and moving. Teens, you know. I do it for the hubs, as well. Although his paper is generally black or white background, and he uses the opposite for me. So not as much suspense for us!

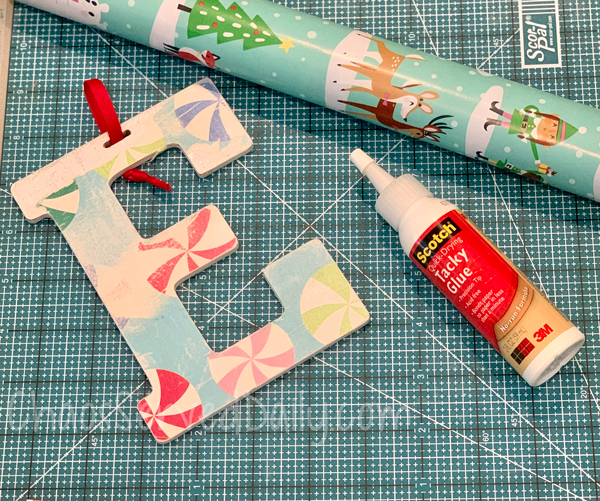
To make these for your own hooligans, the supplies are simple. An initial ornament, some wrapping paper, tacky glue, scissors, a Sharpie, and an Exacto knife. This is Esme’s ornament from last year…as you can see, 2020 has been pretty rough on it, too.

  • Place the ornament on the wrapping paper, both facing up. I kind of move it around and try to get the most of the pattern I can on it.
  • Outline it with a fine tip Sharpie, then cut it out. This is the hardest part of this craft for me!
  • If there’s a ribbon on the ornament, untie it or cut it, if you’re planning to use new ribbon.
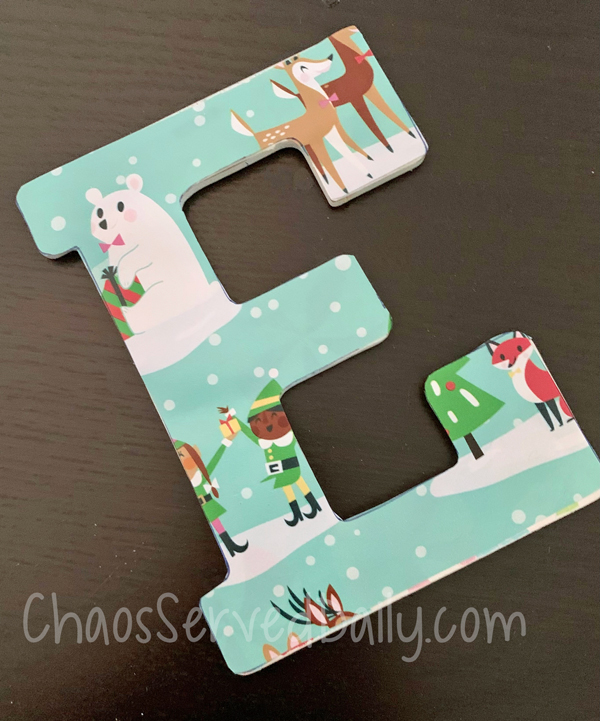
  • Spread a very thin layer of craft glue on the ornament (not on the paper…it’s too thin), then carefully place your cutout paper on the ornament. I like to start with an edge and work across, smoothing as I go.
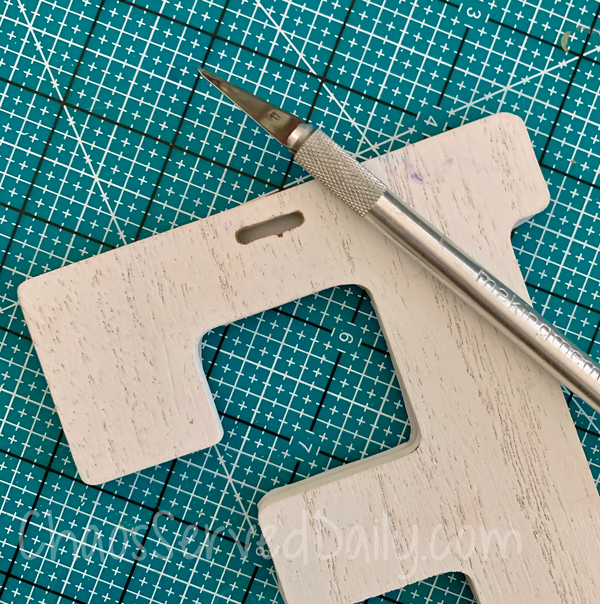
  • Now we’ve covered the ribbon slot, so flip the ornament over and use an Exacto knife to trim out the hole.

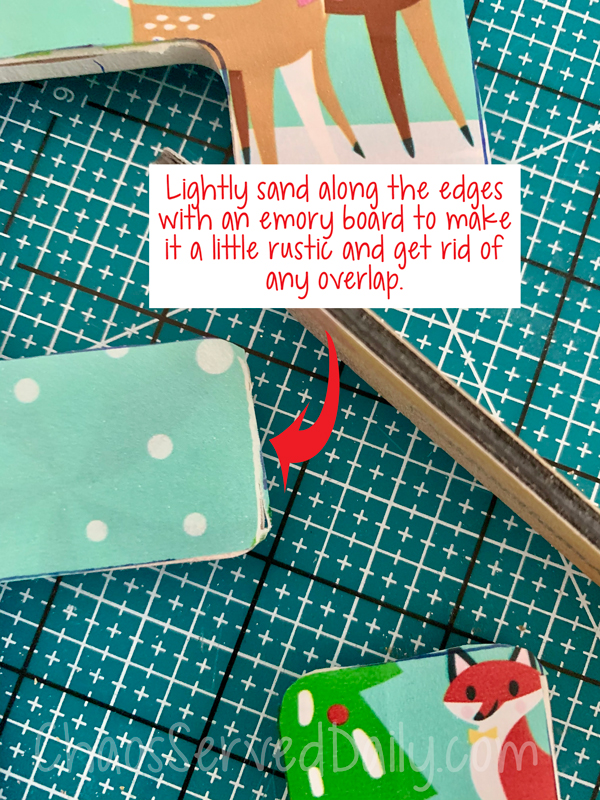
The paper will likely not be an exact fit, so just use an emery board to sand off any overhang. Wouldn’t it be nice if that worked on waistlines, too! Anyway, sand it off and it looks more finished and a little rustic.

Thread the ribbon through and tie it, and you’re done!

I keep thinking my kids will outgrow this, along with many other traditions, but right now, they’re hanging on to childhood…and I’m fine with that! They’re only home for a few more years and I’m happy to oblige them with Advent calendars, secret code ornaments, and Christmas lights inside my car. But I’d be just as happy if our elf moves away to live with whichever of them has their own home first!
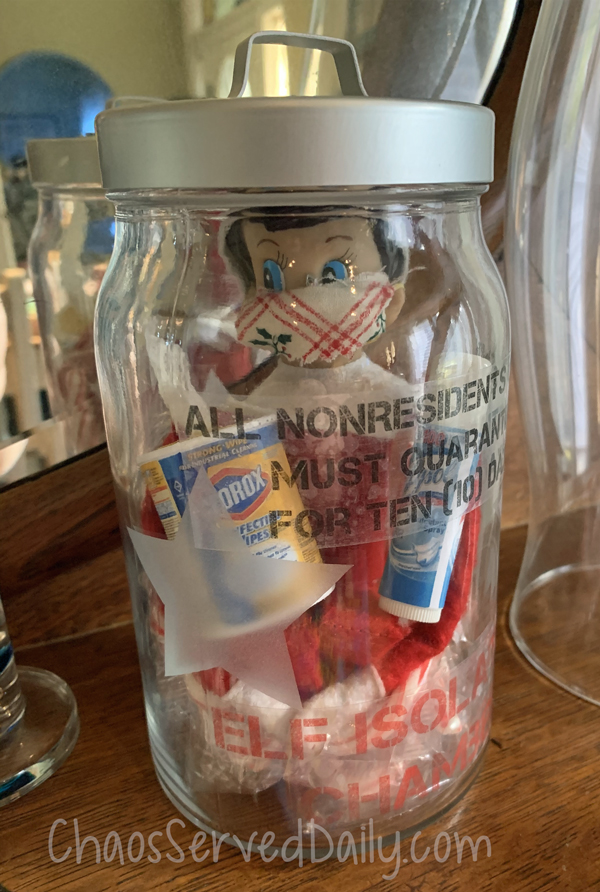
Our elf, Joe, reappeared on December 1, bearing chocolate filled Advent calendars. However, our state has some pretty strict restrictions in place, so Joe is in quarantine for ten days. That’s ten days of me not waking in a panic in the middle of the night, realizing I forgot to move him again! I’ll take that as a win.

Posted in Christmas, crafts, kids | Tagged , , , , | Leave a comment

Christmas Bucket List Printable

Like much of the last eight and a half months, November passed in a blur. Suddenly, December is knocking on the door! Even with social distancing, virtual school, and staying close to home, I’m still planning on a fun and meaningful Christmas season. Who knows…maybe without all of the usual school and community events that usually fill our December, we’ll enjoy this one just as much, or perhaps even more, and I know we’ll treasure the time with our teens.

Anyway, we still have plenty to keep us busy…and I thought I’d share this printable again that I first created in 2013. I really think everything on it can still be enjoyed, even in this pandemic year. I hope you and those you love will have fun creating new memories this December!

Christmas-Bucket-List-Chaos
Click here to download the printable (download doesn’t have the watermark on it)
Posted in Christmas, Printables | Tagged , , | Leave a comment

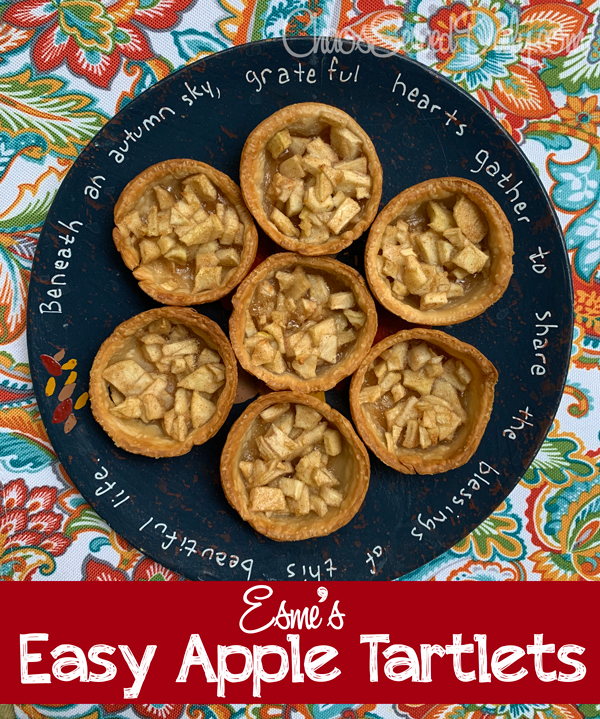
Esme’s Easy Apple Tartlets

I have a confession…I’m not a huge fan of apple pie. I know…gasp! How totally unAmerican of me. I love plenty of other pies, though, so I more than make up for it. Unfortunately for my family, as often as I make pies, I rarely think to make apple. So last week, my girl’s school had club day on Friday. Friday is usually a pretty unscheduled day online, with students finishing up assignments, getting extra help, etc. She was super excited that one of the clubs was cooking. I totally thought she’d go for gaming club or book club when she first told me what was being offered. But nope, cooking club it was. I helped her gather ingredients, but other than that, I was totally uninvolved. Her results were beautiful and delicious, so she has now wanted to make them pretty much every day since. But life interferes.

Anyway, she agreed to let me photograph her steps and share the recipe here. We’ve changed very little but have no idea who to credit for the original recipe. So if it’s yours, let me know!

First, peel and dice the apples (about 1/4″ pieces). She used my apple peeler that also slices, and when she was peeling and slicing in one step, my son heard the other girls in the club (they were in a Zoom) go, “Ooooo…..” So funny!

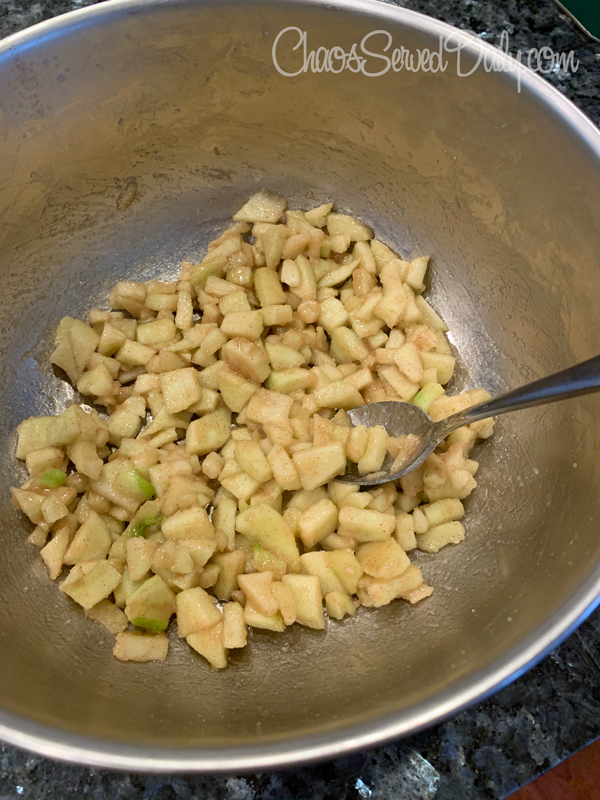
Mix all the other filling ingredients in with the apples.

Apples, flour, sugar, cinnamon, vanilla

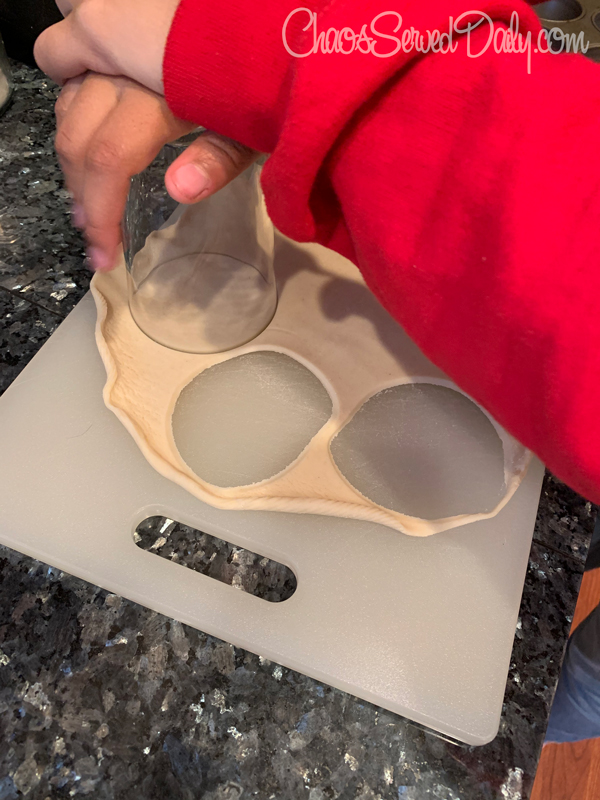
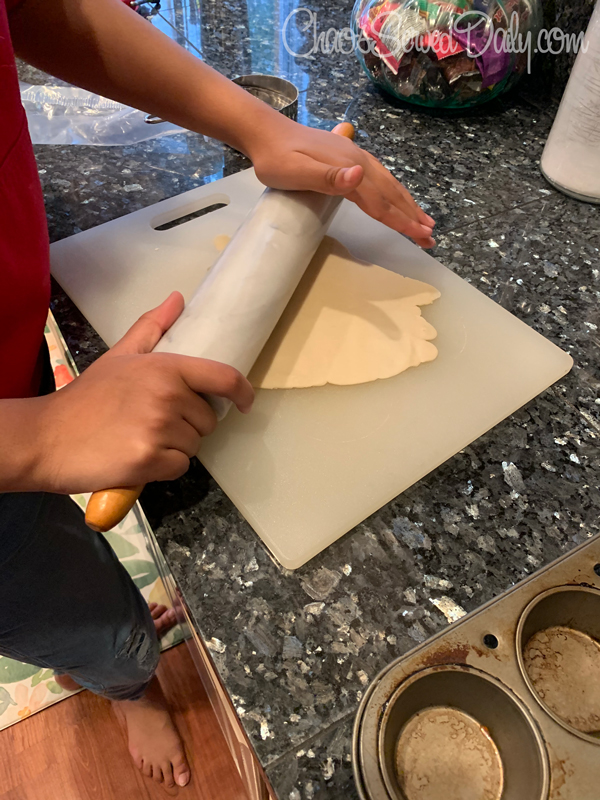
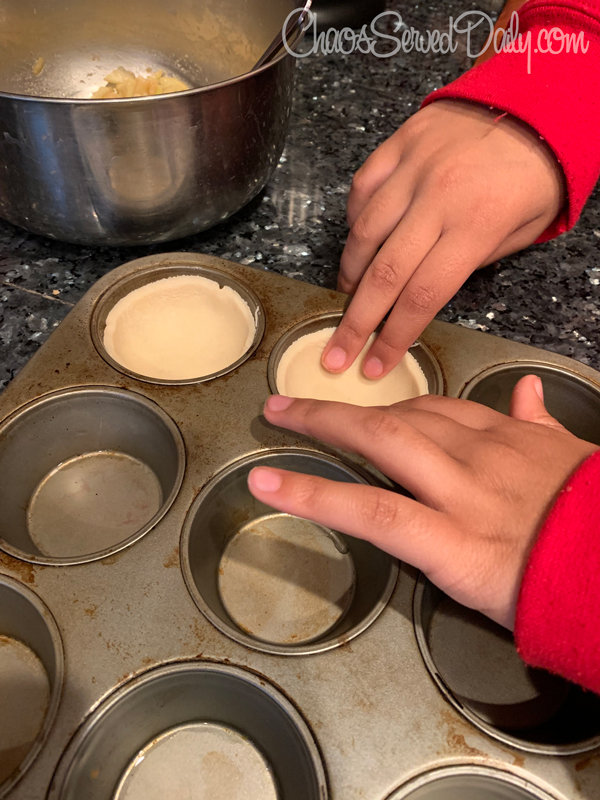
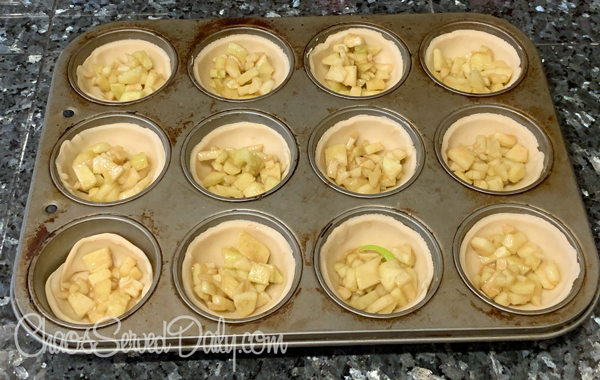
Then, let the filling sit and get juicy while you prep the crusts. Unroll the crust, and use a biscuit cutter or glass to cut out the circles of dough. Ours is about 3″ in diameter. Cut them as close together as you can, then reroll the dough and cut out the rest. She got 12 crusts from 1 pie crust. Gently press them into your muffin tin, being careful not to puncture them!

Evenly spoon the filling into each one. I think it would be tasty to add a few craisins or fresh cranberries to each one at this point. They’re ready to go in the preheated oven now!

Bake them for 15-20 minutes, until the crust is golden brown. Remove from oven and let cool for a few minutes in the tin. When they’re cool enough to handle, remove them and let cool completely on a wire rack. If you don’t get them out of the pan, they tend to stick as they cool completely.

Click here for the downloadable recipe:

Esme’s Easy Apple Tartlets

  • Ingredients:
    • 2 apples, peeled and diced (we used Granny Smiths)
    • 2 tablespoons sugar
    • 1 tablespoon flour
    • ½ teaspoon ground cinnamon
    • 1 teaspoon vanilla
    • 1 refrigerated rolled pie crust
  1. Preheat the oven to 375 degrees. Mix the apples, flour, sugar, cinnamon, and vanilla in the mixing bowl and let sit while you prep the crusts.
  2. Unroll the pie crust on a cutting board or piece of parchment paper. Use the biscuit cutter or glass to cut out as many circles as you can. We got 8 the first time. Then roll the scraps out again, and cut more circles. We ended up with 12 circles from 1 crust.
  3. Gently press the dough circles into the muffin tin, going up the sides a little.
  4. Spoon the filling into the crusts evenly…it doesn’t take a lot!
  5. Carefully slide the tartlets into the preheated oven, and bake for 15-20 minutes, until the crust is golden. Remove from oven and let cool for a few minutes, then remove from tin and let cool on a wire rack. If you wait too long, they may stick to the muffin tin! I think drizzling them with caramel sauce would be the bomb, but I haven’t talked her into that yet.
I have posted apple recipes before, so I’m not totally horrible. I wrote a whole post full of apple recipes, including this Paper Bag Apple Pie…you should check it out!

My mom makes an amazing apple fritter, which is sort of like a giant apple turnover in the most delicious syrup ever. Maybe I’ll have to expand Esme’s repertoire over this holiday break!

I probably won’t post again until after Thanksgiving, so I hope yours is happy and safe (what a weird thing to have become common in everyday language)!

Posted in dessert, Fall, kids | Tagged , , | Leave a comment

Cranberry Favorites

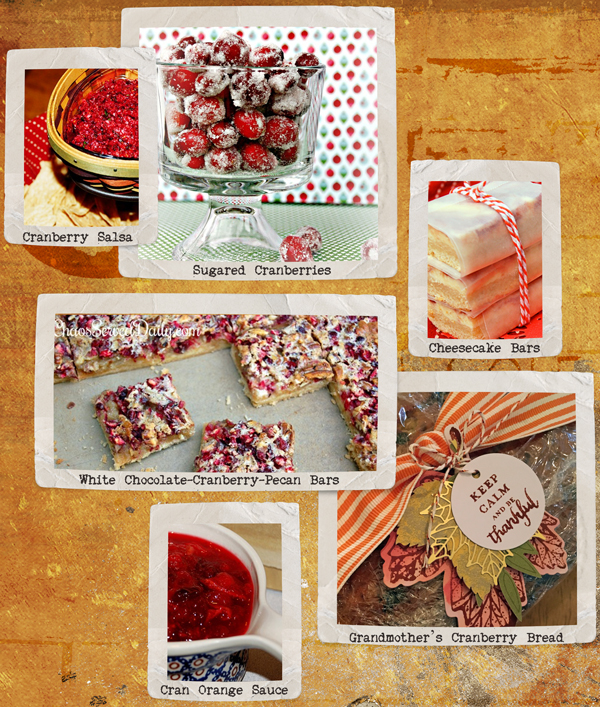
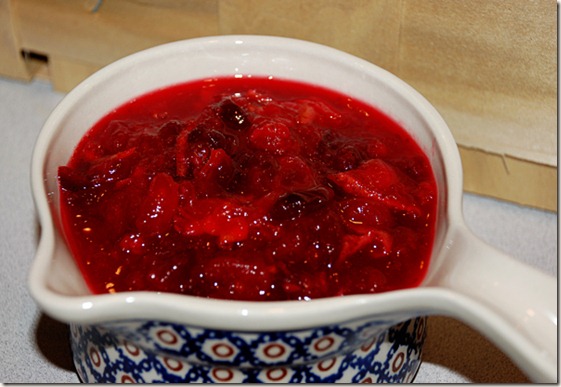
In Geometry class yesterday, I asked my students what their favorite Thanksgiving food was (because math teachers need to humanize themselves as much as possible!). Several said cranberry sauce, and it made me think about my own favorites. Cranberries are kind of taken for granted in the whole holiday food theme, except as sauce or added to various baked good. But I realized that I really love the tartness of cranberries, as stars in their own right! So I’m just linking to some previous posts with my favorite cranberry recipes, with a couple of new ones thrown in for good measure.

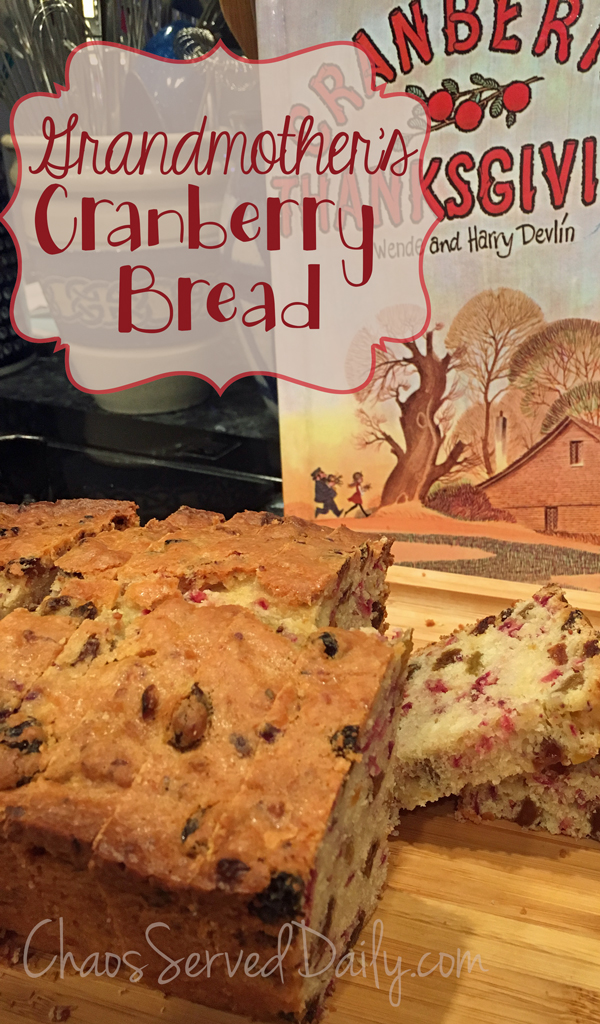
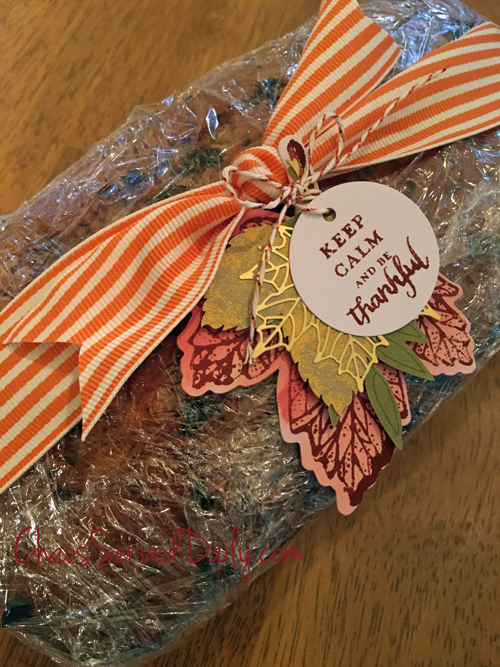
One of my most indelible Thanksgiving memories is reading Harry and Wendy Devlin’s book Cranberry Thanksgiving (and watching the cartoon on TV), then making the bread featured throughout the book from the recipe in the back. It was a labor of love back then, with my mom letting my brother and me grind the cranberries by hand…this was before the days of food processors! But it’s by far the best quick bread ever, and we still make loaf after loaf to give neighbors, teachers, and friends at Thanksgiving.

I kid you not…everyone I’ve ever served these simple Sugared Cranberries to has loved them. The hardest part is waiting for them to “marinate” overnight. They’re also gorgeous piled on a cheesecake, if you can keep your family from snacking on them long enough.

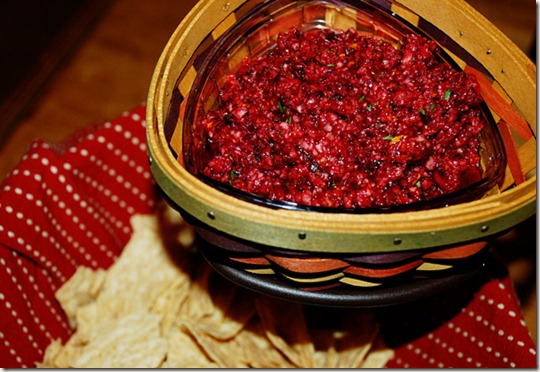
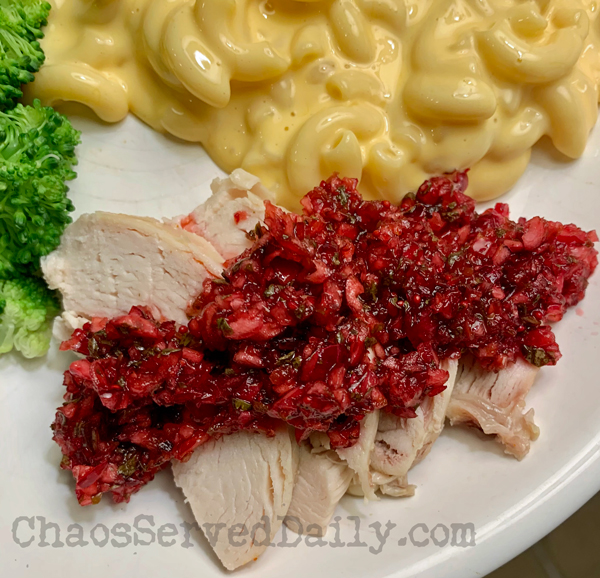
Cranberry Salsa is too delicious to adequately describe. We eat it with tortilla chips, in wraps, and last night over chicken (which is another post…I cooked a whole chicken in my slow cooker and it tasted just like a rotisserie chicken…so good!). The Cranberry Marmalade is also super simple, and the orange marmalade gives it just a little depth of flavor.

Marm-Sauce

We can’t forget dessert, of course! These White Chocolate, Cranberry, and Pecan Pie Bars combine three of my favorite flavors, and are perfect for Thanksgiving and on into Christmas, with their white and cranberry colors. Maybe even Valentine’s Day, they’re so delicious! Orange Cranberry Cheesecake Bars are perfectly sweet and rich, and easier to serve than slices of an actual cheesecake. And easier to grab surreptitiously as you pass the dessert bar without having to share with a kid.

I just can’t help myself when I go to Costco in the fall…a two pound bag of fresh Oregon cranberries is only $3! I usually try to freeze at least one bag to use throughout the year, but in a pinch, I’ll use whole berry canned sauce. Cranberries are just so delicious!

I hope you have a safe and happy Thanksgiving, if I don’t talk to you before then!

Posted in Fall, recipes | Tagged , , , , , | 2 Comments

Thankful for You Printable

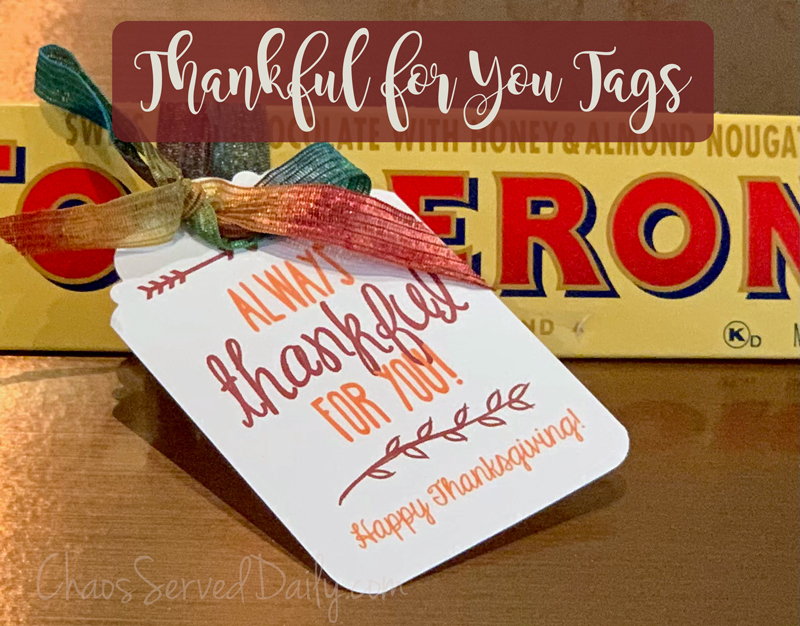
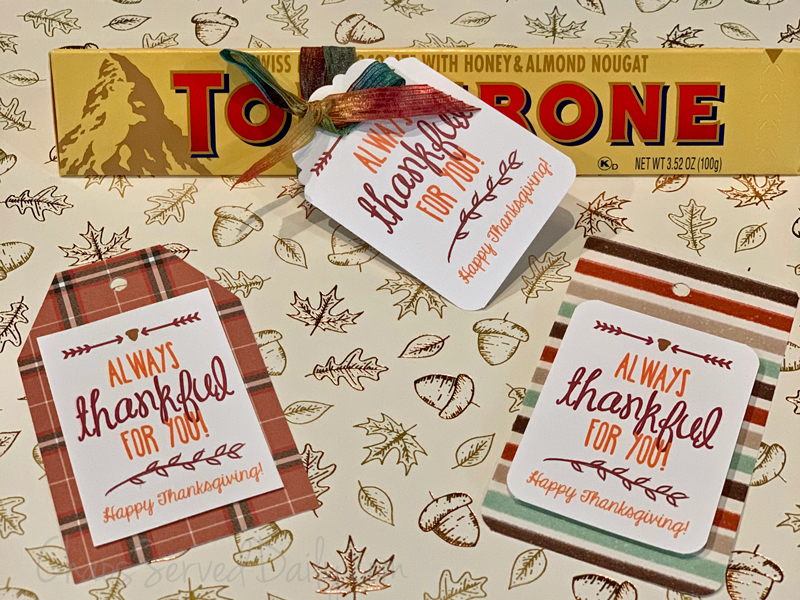
I’m still wondering how it’s so close to Thanksgiving, y’all. As long as the days have seemed since March, the time has seemed short overall. I’m not advocating we need to stretch out 2020 any longer than it already is, though, by any means! Anyway, one of my favorite teacher gifts that we’ve given for several years now is a chocolate bar with a little Thanksgiving tag attached. I know it’s not much, but I do want teachers to know we appreciate them! Also, Costco obligingly puts the bars on sale every November, so I feel the need to capitalize on that.

While two of my three kids are attending school online, the school offices are open, so I can drop off these little gifts for teachers. After a health screening and while wearing a mask, of course! These are super simple for kids to assemble, too, so that’s a fun way to use up fifteen minutes of your time at home, together.

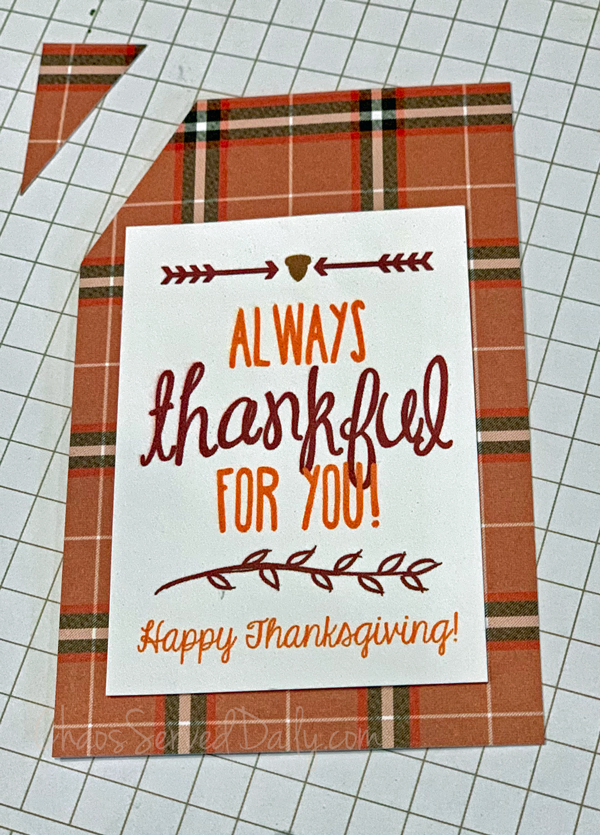
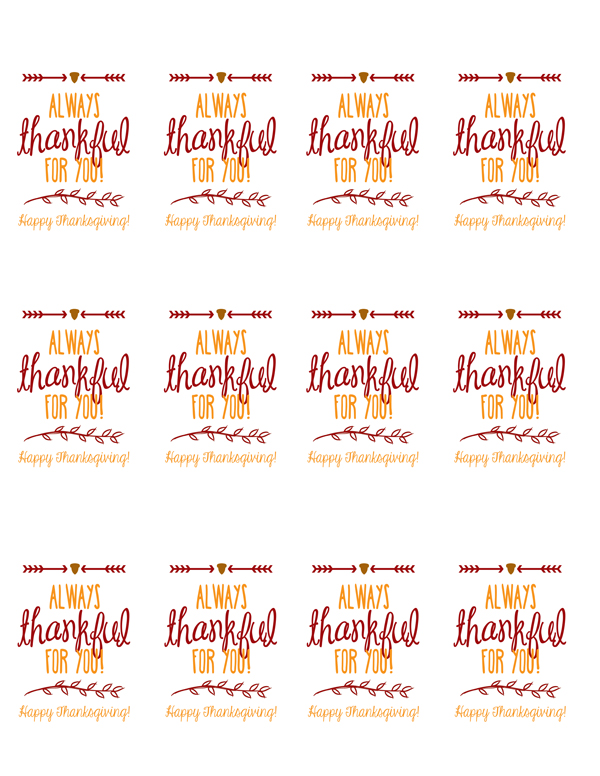
I designed this cute page of tags you can download, even! Click here for that, or on the image.

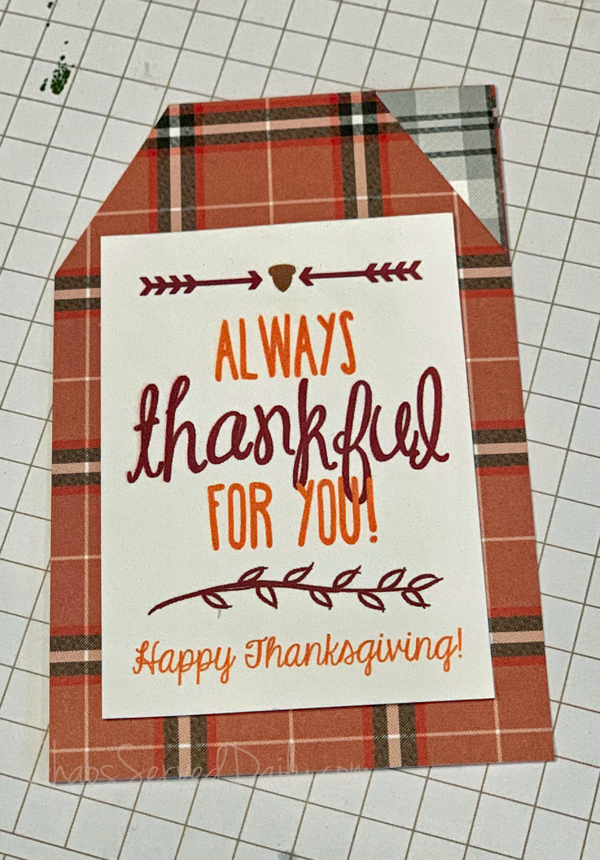
These are quick and easy to turn into tags, using basic supplies. If you have a tag top punch that will punch paper 2″ wide, you’re all set. That’s what I did in the photo for the one tied to the chocolate bar. But if you don’t have a punch, you can just cut the tags out and use them as is, or mat them on some fun cardstock. My printer refuses to accept anything but the thinnest of cardstock, so I only have white that will work. But this tag would look great on a vanilla cardstock, too.

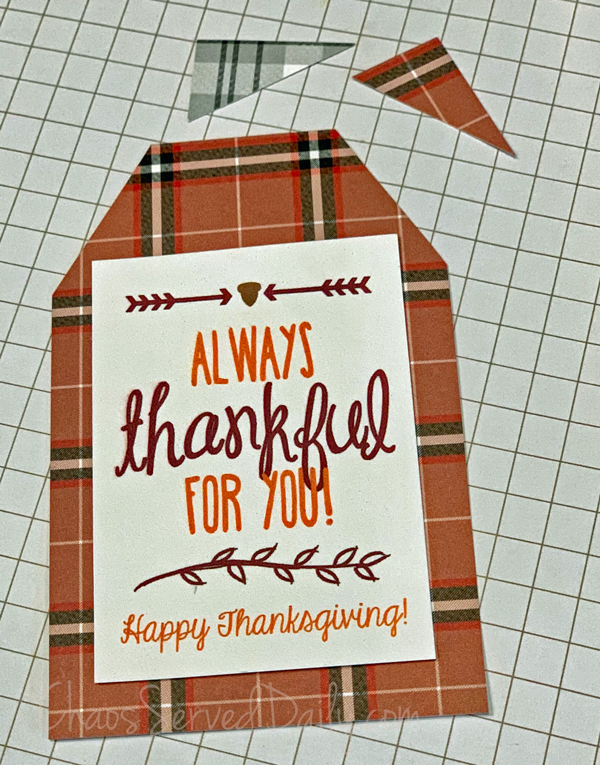
If you don’t have any sort of punch, you can easily make a cute tag shape by just snipping off a corner. For me, the biggest challenge in this is getting both corners snipped the same angle and size. But here’s a nifty trick for that. First, snip off a corner. I like it taller than it is wide, but you do you. Then, flip that snipped part over onto the other corner. Cut along the snipped piece, and, voilà! Matching corners! Then just use a regular hole punch to thread your ribbon or twine through. We used some ribbon-like yarn that I found years ago and have used heavily ever since. Bakers’ twine, burlap twine, raffia, ribbon…any would look great, so again, save yourself a trip to the craft store and just use what you have.

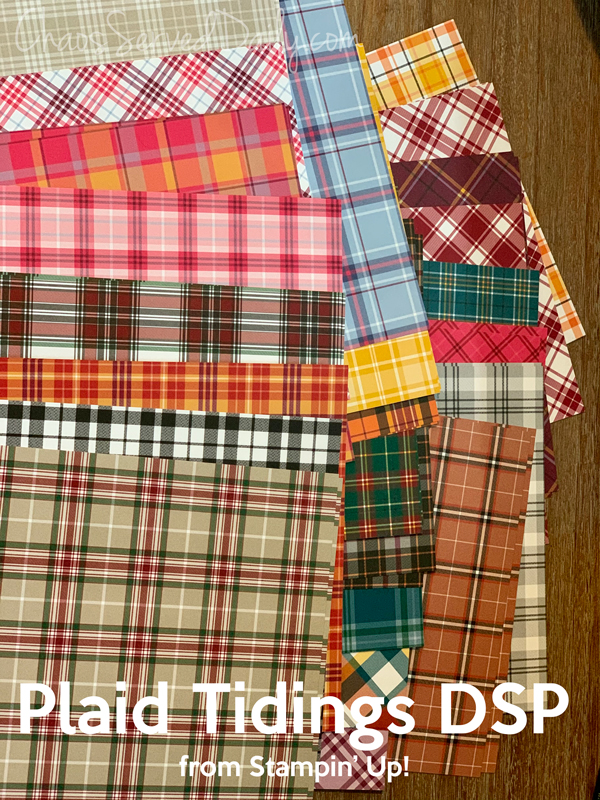
For my matted ones, I used Plaid Tidings DSP from Stampin’ Up…just look at all the seasons that are covered in this paper pack!

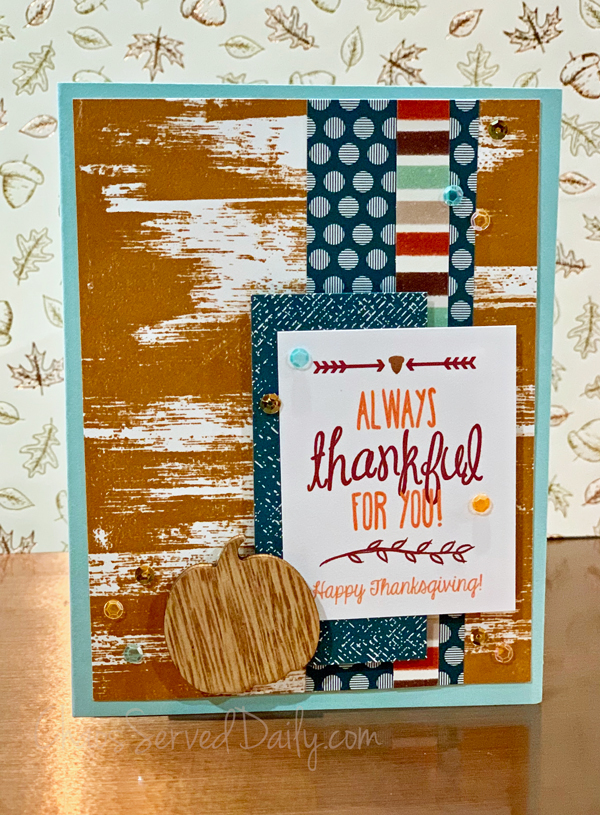
I also matted one on the Gilded Autumn DSP…such pretty designs, and one side of each piece has metallic accents. I just love using it. I also needed to make a few Thanksgiving cards, so I used one of the tags on this simple one. I know it looks a little complicated, but it was really just adhering embellishments and scraps of paper, other than stamping the background.

From Stampin’ Up: Drybrush background stamp, Cajun Craze ink, Whisper White and Mint Macaron Cardstock, Gilded Autumn DSP, 2020-2022 In Color DSP, Artistry Blooms adhesive sequins. Others: printable tag, wooden pumpkin shape

I hope you’ll download the printable, and whip up some fun cards or gifts for the people you’re thankful for this Thanksgiving…teachers, neighbors, the Amazon delivery dude…you get the idea!

Posted in cards, Fall, gifts, Printables, teachers | Tagged , , , , , , | 2 Comments

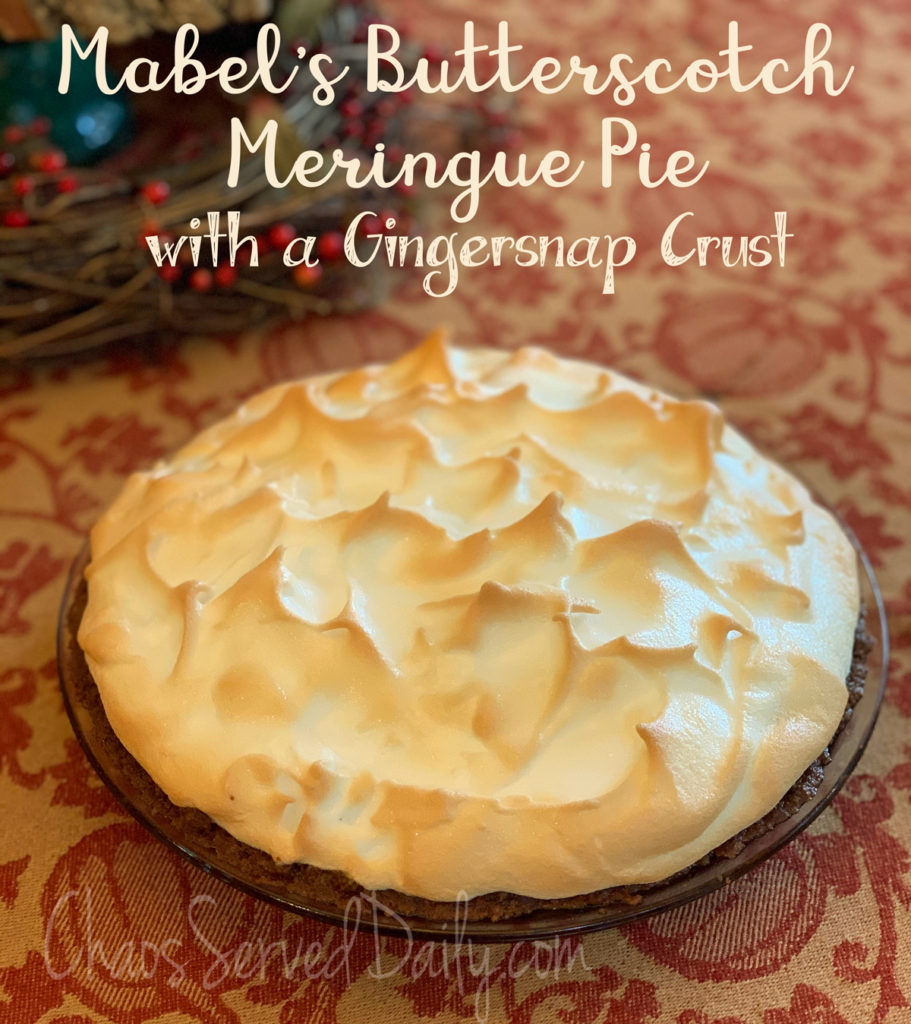
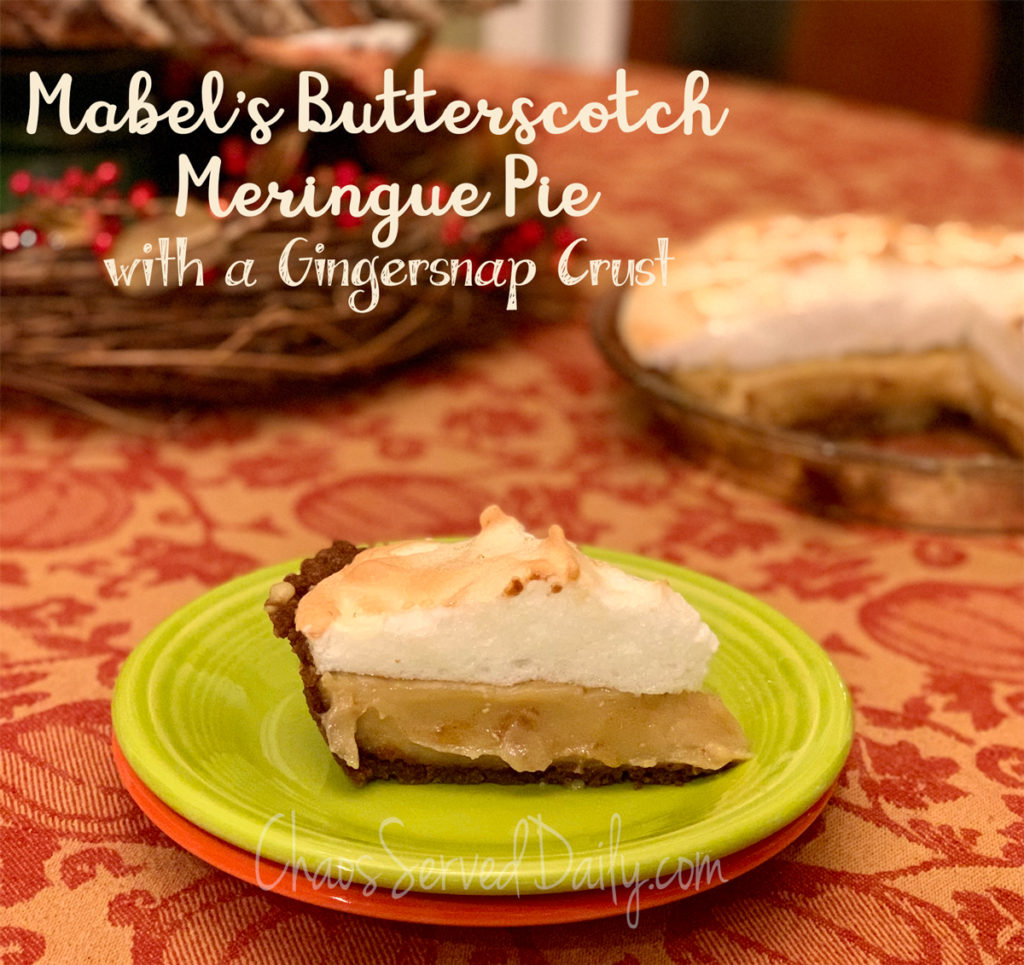
Mabel’s Butterscotch Pie with a Gingersnap Crust

As Thanksgiving approaches each year (or really, any holiday that involves food, and that’s all the best ones!), my thoughts turn to my childhood and the impacts of family and friends. In this year of too-many-challenges-to-list, I think we’re all looking for comfort and familiarity. I remember hearing stories of my Great Aunt Mabel deciding to make a butterscotch pie…at midnight…when my dad was in college and staying with her. Just because it was my dad’s favorite…or maybe just because she wanted a butterscotch pie herself! Mabel was a fabulous cook, and being in her kitchen when she was cooking (and some of her many sisters and their offspring were also crowded in) is linked indelibly to so many holiday memories for me.

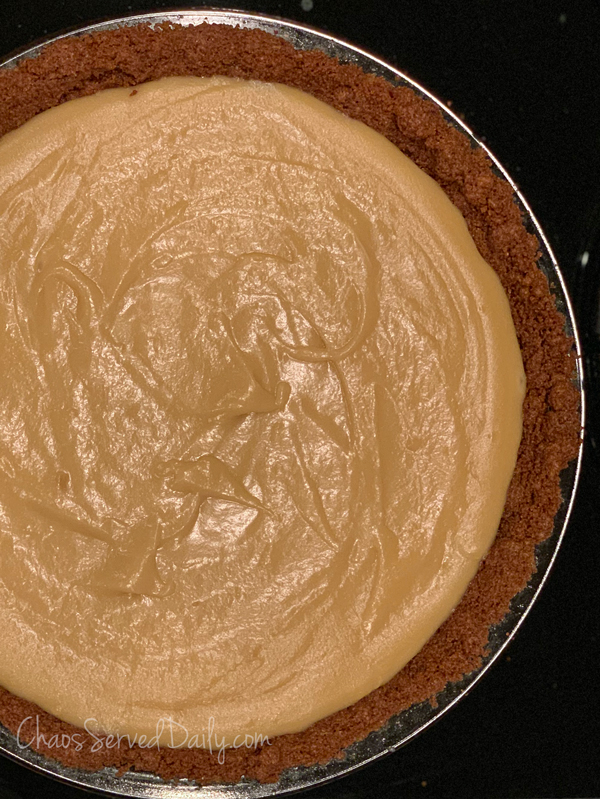
As I was thinking what pie I could make, that I haven’t already shared here, her butterscotch pie came to mind. I also had a bag of gingersnaps in the cabinet, and it seemed that would be a fabulous tweak to her recipe…a gingersnap crust! It’s basically made like a graham crust…just a few minutes in the oven so it stays crisp when you put the filling in it. If you don’t have gingersnaps, or are short on time and have a regular piecrust on hand, this is pretty fabulous in a regular crust…but with the gingersnaps…wow, wow, wow, as my cute toddlers used to say!

While the crust was baking, I made Mabel’s pie filling. The only tricky parts of that are to continuously stir the filling so it doesn’t scorch. Another part of the pie at midnight story that created a family catch phrase is that while Mabel was a great cook, she was a little…flighty, let’s say. She would get to talking and not stirring, and the pie filling scorched. She served it anyway, saying, “A little charcoal is good for the digestion!” Now, 50 years later, there is some science that proves that! And we use her phrase quite often around here!

But I digress…so stir constantly, then when it thickens, add a little of the hot mixture to the egg yolks and quickly stir to warm them, but not cook them. Other than those 2 little things, this is an easy and delicious pie to whip up!

I put meringue on top, because I’m fancy like that, but it’s equally good with whipped cream. So if time is short, or if you just don’t want to make meringue, I hope you’ll make the gingersnap crust and butterscotch filling, anyway!

Click for printable recipe

Mabel’s Butterscotch Pie with a Gingersnap Crust

  • Filling:
  • 1 cup packed brown sugar (dark or light)
  • ½ c all purpose flour
  • ½ tsp salt
  • 2 cups milk, very hot
  • 4 beaten egg yolks (keep the whites for meringue)
  • 4 Tbsp butter
  • 1 tsp vanilla
  • ½ tsp Vanilla Butternut flavor (optional, but good!)
  • Crust:
  • 1 ½ cups finely crushed gingersnaps (about half of a 13 oz bag)
  • ¼ cup brown sugar
  • ¼ tsp salt
  • 5 Tbsp butter, melted
  • Meringue:
  • 4 egg whites at room temperature
  • ¼ c sugar
  • ¼ tsp cream of tartar
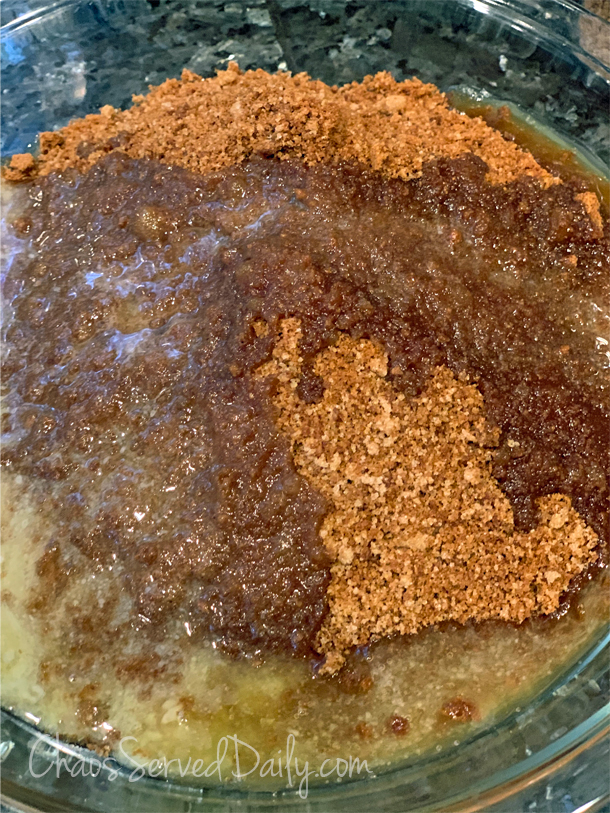
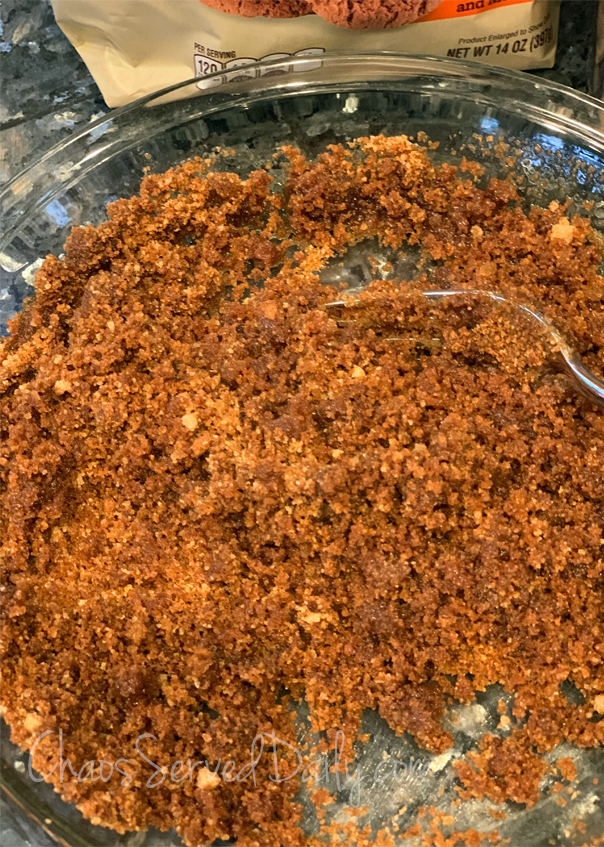
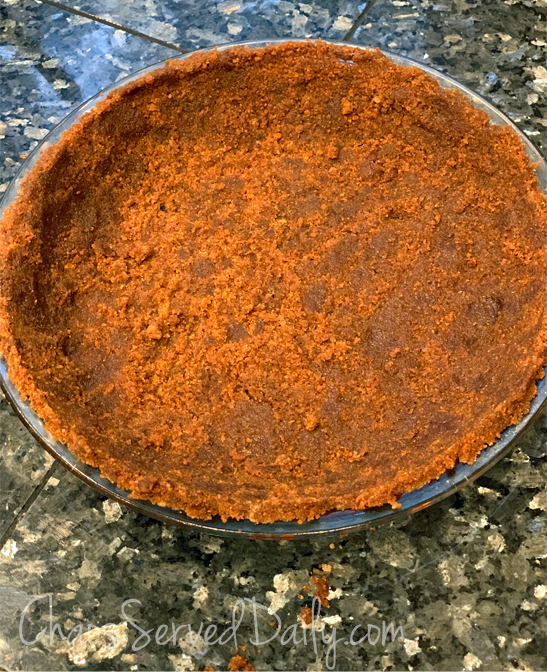
  1. For the crust:  Preheat oven to 350. I ground my gingersnaps in the food processor, then added in the sugar and salt to blend.  Pour that into your pie plate, and pour the melted butter over the crumb mixture. Using a fork, blend it well, so all the crumbs are buttery.  Using a glass, press the mixture firmly into the bottom of the pie plate, then use your fingers to press it against the sides and along the lip, making a firm ridge along the edge. Bake at 350 degrees for 10-12 minutes, until quite brown and hard. Let cool while finishing the filling. Leave the oven on.
  2. For the filling:  While the crust bakes, make the filling. Combine the brown sugar, flour, and salt in a large, heavy-bottomed saucepan over medium heat. Whisk to make sure there are no lumps. Slowly add the hot milk, whisking constantly. Continue to whisk constantly until mixture thickens. Add a bit (maybe a couple of tablespoons) of the hot mixture to the beaten egg yolks, stirring quickly to warm the yolks but not cook them. Whisking constantly, add the yolk mixture to the saucepan, and cook for 2 more minutes, to cook the egg. Stir in butter and vanilla (and butternut if using).
  3. Assemble the pie!  Pour the filling into the baked crust, then make the meringue. In the bowl of a stand mixer (or a large bowl if using a hand mixer), whip the egg whites until glossy, adding the cream of tartar and sugar gradually.  There should be peaks, but not stiff ones. Spread the meringue over the pie, sealing the edges.  Use the back of your spatula or spoon to make crests by flipping up a little. You’ll see what I mean!
  4. Bake at 350 for 10-12 minutes, until peaks begin to brown. With meringue, if it doesn’t brown enough and cook, it will weep. But you don’t want it to burn, either, so there’s that.
  5. Let cool at least 6 hours.  You can make this the day before and refrigerate, and it’s just as delicious!
Posted in dessert, recipes | Tagged , , | 4 Comments

Happy Fall Y’all Tag {& Cookies!}

Since I just decided a week or so ago to start posting again, I unfortunately missed a lot of my favorite season…autumn! Until winter rolls around, that is..then I’ll be all about the snow and cold. I’m pretty fickle. Anyway, before everyone starts tinseling and twinkly-lighting for Christmas, I wanted to share a cute packaging idea, and a link to the recipe for the yummy cookies inside.

Supplies: Hapy Fall Y’all stamp set from Simon Says Stamp; Stampin’ Up! : Plaid Tidings and Gilded Autumn DSP, Cajun Craze ink, Cajun Craze and Bumblebee cardstock, Autumn Punch Pack, Braided Linen Trim, & Bumblebee ribbon; foam dots, & bakery bag.

During our time at home over the last seven months, I discovered a fun stamping supply site, Simon Says Stamp. They’re a small company, but did their best to get stamps and other goodies out as soon as possible, with Covid precautions, once their state opened back up a little. I appreciated that, so have happily continued to throw some crafting funds their way. They have a really fun subscription box each month, and the stamp set I used here was from that October kit…but you can order just the components, too, and not have to get the whole kit. If you don’t want all the fabulous things in there, that is. Everything else I used is from Stampin’ Up!.

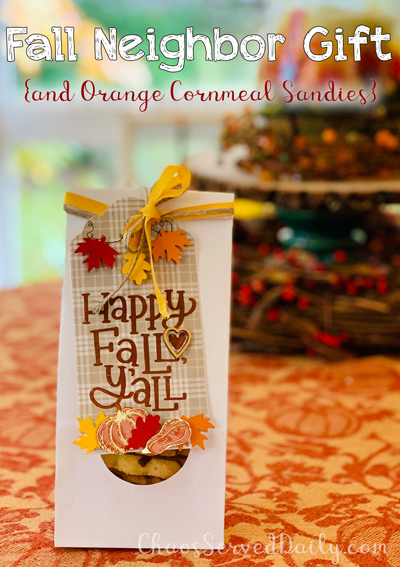
I cut some Plaid Tidings Designer Series paper in the same shape as a white cardstock tag I had on hand, and adhered that to give the DSP some body. I stamped the “Happy Fall Y’all” in Cajun Craze and punched out those cute little leaves from Bumblebee and Cajun Craze using the Autumn Punch Pack. I also fussy cut the pumpkin and squash from a piece of DSP. That’s about my limit for fussy cutting…no patience for it! It’s kind of hard to see, but they’re gilded along the edges…so pretty! It just took a couple of minutes to adhere all those embellishments, popping up a few just for interest.

I always keep some of these little bakery bags (they’re waxed) with a window in my gift wrapping stash, and they’re the perfect size for some Orange Cornmeal Sandies. After I put about a dozen in the bag, as I folded it shut, I folded in a piece of Bumblebee ribbon and Braided Linen trim to attach the tag.

It’ll be a fun and tasty treat to drop off to my neighbor who is so very generous with her cooking talents! Last week she brought us little pumpkin-shaped breads with pumpkin-cream cheese filling…they were delicious! Maybe I’ll try to wrangle that recipe from her for a future post….

Until next time, I hope you’re having a great week, and taking some time to breathe!!

Posted in Uncategorized | Tagged , , , | 2 Comments